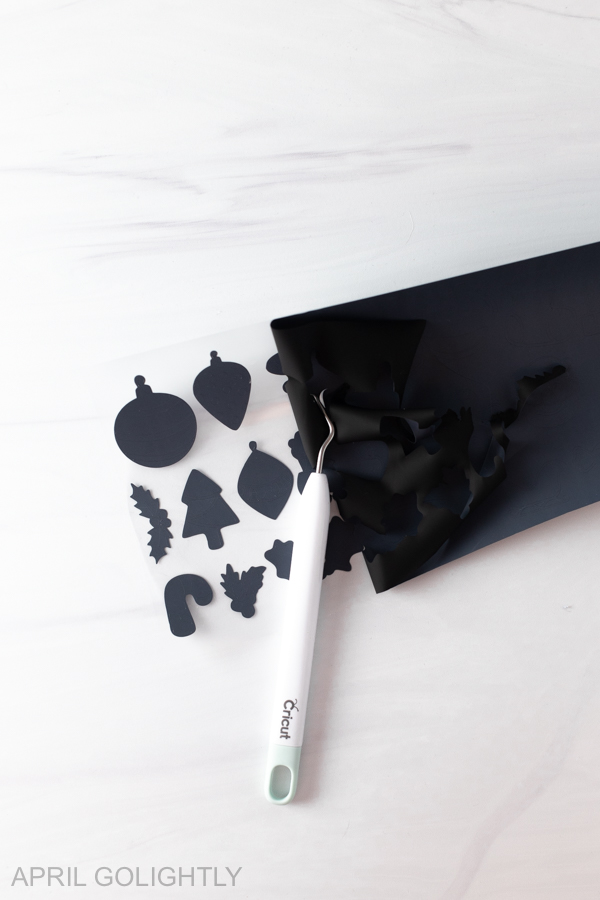
These DIY Christmas Masks are a super fun activity to do with your kids during the holiday season. You can make them with your Cricut.
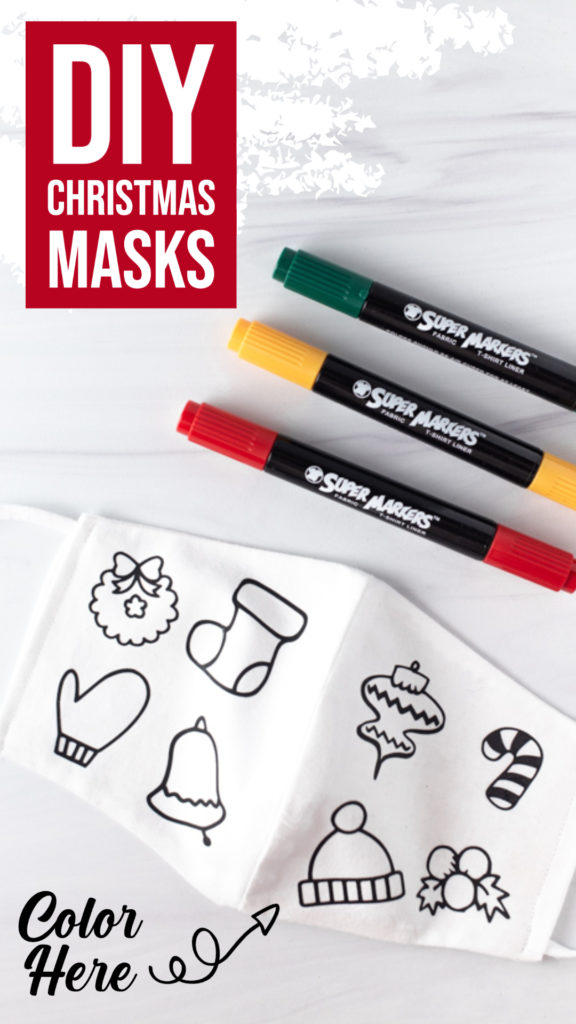
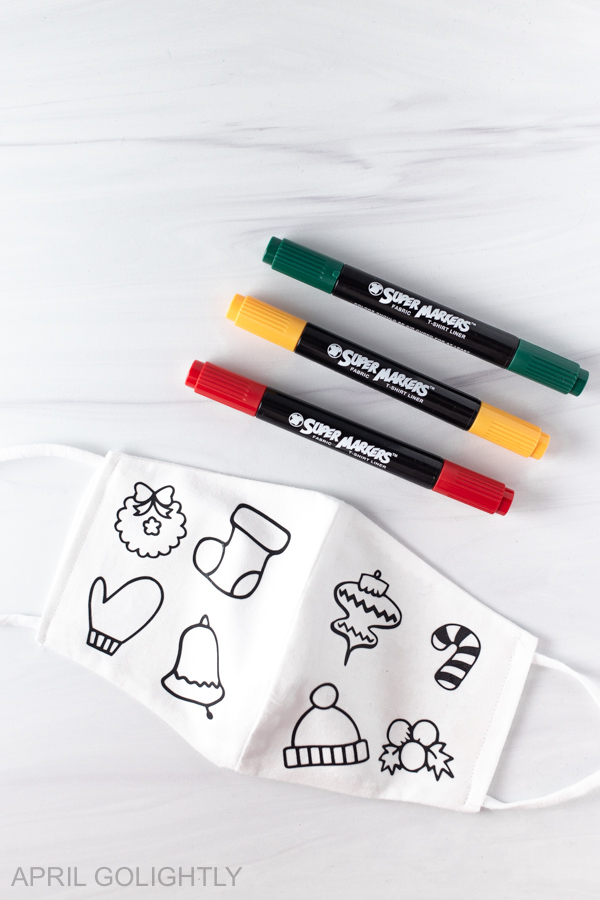
This is a super fun DIY project that you can make for your kids to color. All you need to do to make these Coloring Masks is add the outlines to the masks using this Cricut file.
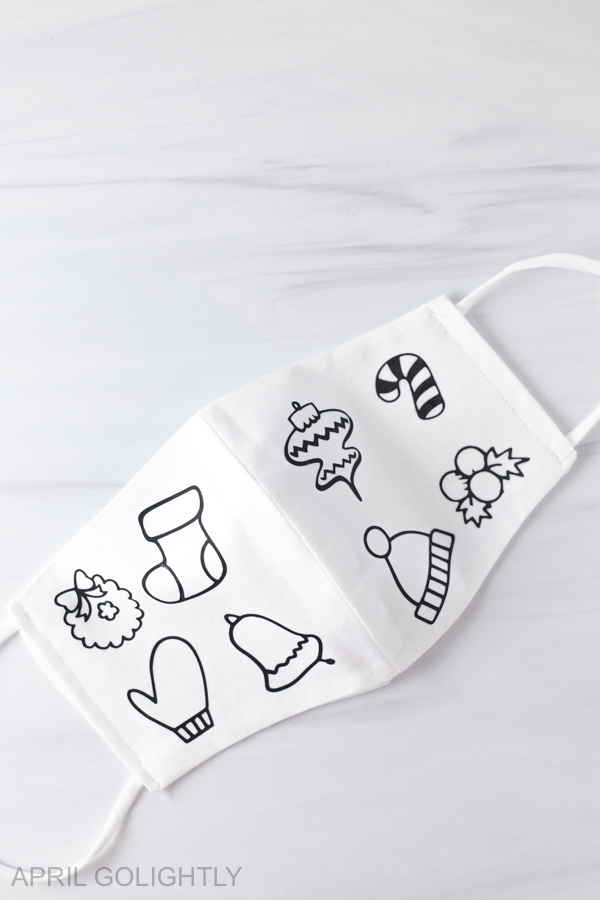
The Cricut file and designs are properly sized so that you can apply several different clip art to your Christmas face masks.
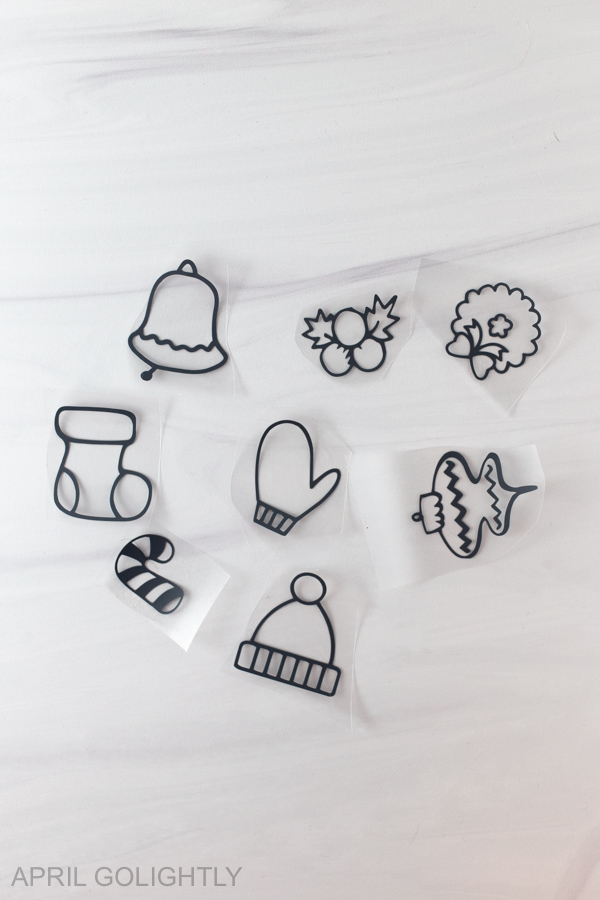
For these face coverings, we have cute clip art of candy canes, Christmas wreath, holiday bell, mittens, stockings, holly, Christmas ornaments, and a Santa hat.
Cricut Christmas Masks Tutorial
This is such a fun project for kids during the holidays. It is also a great way for kids to make Christmas themed gifts for grandparents and friends. I know your kids will love making holiday face masks as much as my daughter did.
If you do not want to make these Christmas masks yourself, you can buy them here from my Etsy shop – Twice the Dreams.
Tools & Supplies
You can make your own face mask with the Cricut Maker or buy a solid color white mask online.
- Cricut Maker or Cricut Joy or Cricut Explore II
- Standard Grip Mat
- Acrylic Ruler
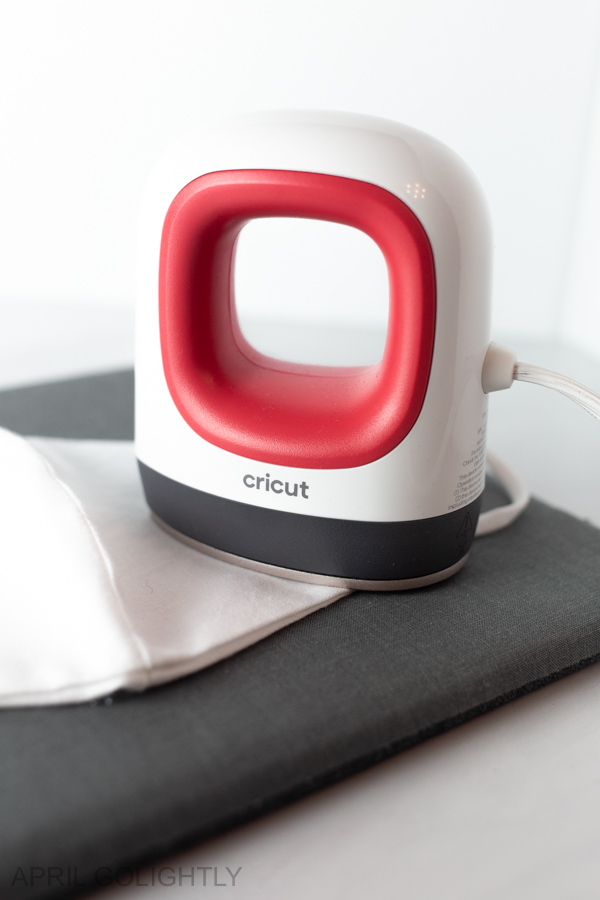
- Cricut EasyPress Mini
- Cricut Everyday Iron On Vinyl
- Cricut Easy Press Mat
- Weeding Tools
- Cricut DIY Mask or White Masks
- Cricut Design File
To make your own cloth face masks, you will need white fabric, white elastic, and white thread along with a sewing machine.
Here are the fabric markers we used to color the fabric.
You can use the Cricut Maker to cut fabric. Here are some pre-made adjustable ear loop elastics in a ton of colors.
Here are some more DIY Cricut Projects you have to try this holiday season: Cricut Infusible Ink – Personalized Christmas Shirts, DIY Christmas Coasters, Kid’s Colored Christmas Ornament, and Christmas Shirts For Family.
How to Make the Heat Transfer Vinyl Masks?
Open the Cricut Design Space on your computer. You can do this from your phone and tablet too.
Open this Cricut Design File.
Now, hit MAKE it in green in the upper right corner.
How to Print Using Cricut Everyday Iron On Vinyl?
To use Cricut Everyday iron on vinyl, you should use the green circuit sheet with the standard stickiness.
Place the Everyday Vinyl shiny side down on the green standard grip Cricut mat.
Make sure it is secure and try to avoid bubbles.
Load the green sheet with the Everyday Iron-On Vinyl on it using the arrows and make sure the Cricut pulls it in properly.
On the computer, choose the machine and make sure that you are reversing the image.
Also, choose the type of Cricut Everyday Iron-on vinyl by selecting from the Cricut database of material. There are so many – make sure you get the right one.
Ensure that the Cricut has space behind and in front so it can work properly.
When the C – Cricut symbol is flashing, press it and watch the Cricut cut the letters.
Remove the sheet with the arrows.
Pull off the Vinyl and cut the space where the letters are.
Remove everything except the letters from the sheet using the weeding tools.
How to Print Using Cricut Everyday Iron On Vinyl?
To use Cricut Everyday iron on vinyl, you should use the green circuit sheet with the standard stickiness.
Place the Everyday vinyl shiny side down on the green standard grip Cricut mat. Make sure it is secure and try to avoid bubbles.
Load the green sheet with the Everyday vinyl on it using the arrows and make sure the Cricut pulls it in properly.
On the computer, choose the machine and make sure that you hit the toggle to MIRROR the IMAGE.
Also, choose the type of Cricut Everyday iron-on vinyl by selecting from the Cricut database of material. There are so many – make sure you get the right one.Ensure that the Cricut has space behind and in front so it can work properly.
When the C – Cricut symbol is flashing, press it and watch the Cricut cut the letters.
Remove the sheet with the arrows.
Using the weeding tools, remove the negative pieces so that just your design remains.
Cut around the designs so that you can place them on the mask.
Pressing Everyday Iron-On
Check the material of the mask before pressing. It makes a difference if the mask is 100% cotton or a blend of cotton. The Cricut Heat Guide is my go to choice for
If you are using a 100% cotton mask like we did here, follow these instructions.
Set the Cricut Mini Press to Medium with 2 bars lit up. Wait until the light turns green.
The Cricut EasyPress Mini does not have a timer so just your phone timer or Alexa to time.
Place the whole design to get the spacing.
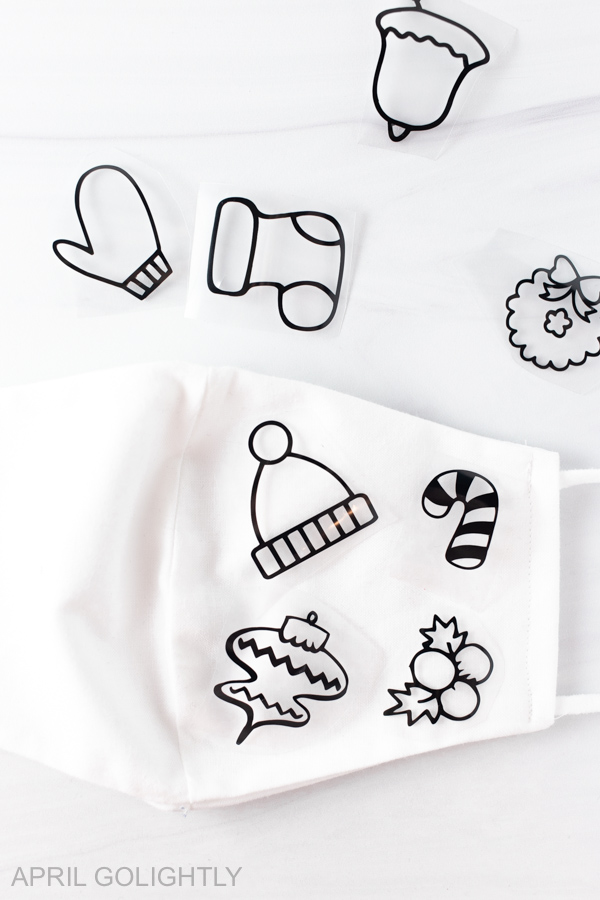
Preheat the masks with the EasyPress Mini for 5 seconds before adding the vinyl.
Place iron-on material face down, liner side up.
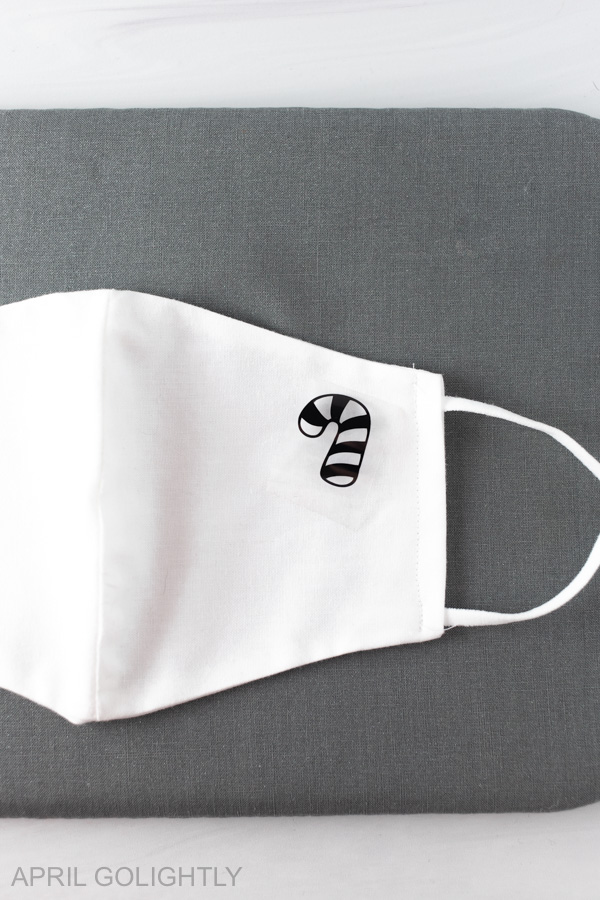
Press while moving with light pressure at medium setting for 25 seconds.
Flip 100% cotton over and press for 15 seconds.
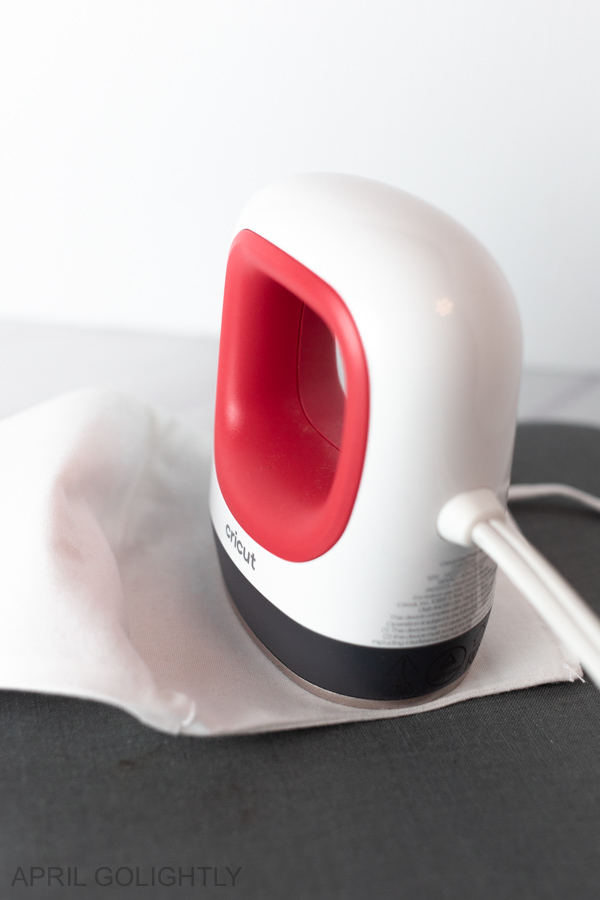
Slowly remove liner while warm, not cold.
Mask Care NOTES
Allow 24 hours after application before washing
Wash and tumble dry is fine, but do not bleach.
Who do you plan to make these Christmas themed face masks for?
What Cricut projects are you doing for gifts for the Christmas holiday? I have a list that I am planning for the next few weeks. Stay tuned!
Such a great idea, it has given me inspiration for my new project.
Good post! We will be linking to this great content on our website. Keep up the great writing. Harmonie Reid Vanni
Kadın, yaşam, moda, güzellik, sağlık, kişisel bakım ve kadın yaşamına dair konular…
Trabzon Haber, Trabzonspor haberleri, son dakika Trabzon’da sıcak gelişmeleri 61 Medya haber sitesinde takip edin, Trabzon gündeminden haberiniz olsun.
very nice blog. Türkiye’nin tüm il ve ilçelerinin hava durumları
Hiç hata yapmayan insan, hiçbir şey yapmayan insandır. Ve hayatta en büyük hata, kendini hatasız sanmaktır.
Çağın gereklerini değerleriyle yorumlayarak içinde yaşadığı topluma örnek olup yön verebilecek vizyon sahibi gençler yetiştirmek amacıyla bu yola çıktık.
Üsküdarda Ev İlaçlama Yapan Firmalar
İSTANBUL ANADOLU YAKASI ÜSKÜDAR BÖCEK İLAÇLAMA
Pire İlaçlama
İSTANBUL AVRUPAYAKASI GÜNGÖREN İLÇESİ BÖCEK İLAÇLAMA
thanks for the content
Omuz çıkıklarının oluş mekanizması veya omuz çıkığı sebebi araştırıldığında en sık gördüğümüz nedenin bir travma olduğunu söyleyebiliriz.
Hurdalarınızın çeşidi her ne olursa olsun tüm hurdalarınızı değerinde alıyoruz.
Hurdalarınızın çeşidi her ne olursa olsun tüm hurdalarınızı değerinde alıyoruz.
Omuz çıkıklarının oluş mekanizması veya omuz çıkığı sebebi araştırıldığında en sık gördüğümüz nedenin bir travma olduğunu söyleyebiliriz.
quality and beautiful content
Toplumumuzda ortodonti tedavilerinin sadece çocuklarda yapıldığını düşüncesi yaygındır
nice content thanks
Medyum papaz gültekin teşekkürler
en güncel haberler
güncel haberler
you might have an amazing blog right here! would you like to make some invite
Gorabet güncel gibir adresi
thanks for sites.
ons 1.10.32 and 1.10.33 of “de Finib
Viyana dil kursu, sadece Almanca değil, farklı diller için de seçenekler sunmakta ve öğrenciler için kapsamlı bir eğitim sunmaktadır.
Mide balonu, obezite tedavisinde kullanılan, mideye yerleştirilen yumuşak ve esnek bir silikon balondur.
The Best 10 CS:GO Gambling Sites in 2024 – Free Bonus
Eryaman diyetisyen randevusu almak için, öncelikle uzmanlardan ihtiyaçlarınıza en uygun olanı belirlemek önemlidir.
lara sabrina yılmaz eselerine her geçen gün yenisini eklemektedir.
satın almak isteyen kişilerin her zaman sitemizi tercih etmesinin bazı sebepleri var.
thank you
thank you
thank you
thank you
thank you
thank you very much
thank you so
Hello, I really liked your website, you can be sure that I will visit it again in the future.
Viyanada öğrenci yurtları sizlere hizmet vermekteyiz.
thank you very much
En iyi penye şal modelleri için Mirsoy Scarfı ziyaret edin
Eskişehir, Türkiye’nin önemli şehirlerinden biri olarak tarihi ve kültürel zenginlikleriyle bilinir. Bu dinamik şehirde yaşayan insanlar,
thank you
Very good. I come back..
merhaba pendik escort kurtköy escort sitesini ziyaret ettinizmi
thank you
HaberKontrol, güncel haberler, ekonomi, teknoloji, spor ve yaşam kategorilerinde güvenilir içerikler sunan bir haber platformudur.
casinobeton giriş
Трикс играть онлайн раздача каждый день
İmplant eksik olan dişlerin yerine dişin fonksiyonunu ve estetiğini tekrar sağlamak amacıyla çene kemiğine yerleştirilen yapay diş köküdür.
ankara çocuk diş hekimi
alanında uzman hekimlerle hizmet verilmektedir.
İmplant eksik olan dişlerin yerine dişin fonksiyonunu ve estetiğini tekrar sağlamak amacıyla çene kemiğine yerleştirilen yapay diş köküdür.
iyi günler
İncek özel ders alanında uzman eğitimciler tarafından verilmektedir.
İncek özel ders alanında uzman eğitimciler tarafından verilmektedir.
Ortodonti de çene tedavileri çocuklarda ve erişkinlerde farklılık göstermektedir.
Avusturya Yaz Dil Okulu Avusturya Yaz Dil Okulu
CS2 Jackpot – Official Site
İmplant eksik dişleri tamamlamak için çene kemiğine yerleştirilen bir tür vidadır.
viyana ekonomi üniversitesi viyana ekonomi üniversitesi
viyana teknik üniversitesi kabul şartları viyana teknik üniversitesi kabul şartları
İstanbul excimer lazer tedavisi, genellikle gözdeki görme bozukluklarını düzeltmek amacıyla uygulanan bir lazer tedavi yöntemidir
İstanbul excimer lazer tedavisi, genellikle gözdeki görme bozukluklarını düzeltmek amacıyla uygulanan bir lazer tedavi yöntemidir
CS:GO Jackpot Site
Ataşehir botoks alanında uzman hekim hizmet vermektedir.
Kozyatağı implant tedavisi, eksik dişlerin yerini almak için çene kemiğine yerleştirilen titanyum vidalardır.
ankara çocuk diş hekimi alanında uzman hekimlerle hizmet vermektedir.
Kozyatağı implant tedavisi, eksik dişlerin yerini almak için çene kemiğine yerleştirilen titanyum vidalardır.
Suadiye implant tedavisi, eksik dişlerin yerine yapay diş kökleri yerleştirilerek yapılan bir tedavi yöntemidir.
In the state of New South Wales, Australia, MapperX helped us identify faulty inverters in our 1,200 MW solar farm, restoring energy production and increasing efficiency by 4%.
Bu uzmanlık alanı, diş hekimliğinin önemli bir parçasını oluşturur ve çeşitli cerrahi işlemleri kapsamaktadır.
At our 1,500 MW solar park in the Negev Desert, Israel, MapperX’s thermal imaging helped detect panel overheating, leading to operational adjustments that boosted performance by 6%.
This is exactly what I was looking for! Your insights are truly valuable, and I appreciate the effort you put into sharing such detailed information.
CS:GO Jackpot – Official Site
Balgat diş klinikleri, diş sağlığıyla ilgili çeşitli hizmetleri sunan sağlık kuruluşlarıdır.
Balgat diş klinikleri, diş sağlığıyla ilgili çeşitli hizmetleri sunan sağlık kuruluşlarıdır.
I just came across this site, and I must say the content is incredibly well-researched and informative. Keep up the great work
At our 700 MW solar installation in Rajasthan, India, MapperX’s thermal imaging revealed overheating modules that were decreasing performance by 6%. After repairs and alignment adjustments, we saw an efficiency increase of 5%.
Viyana Dil Okulu Fiyatları Viyana Dil Okulu Fiyatları
Wow, this article really helped me understand the topic better. Thanks for breaking it down so well
Ankara Burun estetiği (rinoplasti), burnun şeklini, boyutunu veya oranlarını değiştirmek amacıyla gerçekleştirilen cerrahi bir operasyondur.
Meme dikleştirme ameliyatı, sarkmış memelerin yeniden şekillendirilmesi ve estetik bir görünüm kazandırılması amacıyla yapılan bir cerrahi işlemdir.
Your website has quickly become one of my favorites. The way you explain things makes it so much easier to grasp complex topics.
Çene botoksu, diğer adıyla Masseter botoks, masseter kasına yapılan bir botoks uygulamasıdır.
This is an amazing read! I learned a lot, and I appreciate the effort you put into making this so easy to understand.
viyana dil kursu viyana dil kursu
money x официальный сайт
ankara çocuk diş hekimi alanında uzman ekibiyle hizmet vermektedir.
This is an amazing read! I learned a lot, and I appreciate the effort you put into making this so easy to understand.
ankara tüp mide ameliyatı alanında uzman hekimler tarafından gerçekleştirilir.
In the vast deserts of Tunisia, MapperX’s thermal inspection of our 700 MW solar farm revealed damaged modules, boosting energy output by 4% after repairs.
Ankara üroloji alanında uzman hekimiz Hasan Bey hasta kabulüne başlamıştır.
Arbitration agreements are often included in commercial contracts.
ucuz taksi
İstanbul Üsküdar burun estetiği (rinoplasti) ameliyatı, burunun şeklini veya fonksiyonunu değiştirmek amacıyla yapılan cerrahi bir müdahaledir.
Trix – официальный сайт
Ankara çocuk aciline sahip hastanelerimizle hizmet vermekteyiz.
Mamak implant tedavisi, eksik dişlerin yerine yapay diş köklerinin yerleştirildiği modern bir diş tedavi yöntemidir.
Mamak implant tedavisi, eksik dişlerin yerine yapay diş köklerinin yerleştirildiği modern bir diş tedavi yöntemidir.
I love how you break down complex topics into simple terms. This article was a pleasure to read
Göz kapağı estetiği, göz çevresinin şekillendirmesini amaçlayan cerrahi bir işlemdir.
Hastalarımıza hem yetkin bir tedavi sunmak hem de bunu mümkün olan zamanda ve uygun maliyetle gerçekleştirmek isteriz.
Günümüzde kilo vermeye destek olmak amaçlı uygulanan cerrahi girişimlerden biri de tüp mide ameliyatıdır.
ankara tüp mide ameliyatı alanında uzman hekim tarafından gerçekleştirilir.
ankara üroloji profesörü sizlere hizmet vermektedir.
Günümüzde kilo vermeye destek olmak amaçlı uygulanan cerrahi girişimlerden biri de tüp mide ameliyatıdır.
ankara üroloji profesörü sizlere hizmet vermektedir.
Botoks (botulinum toksini), medikal tedavi ve estetik amaçla yaygın olarak kullanılan bir inaktif nörotoksindir.
Botoks (botulinum toksini), medikal tedavi ve estetik amaçla yaygın olarak kullanılan bir inaktif nörotoksindir.
Daha önce araştırıp pek Türkçe kaynak bulamadığım sorundu Elinize sağlık eminim arayan çok kişi vardır.
ankara çocuk diş hekimi alanında uzman hekimler tarafından hizmet verilmektedir.
Meme Dikleştirme Ankara alanında uzman hekim tarafından gerçekleştirilir.
Üniversiteye giriş sınavı olan TYT (Temel Yeterlilik Testi) ve AYT (Alan Yeterlilik Testi), adayların hayallerindeki bölüme yerleşmeleri için önemli bir adımdır.
Üniversiteye giriş sınavı olan TYT (Temel Yeterlilik Testi) ve AYT (Alan Yeterlilik Testi), adayların hayallerindeki bölüme yerleşmeleri için önemli bir adımdır.
Merhaba, yazınız gerçekten çok bilgilendirici olmuş ve bana yeni şeyler kattı. Eğer ilginizi çekerse ben de şirketler konusunda yazılar yazıyorum. Limited şirket kurmak konusundaki çalışmalarımı paylaşmak isterim.
Ankara fraksiyonel CO2 lazer, cilt yenileme ve estetik tedavilerde yaygın olarak kullanılan bir lazer teknolojisidir.
Brezilya popo estetiği, tıbbi terimiyle Brazilian Butt Lift (BBL), popo bölgesinin dolgunluğunu artırmak ve şekillendirmek amacıyla gerçekleştirilen bir estetik cerrahi prosedürdür.
ערב טוב
Sağlık sektörüne özel dijital pazarlama ve iletişim çözümleri sunan Propal; 10 yılı aşkın sektörel deneyimi ve profesyonel kadrosu ile hazır.
ostim web tasarım ostim web tasarım
viyana teknik üniversitesi kabul şartları viyana teknik üniversitesi kabul şartları
bulgaristan yüksek lisans bulgaristan yüksek lisans
avusturya dil okulu avusturya dil okulu
İmplant tedavisi, diş eksikliklerini tedavi etmek ve sağlıklı bir gülüşü yeniden sağlamak için kullanılan etkili bir yöntemdir.
Burun, yüzün güzelliğini önemli ölçüde etkileyici bir yapı taşıdır.
Casibom güncel giriş adresi ile siz de kazanın.
Genel olarak insanların dış görünüşleri gülüşleri ile tamamlanır.
ankara çocuk diş hekimi ankara çocuk diş hekimi
Money-X официальный сайт
Invisalign, şeffaf plaklar adı verilen, özel olarak tasarlanmış bir dizi plastik plak kullanarak dişleri hizalar.
ankara çocuk diş hekimi ankara çocuk diş hekimi
Ataşehir dudak dolgusu, dudaklara daha dolgun, hacimli ve şekilli bir görünüm vermek için uygulanan bir estetik işlemdir.
ankara tüp mide ameliyatı alanında uzman hekimler tarafından gerçekleştirilir.
ankara üroloji robotik cerrahi
Varis, çeşitli nedenlerde yüzeysel toplar damarların uzaması genişlemesi ve kıvrılması ile gelişen bir hastalıktır
mesane kanseri ameliyatı ankara
Bursa Gülüş Tasarımı sayesinde gülümsemenin hayatımızdaki yeri daha önemli bir yer almaktadır.
ostim web tasarım ostim web tasarım ostim web tasarım
İmplant tedavisi, eksik dişlerin yerine yapay diş kökleri yerleştirilen bir diş tedavi yöntemidir.
burası anahtar kelime girilen kısım herşeyi girdikten sonra ekleye basıyorsun
Thanks for sharing this great insight! We truly appreciate the effort and thought you put into it. Looking forward to more of your excellent content!
Akıllı lens (göz içi lens), gözdeki doğal merceğin yerine yerleştirilen yapay bir mercektir.
çok güzel bir yer
Akıllı lens (göz içi lens), gözdeki doğal merceğin yerine yerleştirilen yapay bir mercektir.
CSGO Jackpot Site | Earn Skins on CS:GO Jackpot Game
Suadiye Diş Polikliniği, diş sağlığına önem veren bireyler için en iyi hizmetleri sunan bir merkezdir.
Forumuz
Kadıköy implant tedavisi, eksik dişlerin yerine yerleştirilen yapay diş kökleridir.
CS:GO
cs2 jackpot site
cs2 jackpot site
Meme büyütme operasyonu, memelerini küçük bulan kadınların kurtarıcısı haline gelen estetik bir cerrahi operasyondur.
sofya teknik üniversitesi dünya sıralaması sofya teknik üniversitesi dünya sıralaması
ankara çocuk diyetisyen ankara çocuk diyetisyen
CSGO
sofya teknik üniversitesi dünya sıralaması sofya teknik üniversitesi dünya sıralaması
CS2 Jackpot – Official Site
Money-X официальный сайт – сервис мгновенных игр
Excimer lazer, lazer ışınları kullanan ve yüksek derecede hassas bir teknolojiye sahip bir lazer türüdür.
CSGO
Excimer lazer, lazer ışınları kullanan ve yüksek derecede hassas bir teknolojiye sahip bir lazer türüdür.
If you need specific details about their dispute resolution services, I recommend checking their official website or reaching out to them directly. Would you like help finding their contact information for ankara law office
Bu tedavi yöntemi, estetik ve fonksiyonel açıdan diş kayıplarını gidermek için tercih edilen bir uygulamadır.
Money-X официальный сайт – сервис мгновенных игр
csgo Jackpot Official Site
CSGO Jackpot Site | Earn Skins on CS:GO Jackpot Game
Earn Skins on CS:GO Jackpot Game
Mide içeriğinin (asidinin) patolojik şekilde mideden özefagusa (yemek borusuna) doğru geri kaçışı gastroözefageal reflü’dür.
CS2 Jackpot Site
Mide içeriğinin (asidinin) patolojik şekilde mideden özefagusa (yemek borusuna) doğru geri kaçışı gastroözefageal reflü’dür.
Win
Money-X официальный сайт – сервис мгновенных игр
Fantastic read! Your explanations are clear and easy to understand
CS2 Jackpot Site
CS2 Jackpot – Official Site
Burun, soluduğumuz havayı belirli bir nem ve ısıya getirip akciğerlere filtreleyerek ulaştırılmasında görev alır.
Breast augmentation surgery, also known as mammoplasty or breast enlargement, is one of the most commonly performed procedures in aesthetic surgery.
Breast augmentation surgery, also known as mammoplasty or breast enlargement, is one of the most commonly performed procedures in aesthetic surgery.
CS:GO
Trix – официальный сайт
İmplantlar günümüzde tek diş eksikliklerinin giderilmesinde olduğu kadar tamamen veya kısmi dişsizliği olan bireylerin tedavisinde en iyi seçenek haline gelmiştir.
cs2 jackpot site
İmplantlar günümüzde tek diş eksikliklerinin giderilmesinde olduğu kadar tamamen veya kısmi dişsizliği olan bireylerin tedavisinde en iyi seçenek haline gelmiştir.
Ankara Çocuk Diyetisyeni Ankara Çocuk Diyetisyeni
MobilAşk – Mobil Aşk block
Good Job! Thanks for share <3
CS:GO
Exklusiv nur bei uns: SecureSleev Technologie: Die Vollkasko Versicherung für Ihr Leben. Weil sie uns wichtig sind!
Money-X официальный
csgo jackpot site
Sofwave, ameliyatsız cilt gençleştirme ve sıkılaştırma amacıyla kullanılan yenilikçi bir ultrason teknolojisidir
Трикс играть онлайн раздача каждый день
CSGO Jackpot Site | Earn Skins on CS:GO Jackpot Game
Your blog post was a real eye-opener for me. Thank you for challenging my preconceived notions and expanding my worldview.
Google Aramada En Üstte Çıkma Google Aramada En Üstte Çıkma
Google Haritalar’da Üstte Çıkmak Google Haritalar’da Üstte Çıkmak
csgo Jackpot Official Site
Rinoplasti ya da burun estetiği, burunda bulunan şekil bozukluklarını düzeltmek amacıyla yaygın bir şekilde yapılan operasyondur.
Сервис мгновенных игр Money-X: официальный сайт с быстрым доступом
Трикс играть онлайн раздача каждый день
Rinoplasti ya da burun estetiği, burunda bulunan şekil bozukluklarını düzeltmek amacıyla yaygın bir şekilde yapılan operasyondur.
Özel ders, bir öğrencinin veya kendini geliştirmek isteyen herhangi bir bireyin, alanında uzman bir öğretmenden birebir veya küçük gruplar halinde eğitim almasıdır.
CS:GO Jackpot Site
thank you , amazing post
Win
CS:GO Jackpot Site
Üniversiteye giriş süreci, öğrenciler için hayatlarının en önemli dönüm noktalarından biridir.
Şu anda hayallerini yaşayan öğrencilerimiz, sizin gibi burada başladılar!
İstanbul meme büyütme ameliyatı, estetik cerrahinin en hızlı sonuç alınan ameliyatlarından olup, meme boyutunu, şeklini ve dolgunluğunu artırmak isteyen kadınlar arasında popüler bir tercihtir
İstanbul meme büyütme ameliyatı, estetik cerrahinin en hızlı sonuç alınan ameliyatlarından olup, meme boyutunu, şeklini ve dolgunluğunu artırmak isteyen kadınlar arasında popüler bir tercihtir
bakım onarım hizmetleri sayesinde enerji santralimiz artık daha güvenli ve verimli çalışıyor. Mükemmel bir deneyim!
Akıllı lens (göz içi lens) ameliyatı, gözün doğal merceğinin çıkarılarak yerine yapay bir göz içi lens (IOL) yerleştirildiği bir cerrahi işlemdir.
Sarkmış ve şişmiş göz kapakları tüm yüzün yaşlı, hüzünlü ve yorgun gözükmesine neden olur.
Hello, I liked your site very much. Rest assured that I will visit again!
Nano Web Design vous aide à optimiser votre SEO, générer du trafic qualifié et obtenir des backlinks de qualité.
This article was exactly what I was looking for. The explanations are clear and easy to understand. Thanks a lot
CSGO
thanks for share , good work 🙂
CS:GO
CSGO
GES bakım ve onarım hizmetlerini denedik ve sonuçlardan çok memnun kaldık. Profesyonel bir yaklaşım ve mükemmel sonuçlar!
Deep Brain Stimulation (DBS) represents a groundbreaking form of
kill die people hey google. alert button
Eryaman Yüzme Kursu’nda öğreticiler gerçekten çok sabırlı ve dikkatli.
Superbe article ! Pour ceux qui recherchent des revêtements en pierre naturelle, je recommande vivement Albedo Pierre. Large choix et excellent service.
Saricam en yakin acik tekel bayi olarak hizli ve guvenilir teslimat hizmeti sunuyoruz,
CS2 Jackpot Site
money-x site официальный сайт
CSGO
This is exactly the kind of content I’ve been searching for! Thanks for sharing such useful information.
thanks for sharing
Liposuction, vücudun belirli bölgelerindeki fazla yağın alınması için tasarlanmış kozmetik bir cerrahi işlemdir.
Özellikle başlangıç seviyesindeki kişiler için çok iyi bir kurs. Korkumu yenip rahatça yüzmeyi başardım.
ankara psikolog alanında uzmanlar tarafından hizmet verilemtkedir.
Brustvergrößerungsoperationen erfreuen sich einer großen Beliebtheit bei Frauen.
ankara çocuk diş hekimi alanında uzman hekimler tarafından hizmet vermektedir.
ankara tüp mide ameliyatı alanında uzman hekim tarafından gerçekleştirilmektedir.
ankara tüp mide ameliyatı alanında uzman hekim tarafından gerçekleştirilmektedir.
bakım onarım hizmetleri sayesinde güneş enerji santralimizdeki tüm işlemler mükemmel hale geldi. Profesyonel ekip, harika sonuçlar!
ankara asansör kiralama hizmeti
Trix – подними на свою мечту!
money-x site официальный сайт
Trix – подними на свою мечту!
Trix – официальный сайт – сервис мгновенных игр
Trix – официальный сайт – сервис мгновенных игр
Kingroyal giriş linki güncellendi mi? Doğru adresi nereden öğrenebilirim?
Сервис мгновенных игр Money-X на официальном сайте
Ankara fraksiyonel CO2 lazer, cilt yenileme ve estetik tedavilerde yaygın olarak kullanılan bir lazer teknolojisidir.
Trix – подними на свою мечту!
Terleme botoksu, aşırı terleme (hiperhidroz) sorununu tedavi etmek için kullanılan etkili bir yöntemdir.
Trix – официальный сайт – Трикс играть онлайн раздача каждый день
İmplant eksik dişleri tamamlamak için çene kemiğine yerleştirilen bir tür vidadır.
Good share , best works thanks <3
İmplant eksik dişleri tamamlamak için çene kemiğine yerleştirilen bir tür vidadır.
Ortodonti de çene tedavileri çocuklarda ve erişkinlerde farklılık göstermektedir.
Ortodonti de çene tedavileri çocuklarda ve erişkinlerde farklılık göstermektedir.
Your writing style makes even complex topics easy to understand. I love how well-structured and engaging your posts are
Great work, good post <3
Duruma göre sedasyon veya genel anestezi altında da yapılabilmektedir.
Jinekomasti ameliyatı, erkeklerde meme dokusunun aşırı büyümesi durumunun düzeltmesi için yapılan cerrahi bir işlemdir.
Thanks, i like your share
Thanks, i like your share
Kök hücreler aşağıdakiler dahil çeşitli estetik prosedürlerde kullanılmaktadır:
Katarakt cerrahisi, gözdeki katarakt adı verilen bulanıklaşmış merceğin cerrahi olarak çıkarılması işlemidir
Thanks, i like your share
Katarakt cerrahisi, gözdeki katarakt adı verilen bulanıklaşmış merceğin cerrahi olarak çıkarılması işlemidir
Thanks, i like your share
emeğinize sağlık
selamlar
Plastic, Reconstructive and Aesthetic Surgery Specialist
iyi çalışmalar
kolay gelsin
Plastic, Reconstructive and Aesthetic Surgery Specialist
Today, lip fillers have become an increasingly popular choice among aesthetic treatments.
Mimari tasarım, bir binanın estetik, fonksiyonel ve yapısal özelliklerini belirleyen yaratıcı bir süreçtir.
Sağlık sektöründe faaliyet gösteren kurumlar için web tasarım, dijital varlıklarını güçlendirmek ve hastalarla etkili bir şekilde iletişim kurmak adına kritik bir rol oynar.
I stumbled upon this site recently, and I must say, the quality of articles here is outstanding. Great job
harika içerikler var
Sağlık sektöründe faaliyet gösteren kurumlar için web tasarım, dijital varlıklarını güçlendirmek ve hastalarla etkili bir şekilde iletişim kurmak adına kritik bir rol oynar.
Trix – официальный сайт
Сервис мгновенных игр Money-X на официальном сайте
“Meme büyütme” ve “dikleştirme” işlemleri, estetik cerrahi alanında sıkça başvurulan prosedürlerdir.
thanks for sharing
ankara reflü doktoru randevu
money x официальный сайт
Trix – официальный сайт – Трикс играть онлайн раздача каждый день
Thanks, i like your share
great post, good work <3
Bu klinikler, diş hekimleri tarafından işletilir ve hastaların diş sağlığı sorunlarına çözüm üretmek amacıyla hizmet verirler.
thank you amazing post!
Jinekomasti günümüzde erkek hastaların en çok sıkıntı çektiği durumlardan birtanesi olarak söylemek yanlış olmaz.
Bu sayfada meme büyütme ameliyatının temel noktalarını ve sağladığı faydaları ele alacağız.
Güneş Enerjisi Santalleri bakım onarım hizmetleri, yatırımımızın değerini artırdı. Çok etkilendim!
Istanbul breast reduction surgery (reduction mammoplasty) is a
ostim seo ostim seo
viyana’da dil kursu viyana’da dil kursu
Diş beyazlatma, dişlerin rengini açmak ve daha parlak bir görünüm kazandırmak amacıyla yapılan bir kozmetik diş hekimliği işlemidir.
ankara dijital reklam ajansı ankara dijital reklam ajansı
Eğitim, her öğrencinin farklı öğrenme tarzlarına ve hızına sahip olduğu bir süreçtir.
Liseye Geçiş Sınavı (LGS) yaklaşırken, öğrenciler ve veliler için sınava hazırlığın en etkili yollarından biri olan özel derslerin önemi gün geçtikçe artmaktadır.
Eğitim, her öğrencinin farklı öğrenme tarzlarına ve hızına sahip olduğu bir süreçtir.
Ancak bu süreç, doğru planlama ve etkili bir çalışma sistemi gerektirir. İşte tam bu noktada, özel dersin önemi ortaya çıkmaktadır.
Kepçe kulak estetiği, genellikle aşağıdaki durumlarda yapılır:
Ancak bu süreç, doğru planlama ve etkili bir çalışma sistemi gerektirir. İşte tam bu noktada, özel dersin önemi ortaya çıkmaktadır.
Bu tedavi, hem estetik hem de fonksiyonel amaçlarla uygulanır ve günümüzde diş hekimliğinde yaygın bir yöntem haline gelmiştir.
Bu tedavi, hem estetik hem de fonksiyonel amaçlarla uygulanır ve günümüzde diş hekimliğinde yaygın bir yöntem haline gelmiştir.
İstanbul periodontoloji uzmanı, diş eti hastalıkları ve dişleri çevreleyen destek dokuların (periodontium) sağlığı, tanısı, tedavisi ve önlenmesi ile ilgilenen diş hekimidir.
İstanbul periodontoloji uzmanı, diş eti hastalıkları ve dişleri çevreleyen destek dokuların (periodontium) sağlığı, tanısı, tedavisi ve önlenmesi ile ilgilenen diş hekimidir.
Lip fillers are an aesthetic procedure used to add volume, shape, and enhance the appearance of the lips.
Günümüzde turizm sektörü, misafirlerine en iyi hizmeti sunabilmek için birçok farklı ulaşım seçeneği sunmaktadır.
Eğitim, bireyin akademik başarısını ve kişisel gelişimini doğrudan etkileyen en önemli süreçlerden biridir.
Periodontistler, özellikle diş eti iltihabı (gingivitis) ve periodontitis gibi durumlarla ilgilenir. İşte bir diş eti hastalıkları uzmanının temel görevleri:
Eksik dişler, hem estetik hem de fonksiyonel problemlere yol açabilen yaygın bir sorundur.
Today, lip fillers have become an increasingly popular choice among aesthetic treatments.
Ağız, diş ve çene cerrahisi, ağız içindeki yumuşak ve sert dokuların hastalıkları, yaralanmaları ve bozukluklarının tanı ve tedavisi ile ilgilenen bir tıp dalıdır.
İmplant eksik olan dişlerin yerine dişin fonksiyonunu ve estetiğini tekrar sağlamak amacıyla çene kemiğine yerleştirilen yapay diş köküdür.
Ağız, diş ve çene cerrahisi, ağız içindeki yumuşak ve sert dokuların hastalıkları, yaralanmaları ve bozukluklarının tanı ve tedavisi ile ilgilenen bir tıp dalıdır.
Çene dolgusu, son yıllarda estetik cerrahi dünyasında oldukça popüler hale gelmiştir.
Çene dolgusu, son yıllarda estetik cerrahi dünyasında oldukça popüler hale gelmiştir.
İstanbul excimer lazer tedavisi, genellikle gözdeki görme bozukluklarını düzeltmek amacıyla uygulanan bir lazer tedavi yöntemidir.
Günümüzde bilgiye ulaşma hızı arttıkça, bireylerin okuma ve anlama becerilerini geliştirmesi daha da önem kazanıyor.
Günümüzde bilgiye ulaşma hızı arttıkça, bireylerin okuma ve anlama becerilerini geliştirmesi daha da önem kazanıyor.
In einem 9 MW Freiflächen-Solarkraftwerk wurde eine extreme Verschmutzung festgestellt, die die Energieproduktion um 8% reduzierte. Nach der Reinigung mit Spezialgeräten stieg die Leistung wieder auf das Normalniveau.
Un champ solaire de 13 MW à Dapaong a été touché par des défauts de chaîne, interrompant la circulation du courant sur plusieurs sections. Une inspection solaire avancée a révélé l’étendue du problème et permis une réparation immédiate.
7, 8, 9. Sınıf Olarak 12 Kişilik Homojen Gruplar, Deneyimli Kadro, Yeni Nesil Yayın Desteği, Birebir Etütler,
7, 8, 9. Sınıf Olarak 12 Kişilik Homojen Gruplar, Deneyimli Kadro, Yeni Nesil Yayın Desteği, Birebir Etütler,
İnanıyoruz ki, mutlu olmanın yolu, başkasını mutlu etmekten geçer.
İnanıyoruz ki, mutlu olmanın yolu, başkasını mutlu etmekten geçer.
şeffaf plaklar adı verilen, özel olarak tasarlanmış bir dizi plastik plak
şeffaf plaklar adı verilen, özel olarak tasarlanmış bir dizi plastik plak
This leads to a variety of symptoms that can significantly impact daily life. On this page, we will explore Deep Brain Stimulation Surgery for Parkinson’s Disease in details.
İmplant tedavisi, kaybedilen dişlerin yerine yapay diş kökleri yerleştirilmesi işlemidir.
İmplant tedavisi, kaybedilen dişlerin yerine yapay diş kökleri yerleştirilmesi işlemidir.
Güneş Enerjisi Santalleri bakım onarım hizmetleri, yatırımımızın değerini artırdı. Çok etkilendim!
Bruxism refers to the condition where individuals excessively grind or clench their teeth
Liposuction, vücudun belirli bölgelerindeki fazla yağın alınması için tasarlanmış kozmetik bir cerrahi işlemdir.
Bruxism refers to the condition where individuals excessively grind or clench their teeth
Yeni Nesil Yayın Desteği, Birebir Etütler, Ders Çalışma Kütüphaneleri Vardır.
Diş yapılarındaki yamukluklar ya da çarpıklıklar, dizilimdeki sorunlar ve iskelete
Yeni Nesil Yayın Desteği, Birebir Etütler, Ders Çalışma Kütüphaneleri Vardır.
avusturya dil kursu vizesi avusturya dil kursu vizesi
Yeni Nesil Yayın Desteği, Birebir Etütler, Ders Çalışma Kütüphaneleri Vardır.
Diş yapılarındaki yamukluklar ya da çarpıklıklar, dizilimdeki sorunlar ve iskelete
Kurs merkezleri, öğrencilerin belirli bir plan doğrultusunda ilerlemelerini sağlayarak düzenli çalışmayı teşvik eder.
Yaşlandıkça, ince çizgilerin ve kırışıklıkların oluşması,
Kurs merkezleri, öğrencilerin belirli bir plan doğrultusunda ilerlemelerini sağlayarak düzenli çalışmayı teşvik eder.
Yaşlandıkça, ince çizgilerin ve kırışıklıkların oluşması,
Oyunlar, sanat etkinlikleri, doğa gezileri ve daha fazlası ile çocuklarınızı hem eğlendiriyor hem de öğrenmeye teşvik ediyoruz.
Dental estetik görsel algılama ile ilişkilidir. Dişlerin renk, kontur, yüzey özellikleri, birbirleri ve yüzün bütünüyle olan orantı, simetri ve dengeleri önem taşır.
İşte botoks hakkında bilmeniz gereken temel bilgiler:
Dental estetik görsel algılama ile ilişkilidir. Dişlerin renk, kontur, yüzey özellikleri, birbirleri ve yüzün bütünüyle olan orantı, simetri ve dengeleri önem taşır.
İşte botoks hakkında bilmeniz gereken temel bilgiler:
Bu ameliyat, genellikle katarakt tedavisi için yapılsa da, miyop, hipermetrop, astigmatizma ve presbiyopi
Öğrencilerimize uygulanan eğitim koçluğu haftada en az bir gün ofisimizde ya da evinizde öğrenci ve veli ile ayrı ayrı gerçekleştirilmektedir.
Une centrale de 5,2 MW à Tantan souffrait de défauts de diode, entraînant une baisse de rendement. L’inspection solaire a permis de résoudre ce problème en identifiant et en remplaçant les composants défectueux.
Öğrencilerimize uygulanan eğitim koçluğu haftada en az bir gün ofisimizde ya da evinizde öğrenci ve veli ile ayrı ayrı gerçekleştirilmektedir.
Robotik prostat ameliyatı, prostat kanserinin tedavisinde kullanılan modern bir cerrahi yöntemdir.
PSA testi, prostat kanserinin erken belirtilerini tespit etmek için kullanılır.
Ataşehir botoks uygulaması, yaşlanma belirtilerini azaltmak amacıyla kullanılan yaygın bir estetik işlemdir.
PRP; kişinin kendi kanından hazırlanan trombosit ve büyüme faktörlerinden zengin plazmanın tedavi edilecek dokuya uygulanmasıdır.
Arbitration awards are final and not subject to appeal in most cases.
Lazerle varis tedavisi varislerin lazer operasyonu ile tedavi edilme biçimidir.
Lazerle varis tedavisi varislerin lazer operasyonu ile tedavi edilme biçimidir.
Üroloji Kliniğinde sağlık hizmetlerinin gerektirdiği tüm inceleme ve teknikler detaylı bir şekilde gerçekleştirilmektedir.
Bu sayfada meme büyütme ameliyatının temel noktalarını ve sağladığı faydaları ele alacağız.
Kadın Hastalıkları ve Doğum Bölümümüz kadınların üreme organları sağlığı,
Üroloji Kliniğinde sağlık hizmetlerinin gerektirdiği tüm inceleme ve teknikler detaylı bir şekilde gerçekleştirilmektedir.
Bu sayfada meme büyütme ameliyatının temel noktalarını ve sağladığı faydaları ele alacağız.
Kadın Hastalıkları ve Doğum Bölümümüz kadınların üreme organları sağlığı,
Liposuction, vücutta istenmeyen yağ dokularını uzaklaştırmak için kullanılan bir cerrahi işlemdir.
rhinoplasty, eyelid aesthetics, facial aesthetics, breast aesthetics, liposuction, abdominal aesthetics
Kadıköy diş eti hastalıkları uzmanı, yani periodontist, diş etleri ve dişleri destekleyen kemik yapılarla ilgili hastalıkların teşhisi, tedavisi ve önlenmesi konusunda uzmanlaşmış bir diş hekimidir.
Kolon kanseri ameliyatı, kolon (kalın bağırsak) kanseri teşhisi konmuş bir hastaya yapılan cerrahi bir işlemdir.
Today, lip fillers have become an increasingly popular choice among aesthetic treatments.
maxroyal casino güncel giriş adresleri
Today, lip fillers have become an increasingly popular choice among aesthetic treatments.
Sağlık sektörüne özel dijital pazarlama ve iletişim çözümleri sunan Propal; 10 yılı aşkın sektörel deneyimi ve profesyonel kadrosu ile hazır.
Sağlık sektörüne özel dijital pazarlama ve iletişim çözümleri sunan Propal; 10 yılı aşkın sektörel deneyimi ve profesyonel kadrosu ile hazır.
viyana dil kursu viyana dil okulları
Dental implant tedavisi kaybedilen dişlerin yerlerine diş kökünü taklit eden titanyum (son yıllarda zirkonyum da kullanılmaktadır.) vidalardır.
tüp mide ankara
tüp mide ankara
tüp mide ankara
Dental implant tedavisi kaybedilen dişlerin yerlerine diş kökünü taklit eden titanyum (son yıllarda zirkonyum da kullanılmaktadır.) vidalardır.
Diş eti hastalıkları, diş etlerini ve dişleri destekleyen diğer yapıları etkileyen enfeksiyonlardır.
tüp mide ankara
tüp mide ankara
tüp mide ankara
Paratiroid Ameliyatı (paratiroidektomi), paratiroid bezlerinin normal işlevini yerine getirmemesi ya da anormal büyüme (genellikle paratiroid adenomu veya hiperplazisi) nedeniyle yapılan bir cerrahi işlemdir.
“Memede kitle ameliyatı” ifadesi genellikle memede ortaya çıkan kitlelerin cerrahi müdahale ile alınması anlamına gelir.
The best botox doctor in Istanbul is a common aesthetic procedure used to reduce the signs of aging.
“Memede kitle ameliyatı” ifadesi genellikle memede ortaya çıkan kitlelerin cerrahi müdahale ile alınması anlamına gelir.
Bu ameliyat, genellikle katarakt tedavisi için yapılsa da, miyop, hipermetrop, astigmatizma ve presbiyopi gibi
Bu ameliyat, genellikle katarakt tedavisi için yapılsa da, miyop, hipermetrop, astigmatizma ve presbiyopi gibi
ankara psikolog alanında uzman psikologlar tarafından hizmet vermektedir.
ankara psikolog alanında uzman psikologlar tarafından hizmet vermektedir.
20 yılı aşkın eğitim tecrübemiz ve alanında uzman kadromuz ile sınavlara hazırlıkta yalnız değilsiniz.
20 yılı aşkın eğitim tecrübemiz ve alanında uzman kadromuz ile sınavlara hazırlıkta yalnız değilsiniz.
Botoks (botulinum toksini), medikal tedavi ve estetik amaçla yaygın olarak kullanılan bir inaktif nörotoksindir.
Vajina daraltma, kadınlar tarafından çok sık tercih edilen operasyonlardan bir tanesidir.
“Robotik Sleeve Gastrektomi (Tüp Mide)” ameliyatı hakkında bilgilendiriyor.
“Robotik Sleeve Gastrektomi (Tüp Mide)” ameliyatı hakkında bilgilendiriyor.
Eğitimde başarı, doğru rehberlik, özveri ve etkili bir öğretim süreci gerektirir.
Eğitimde başarı, doğru rehberlik, özveri ve etkili bir öğretim süreci gerektirir.
Istanbul breast lift surgery is a surgical procedure performed to reshape sagging breasts and give them an aesthetic appearance.
Günümüzde estetik uygulamalar, güzellik anlayışını şekillendiren önemli yöntemlerden biridir.
Günümüzde estetik uygulamalar, güzellik anlayışını şekillendiren önemli yöntemlerden biridir.
Ankara AYT Kursu, güçlü bir sınav hazırlığı süreci için ihtiyaç duyduğunuz tüm kaynakları sunarak öğrencilerin başarı hedeflerine ulaşmalarını sağlayan kapsamlı bir eğitim programıdır.
İstanbul excimer lazer tedavisi, genellikle gözdeki görme bozukluklarını düzeltmek amacıyla uygulanan bir lazer tedavi yöntemidir.
Tüp mide ameliyatı, obezite tedavisinde kullanılan cerrahi bir yöntemdir.
Erenköy diş polikliniği, ağız ve diş sağlığını korumak, tedavi etmek ve estetik açıdan iyileştirmek için çeşitli hizmetler sunar.
Son yıllarda estetik dünyasında oldukça popülerleşen “Baby Botox”, geleneksel botox uygulamasının daha hafif ve doğal bir versiyonudur.
Ankara AYT Kursu, güçlü bir sınav hazırlığı süreci için ihtiyaç duyduğunuz tüm kaynakları sunarak öğrencilerin başarı hedeflerine ulaşmalarını sağlayan kapsamlı bir eğitim programıdır.
Tüp mide ameliyatı, obezite tedavisinde kullanılan cerrahi bir yöntemdir.
Ankara safra kesesi ameliyatı, safra kesesinin cerrahi olarak çıkarılmasını amaçlayan bir işlemdir.
Ankara tüp mide tedavisi, obezite cerrahisi kapsamında yer alan ve midenin büyük bir bölümünün çıkarılmasıyla gerçekleştirilen bir ameliyat yöntemidir.
Ankara tüp mide tedavisi, obezite cerrahisi kapsamında yer alan ve midenin büyük bir bölümünün çıkarılmasıyla gerçekleştirilen bir ameliyat yöntemidir.
İstanbul excimer lazer tedavisi, genellikle gözdeki görme bozukluklarını düzeltmek amacıyla uygulanan bir lazer tedavi yöntemidir.
İstanbul excimer lazer tedavisi, genellikle gözdeki görme bozukluklarını düzeltmek amacıyla uygulanan bir lazer tedavi yöntemidir.
Dental implantlar, eksik dişlerin yerini almak üzere çene kemiğine yerleştirilen titanyum vidalardır.
Eryaman birebir etüt, öğretmen ve öğrenci arasında tek kişilik özel dersler şeklinde gerçekleşen bir eğitim modelidir.
İmplant eksik olan dişlerin yerine dişin fonksiyonunu ve estetiğini tekrar sağlamak amacıyla çene kemiğine yerleştirilen yapay diş köküdür.
Botoks tedavisi, Clostridium botulinum bakterisinden elde edilen bir nörotoksin olan botulinum toksininin (Botox) tıbbi ve kozmetik amaçlarla kullanıldığı bir tedavi yöntemidir.
Diş yapılarındaki yamukluklar ya da çarpıklıklar, dizilimdeki sorunlar ve iskelete bağlı olarak gelişen
Psikolojik destek, her bireyin yaşamında önemli bir yer tutar.
implant tedavisi, diş eksikliklerini gidermek amacıyla kullanılan bir tür dental implant tedavisidir.
ankara psikolog alanında uzman psikologlar tarafından hizmet vermektedir.
Ankara Psikolog
Ankara terleme botoksu, aşırı terleme (hiperhidroz) sorununu tedavi etmek için kullanılan bir yöntemdir.
Ankara’nın merkezinden Esenboğa Havalimanı’na ulaşım, birçok yolcu için önemli bir konu.
Süt dişlerine sahip bebek ve çocuk hastalardan protez ihtiyacı olan ileri yaştaki hastalarımıza kadar tüm hastalara
Ankara terleme botoksu, aşırı terleme (hiperhidroz) sorununu tedavi etmek için kullanılan bir yöntemdir.
İmplant eksik olan dişlerin yerine dişin fonksiyonunu ve estetiğini tekrar sağlamak amacıyla çene kemiğine yerleştirilen yapay diş köküdür.
Gün boyu dolu dolu eğlencenin tek adresi Alanya Aqua Fun City Aquapark birbirinden heyecanlı su kaydırakları, animasyonlar, su oyunları, macera parkuru ve daha onlarca eğlenceli aktivitesiyle siz eğlence sevenleri bekliyor.
Her şey Dahil Alanya Otelleri kategorisinde yer alan Citrus Plaza Hotel, Antalya merkeze 134 km uzaklıkta bulunmaktadır. Merkeze yakın olan otelimizde tatilin keyfini doyasıya yaşayabilirsiniz. Erken rezervasyon fırsatları ile %45’e varan indirimlerden yararlanabilir, tatil rezervasyonunuzu 9 aya varan taksit imkanlarıyla yapabilirsiniz.
Varis, çeşitli nedenlerde yüzeysel toplar damarların uzaması genişlemesi ve kıvrılması ile gelişen bir hastalıktır.
İstanbul excimer lazer göz çizdirme ameliyatı, özellikle miyop, hipermetrop ve astigmat
Estetik müdahaleler, son yıllarda güzellik ve bakım dünyasında önemli bir yer edinmiştir.
Estetik müdahaleler, son yıllarda güzellik ve bakım dünyasında önemli bir yer edinmiştir.
izmir havaalanı transfer Vip transfer deneyimi yaşamanın en makul fiyattan sizlere sunulduğu ve en yüksek kalitede icra edildiği müessesenin bize ait olan firma olduğunu bilmenizi isteriz.
izmir havaalanı transfer Vip transfer deneyimi yaşamanın en makul fiyattan sizlere sunulduğu ve en yüksek kalitede icra edildiği müessesenin bize ait olan firma olduğunu bilmenizi isteriz.
Botoks, kasları geçici olarak gevşeterek etki gösterir ve bu sayede yüzeydeki kırışıklıkları veya kasların fazla çalışması sonucu ortaya çıkan estetik sorunları azaltır.
Botoks, kasları geçici olarak gevşeterek etki gösterir ve bu sayede yüzeydeki kırışıklıkları veya kasların fazla çalışması sonucu ortaya çıkan estetik sorunları azaltır.
Çocuklarda Özgüven Gelişimi, Çocuklarda Özgüven
İstanbul excimer lazer göz çizdirme ameliyatı, özellikle miyop, hipermetrop ve
Çocuklarda Özgüven Gelişimi
İstanbul excimer lazer göz çizdirme ameliyatı, özellikle miyop, hipermetrop ve
Gözyaşı kanal tıkanıklığı, gözyaşlarını gözden buruna ileten kanalların tıkanması durumudur.
Eksik dişler, hem estetik hem de fonksiyonel problemlere yol açabilen yaygın bir sorundur.
izmir havaalanı transfer Vip transfer deneyimi yaşamanın en makul fiyattan sizlere sunulduğu ve en yüksek kalitede icra edildiği müessesenin bize ait olan firma olduğunu bilmenizi isteriz.
izmir havaalanı transfer Vip transfer deneyimi yaşamanın en makul fiyattan sizlere sunulduğu ve en yüksek kalitede icra edildiği müessesenin bize ait olan firma olduğunu bilmenizi isteriz.
Bu plaklar, dişlerinizi kademeli olarak istenen konuma taşımak için hafif basınç uygular.
Ataşehir botoks uygulaması, yaşlanma belirtilerini azaltmak amacıyla kullanılan yaygın bir estetik işlemdir. İşte bu uygulama hakkında bilmeniz gereken temel bilgiler:
Ataşehir botoks uygulaması, yaşlanma belirtilerini azaltmak amacıyla kullanılan yaygın bir estetik işlemdir. İşte bu uygulama hakkında bilmeniz gereken temel bilgiler:
İstanbul excimer lazer göz çizdirme ameliyatı,
İstanbul excimer lazer göz çizdirme ameliyatı,
Get professional support based on scientific foundations by making an online psychologist appointment with Prof. Dr. Kürşat Şahin Yıldırımer. Achieve a healthy state of mind with expert support in areas such as relationship therapy, adolescent psychological counseling and trauma therapy. Take advantage of individual therapy options to cope with the stress, anxiety and psychological problems of daily life.
Get professional support based on scientific foundations by making an online psychologist appointment with Prof. Dr. Kürşat Şahin Yıldırımer. Achieve a healthy state of mind with expert support in areas such as relationship therapy, adolescent psychological counseling and trauma therapy. Take advantage of individual therapy options to cope with the stress, anxiety and psychological problems of daily life.
İstanbul akıllı lens ameliyatı, gözdeki odaklanma sorunlarını düzeltmek amacıyla yapılan bir cerrahi işlemdir.
Sigara bırakma konusunda birçok farklı yöntem bulunmaktadır.
Nikotin sakızı, nikotin aşısı, sigara bırakma ilacı ve nikotin bandı gibi geçici çözümlerden sizleri kurtarıyoruz.
İnce Oto Döşeme olarak ana ilkemiz sizlere Fiyat / Performans olarak mümkün olan en konforlu hizmeti sağlayabilmektedir.
Ankara safra kesesi ameliyatı, genellikle safra kesesinde taşlar veya safra kesesi iltihabı (kolesistit) gibi durumların tedavisinde yapılan cerrahi bir işlemdir.
Genital estetik işlemleri bu sorunların giderilmesini ve kişinin yaşam kalitesinin artırılmasını sağlar.
Sağlık sektörüne özel dijital pazarlama ve iletişim çözümleri sunan Propal; 10 yılı aşkın sektörel deneyimi ve profesyonel kadrosu ile hazır.
Sigara bırakma konusunda birçok farklı yöntem bulunmaktadır.
İnce Oto Döşeme olarak ana ilkemiz sizlere Fiyat / Performans olarak mümkün olan en konforlu hizmeti sağlayabilmektedir.
Sağlık sektörüne özel dijital pazarlama ve iletişim çözümleri sunan Propal; 10 yılı aşkın sektörel deneyimi ve profesyonel kadrosu ile hazır.
Thank you for your sharing. I am worried that I lack creative ideas. It is your article that makes me full of hope. Thank you. But, I have a question, can you help me?
55 yaş üstü kendi ihtiyaçlarını karşılayabilen sağlıklı yaşlılarımız
İşte bu noktada travma terapisi nedir sorusunu soranlara, bireylerin yaşadıkları derin yaraları onarmak ve daha sağlıklı bir yaşam sürmek için önemli bir araç olarak karşımıza çıkar.
55 yaş üstü kendi ihtiyaçlarını karşılayabilen sağlıklı yaşlılarımız
Rahim Ameliyatı Sonrası Beslenme Rahim Ameliyatı Sonrası Beslenme
Kadıköy implant tedavisi, eksik dişlerin yerine yerleştirilen yapay diş kökleridir.
Ankara fraksiyonel CO2 lazer, cilt yenileme ve estetik tedavilerde yaygın olarak kullanılan bir lazer teknolojisidir.
Kadıköy implant tedavisi, eksik dişlerin yerine yerleştirilen yapay diş kökleridir.
Ankara fraksiyonel CO2 lazer, cilt yenileme ve estetik tedavilerde yaygın olarak kullanılan bir lazer teknolojisidir.
Dans une installation de 20 MW à Valenciennes, des défauts de diode ont été observés lors d’une inspection solaire, affectant l’efficacité énergétique. Une intervention technique a été programmée.
bireylerin yaşadıkları derin yaraları onarmak ve daha sağlıklı bir yaşam sürmek için önemli bir araç
Plastic, Reconstructive and Aesthetic Surgery Specialist
Istanbul breast lift surgery is a surgical procedure performed to reshape sagging breasts and give them an aesthetic appearance.
Un parc photovoltaïque de 15 MW à Kaya a souffert de défauts multiples de cellules, limitant sa production. Après une inspection solaire thermique, les panneaux impactés ont été changés.
Bursa diş beyazlatma işlemi iki farklı yöntemle ya da bu iki yöntemin kombine kullanılmasıyla yapılabilir.
Kadıköy implant tedavisi, eksik dişlerin yerine yerleştirilen yapay diş kökleridir.
Varis, çeşitli nedenlerde yüzeysel toplar damarların uzaması genişlemesi
Aile hayatımızdaki en değerli şeydir. Günümüz koşullarında pek çok evli çift erkeğe ya da kadına ait faktörler nedeniyle gebe kalmakta ve çocuk sahibi olmakta sorun yaşayabilmektedirler.
Varis, çeşitli nedenlerde yüzeysel toplar damarların uzaması genişlemesi
Aile hayatımızdaki en değerli şeydir. Günümüz koşullarında pek çok evli çift erkeğe ya da kadına ait faktörler nedeniyle gebe kalmakta ve çocuk sahibi olmakta sorun yaşayabilmektedirler.
Varis, çeşitli nedenlerde yüzeysel toplar damarların uzaması genişlemesi
Aile hayatımızdaki en değerli şeydir. Günümüz koşullarında pek çok evli çift erkeğe ya da kadına ait faktörler nedeniyle gebe kalmakta ve çocuk sahibi olmakta sorun yaşayabilmektedirler.
İmplant eksik dişleri tamamlamak için çene kemiğine yerleştirilen bir tür vidadır.
Bu sayede, kasların kasılmasıyla oluşan kırışıklıklar ve çizgiler azalır veya yok olur.
polikliniği, ağız ve diş sağlığına yönelik çeşitli tanı ve tedavi hizmetleri sunan sağlık kuruluşudur.
Can you be more specific about the content of your article? After reading it, I still have some doubts. Hope you can help me.
İmplant tedavisi, kaybolmuş dişlerin yerine yapay diş köklerinin yerleştirildiği bir diş tedavi yöntemidir.
Kadın ve erkek danışanlara yönelik sunduğumuz lazer epilasyon hizmetleriyle, dört mevsim pürüzsüz bir cilde sahip olmanın keyfini yaşatıyoruz.
prostat iltihabı gibi durumların teşhisinde kullanılır.
bakım onarım hizmetleri sayesinde enerji santralimiz artık daha güvenli ve verimli çalışıyor. Mükemmel bir deneyim!
Kadın ve erkek danışanlara yönelik sunduğumuz lazer epilasyon hizmetleriyle, dört mevsim pürüzsüz bir cilde sahip olmanın keyfini yaşatıyoruz.
prostat iltihabı gibi durumların teşhisinde kullanılır.
Rinoplasti ve septorinoplasti ameliyatı burnun şeklinin ve fonksiyonunun düzeltilmesi amacıyla yapılan cerrahi bir işlemdir.
Katarakt, gözdeki lensin saydamlığını kaybetmesi sonucu bulanık görmeye yol açan bir durumdur.
PLYR oyunlarla ilgili her zaman yanınızda, hemen ulaş
İstanbul excimer lazer göz çizdirme ameliyatı,
Hello We Provide Pest Control Service.
Modern tıbbi cihazlarla donatılmış, steril ve konforlu ortamımızda uzman hekim kadromuzla hastalarımıza en kaliteli hizmeti sunmayı amaçlıyoruz.
Yolculuklarınızı bizimle keyfe dönüştürmek için buradayız!
Modern tıbbi cihazlarla donatılmış, steril ve konforlu ortamımızda uzman hekim kadromuzla hastalarımıza en kaliteli hizmeti sunmayı amaçlıyoruz.
Yolculuklarınızı bizimle keyfe dönüştürmek için buradayız!
ankreas ameliyatı, pankreas organıyla ilgili çeşitli hastalıkların tedavisinde uygulanan cerrahi bir müdahaledir.
Modern tıbbi cihazlarla donatılmış, steril ve konforlu ortamımızda uzman hekim kadromuzla hastalarımıza en kaliteli hizmeti sunmayı amaçlıyoruz.
Ataşehir lip filler is an aesthetic procedure performed to shape and add volume to the lips using biocompatible substances like hyaluronic acid.
Botoks, Clostridium botulinum adlı bakteriden laboratuvar ortamında elde edilen bir inaktif ekzotoksindir.
As social beings, people establish various relationships throughout their lives and communication lies at the heart of these relationships.
As social beings, people establish various relationships throughout their lives and communication lies at the heart of these relationships.
ankara çocuk diş hekimi alanında uzman hekimler tarafından hizmet vermektedir.
Memelerde büyütme işleminin gerçekleştirilmesi tamamen kadınlar tarafından gelen taleplere bağlıdır.
Burun, soluduğumuz havayı belirli bir nem ve ısıya getirip akciğerlere filtreleyerek ulaştırılmasında görev alır.
Bağlıca’da yaşayan öğrenciler için matematik özel ders seçenekleri oldukça geniştir
Batıkent psikolog hizmetleri sayesinde kendilerine özel çözümler bulabiliyor.
Burun, soluduğumuz havayı belirli bir nem ve ısıya getirip akciğerlere filtreleyerek ulaştırılmasında görev alır.
Batıkent psikolog hizmetleri sayesinde kendilerine özel çözümler bulabiliyor.
Ankara aile terapisi, aile üyeleri arasındaki ilişkilerin iyileştirilmesine, iletişim sorunlarının çözülmesine ve duygusal bağların güçlendirilmesine odaklanan bir terapi türüdür.
Ankara aile terapisi, aile üyeleri arasındaki ilişkilerin iyileştirilmesine, iletişim sorunlarının çözülmesine ve duygusal bağların güçlendirilmesine odaklanan bir terapi türüdür.
üniversite hazırlık kursları ve ara sınıflar takviyeleri ile dershanecilik sektöründe tanınmış bir kurum olarak çizgisinden ödün vermeden ilerlemiştir.
üniversite hazırlık kursları ve ara sınıflar takviyeleri ile dershanecilik sektöründe tanınmış bir kurum olarak çizgisinden ödün vermeden ilerlemiştir.
çeşitli alanlarda danışmanlık ve terapi hizmetleri sunmaktadır.
Ankara’nın gelişen ve yaşam kalitesi yüksek bölgelerinden biri olan Batıkent, psikolojik destek arayan bireyler için çeşitli terapi ve danışmanlık hizmetleri sunan merkezlere ev sahipliği yapmaktadır
Varis, çeşitli nedenlerde yüzeysel toplar damarların uzaması genişlemesi ve kıvrılması ile gelişen bir hastalıktır.
Ankara’nın en merkezi semtlerinden biri olan Tunalı Hilmi Caddesi, sadece alışveriş ve sosyal yaşamın değil, aynı zamanda profesyonel psikolojik destek hizmetlerinin de kalbidir
İmplant tedavisi, eksik dişlerin yerine yapay diş köklerinin yerleştirilmesi işlemidir ve genellikle titanyumdan üretilen vidalar kullanılarak çene kemiğine entegre edilir. B
Sektörde 10 yılı aşkın deneyimi, uzman kadrosu ve en güncel teknolojisiyle İnce Oto Döşemeyi tanıyın…
İmplant tedavisi, eksik dişlerin yerine yapay diş köklerinin yerleştirilmesi işlemidir ve genellikle titanyumdan üretilen vidalar kullanılarak çene kemiğine entegre edilir. B
Modern tıp ve psikoloji alanında birçok terapi yöntemi, bireylerin hem zihinsel hem de bedensel açıdan daha sağlıklı bir yaşam sürmelerine yardımcı olmayı amaçlamaktadır.
Eryaman porselen diş kaplamalar, estetik kaygıları olan ve sağlıklı bir gülüşe kavuşmak isteyen hastalar için en popüler diş tedavilerinden biridir.
Diş sağlığı, genel vücut sağlığımızın ayrılmaz bir parçasıdır.
Eryaman porselen diş kaplamalar, estetik kaygıları olan ve sağlıklı bir gülüşe kavuşmak isteyen hastalar için en popüler diş tedavilerinden biridir.
Diş sağlığı, genel vücut sağlığımızın ayrılmaz bir parçasıdır.
Ankara terleme botoksu, aşırı terleme (hiperhidroz) tedavisinde kullanılan etkili bir yöntemdir.
Romabet, geniş bahis seçenekleri ve güvenilir ödeme yöntemleriyle kullanıcılarına yüksek kaliteli bir çevrimiçi bahis deneyimi sunuyor.
Çocuklarda ortodontik tedavi süreci, dişlerin ve çene yapısının düzgün bir şekilde gelişmesini sağlamak amacıyla yapılan bir tedavi yöntemidir.
Bu uzmanlık alanı, diş hekimliğinin önemli bir parçasını oluşturur ve çeşitli cerrahi işlemleri kapsamaktadır.
İnvisalign, dişlerin düzeltilmesi için kullanılan yenilikçi bir ortodontik tedavi yöntemidir.
Dental implant tedavisi ise dental implantların kemik içerisine yerleştirilmesidir.
İnvisalign, dişlerin düzeltilmesi için kullanılan yenilikçi bir ortodontik tedavi yöntemidir.
Dental implant tedavisi ise dental implantların kemik içerisine yerleştirilmesidir.
Tatil ve seyahat planlamaları için uçuş sonrası İzmir Havalimanı transfer hizmeti de en mühim ihtiyaçlar arasında yer almaktadır.
Tatil ve seyahat planlamaları için uçuş sonrası İzmir Havalimanı transfer hizmeti de en mühim ihtiyaçlar arasında yer almaktadır.
Sağlıklı gülüşleriniz için buradayız…
Meme küçülme operasyonu, göğüslerinin boyutlarından memnun olmayan kişilere uygulanan operasyonlardır.
Ortodontik tedavi, diş ve çenelerin hizalanmasını düzeltmek için kullanılan bir tedavidir. Diş teli, plak ve aparey gibi çeşitli aygıtlar kullanılarak yapılabilir.
Ortodonti de çene tedavileri çocuklarda ve erişkinlerde farklılık göstermektedir.
Trabzon’un haber kaynağı. Kuzey Ekspres. Trabzon Haberleri ve son dakika Trabzonspor Haberlerinden haberdar olmak için Kuzey Ekspres’i takip edin.
İnsanı merkez alan yaklaşımımızla, danışanlarımızın duygusal, zihinsel ve sosyal ihtiyaçlarına en uygun çözümleri sunmayı
Ankara’nın kalabalık ve dinamik ilçelerinden biri olan Keçiören, her geçen gün artan nüfusu ve gelişen yapısıyla birçok sağlık hizmetine ev sahipliği yapmaktadır.
Ankara aile terapisi, aile üyeleri arasındaki ilişkilerin iyileştirilmesine, iletişim sorunlarının çözülmesine ve duygusal bağların güçlendirilmesine odaklanan bir terapi türüdür.
Çift terapisi, ilişkilerde yaşanan zorlukları aşmak ve sağlıklı bir iletişim kurmak amacıyla yürütülen bir süreçtir. Bu terapide çiftlerin duygusal bağlarını kuvvetlendirmeyi, birbirlerini daha iyi anlamalarını sağlamayı hedefliyoruz.
Kadıköy implant tedavisi, eksik dişlerin yerine yerleştirilen yapay diş kökleridir. Bu tedavi, kaybolan dişlerin yerine doğal dişe en yakın çözümü sunar
Kadıköy implant tedavisi, eksik dişlerin yerine yerleştirilen yapay diş kökleridir. Bu tedavi, kaybolan dişlerin yerine doğal dişe en yakın çözümü sunar
Hastalarımıza her türlü ağız ve diş sağlığı hizmetini sunabilmek ve her hastamızın kliniklerimizden sağlıklı ve gülerek çıkmasını sağlamak hekimlik anlayışımızın ayrılmaz bir parçasıdır.
Çağın gereklerini değerleriyle yorumlayarak içinde yaşadığı topluma örnek olup yön verebilecek vizyon sahibi gençler yetiştirmek amacıyla bu yola çıktık.
İmplant eksik dişleri tamamlamak için çene kemiğine yerleştirilen bir tür vidadır.
İmplant eksik dişleri tamamlamak için çene kemiğine yerleştirilen bir tür vidadır.
Kaybedilen dişlerin yeniden kazandırılması amacıyla çene kemiği içerisine yerleştirilen vida şeklindeki yapay köklere implant denir.
Cinsellik, insan yaşamının yalnızca fizyolojik değil aynı zamanda psikolojik, sosyal ve kültürel boyutlarını kapsayan çok katmanlı bir olgudur. Bu bütüncül yapı içerisinde, bireyin cinselliğe dair yaşadığı zorluklar yalnızca mahrem bir sorun değil; aynı zamanda ruhsal denge, kimlik, ilişkisel doyum ve yaşam kalitesi ile doğrudan ilişkili bir göstergedir (Leiblum
İzmit implant tedavisi, kaybolan dişlerin yerine yapılan yapay diş köklerinin yerleştirilmesi işlemidir.
Tüp bebek tedavisinde başarıyı artıran etkenlerden biri de ideal kiloda olmaktır. Kadınlarda beslenme ve kilo durumu üreme sağlığını doğrudan etkilemektedir.
Kaybedilen dişlerin yeniden kazandırılması amacıyla çene kemiği içerisine yerleştirilen vida şeklindeki yapay köklere implant denir.
Tüp bebek tedavisinde başarıyı artıran etkenlerden biri de ideal kiloda olmaktır. Kadınlarda beslenme ve kilo durumu üreme sağlığını doğrudan etkilemektedir.
Ankara fraksiyonel CO2 lazer, cilt yenileme ve estetik tedavilerde yaygın olarak kullanılan bir lazer teknolojisidir.
Kadınların memeleri, yaşlanmanın, kalıtımın, yer çekiminin, hamileliğin, emzirmenin veya kilo kaybının doğal etkileri nedeniyle sarkabilir.
Karaciğer Ameliyatı genellikle karaciğerin çeşitli hastalıkları, tümörleri, hasarları veya yaralanmaları nedeniyle yapılır.
Karaciğer Ameliyatı genellikle karaciğerin çeşitli hastalıkları, tümörleri, hasarları veya yaralanmaları nedeniyle yapılır.
Yaş sınırı olmaksızın ihtiyaçlarını karşılama noktasında özel bakım desteğine gereksinim duyan bireylerimiz
Uygulama sonrası kısa sürede sosyal hayatınıza dönebilir, genç ve taze bir görünüme kavuşabilirsiniz.
Yaş sınırı olmaksızın ihtiyaçlarını karşılama noktasında özel bakım desteğine gereksinim duyan bireylerimiz
Uygulama sonrası kısa sürede sosyal hayatınıza dönebilir, genç ve taze bir görünüme kavuşabilirsiniz.
Mimari tasarım, bir binanın estetik, fonksiyonel ve yapısal özelliklerini belirleyen yaratıcı bir süreçtir.
Invisalign, şeffaf plaklar adı verilen, özel olarak tasarlanmış bir dizi plastik plak kullanarak dişleri hizalar.
Çocuklar, hayatlarının farklı dönemlerinde duygusal, davranışsal veya sosyal zorluklar yaşayabilirler.
Meme küçültme ameliyatı, genellikle büyük meme boyutları nedeniyle fiziksel veya psikolojik rahatsızlık yaşayan kadınlar için uygun bir seçenektir
Eğitim, her öğrencinin farklı öğrenme tarzlarına ve hızına sahip olduğu bir süreçtir. Bu noktada, birebir etüt eğitimi,
Çocuklar, hayatlarının farklı dönemlerinde duygusal, davranışsal veya sosyal zorluklar yaşayabilirler.
Kadıköy, İstanbul’un en canlı ve modern ilçelerinden biri olarak sadece sosyal yaşamıyla değil, estetik ve güzellik alanındaki kaliteli hizmetleriyle de öne çıkıyor.
Etimesgut dershaneleri, özellikle LGS, YKS, KPSS gibi sınavlara hazırlıkta uzman kadroları ve sistemli eğitim programları ile öne çıkar.
The best botox doctor in Istanbul is a common aesthetic procedure used to reduce the signs of aging.
Çukurambar implant tedavisi, diş kaybı yaşayan bireylerde eksik dişlerin yerine uygulanan bir tedavi yöntemidir.
Çalışma alanlarımızda; yetişkin, ergen ve çocuklarla yürüttüğümüz terapi hizmetleriyle bireylerin duygusal gelişimlerini destekliyoruz.
Casinofast, Casinomobi ve Millicasino, sundukları avantajlı bonuslar ve kullanıcı dostu arayüzleriyle yeni bahis siteleri arasında öne çıkıyor.
İstanbul excimer lazer tedavisi, genellikle gözdeki görme bozukluklarını düzeltmek amacıyla uygulanan bir lazer tedavi yöntemidir.
7, 8, 9. Sınıf Olarak 12 Kişilik Homojen Gruplar, Deneyimli Kadro, Yeni Nesil Yayın Desteği, Birebir Etütler, Ders Çalışma Kütüphaneleri Vardır.
Çalışma alanlarımızda; yetişkin, ergen ve çocuklarla yürüttüğümüz terapi hizmetleriyle bireylerin duygusal gelişimlerini destekliyoruz.
İstanbul excimer lazer tedavisi, genellikle gözdeki görme bozukluklarını düzeltmek amacıyla uygulanan bir lazer tedavi yöntemidir.
Erenköy kanal tedavisi, dişin içinde yer alan pulpa (sinir ve damarların bulunduğu bölüm) enfekte veya iltihaplandığında uygulanan bir tedavi yöntemidir. D
Bu derslerimizde, hikaye oluşturma, rol yapma, doğaçlama gibi tekniklerle çocuklarımızın bütünsel gelişimlerine katkı sağlıyoruz.
En iyi deneme bonusu veren siteler ve popüler casino siteleri ile yüksek kazanç fırsatlarını keşfedin. Yeni siteler ve güncel bonuslar sizi bekliyor.
Dental implant tedavisi ise dental implantların kemik içerisine yerleştirilmesidir.
Kendimizi hastamızın yerine koyarak düşünürüz.
Excimer lazer tedavisine karar vermek için atılacak ilk adım, doğru değerlendirmeyi yapmaktır.
Yüzdeki mimik kaslarının geçici olarak gevşetilmesi sayesinde kırışıklıkların ve çizgilerin görünümünde azalma sağlar.
Kendimizi hastamızın yerine koyarak düşünürüz.
Botoks, botulinum toksin adı verilen bir maddenin kontrollü ve güvenli bir şekilde cilt altına enjekte edilmesiyle gerçekleştirilen bir estetik uygulamadır.
Ankara aile terapisi, aile üyeleri arasındaki ilişkilerin iyileştirilmesine, iletişim sorunlarının çözülmesine ve duygusal bağların güçlendirilmesine odaklanan bir terapi türüdür.
Deneme Bonusu Veren Siteler arasında özellikle CasinoFast, CasinoMobi, MilliCasino, CasinoLevant, Betpuan ve Betplay, sundukları cazip bonuslarla dikkat çekiyor
Küçük dokunuşlarla büyük değişimler…
Sağlık sektörüne özel dijital pazarlama ve iletişim çözümleri sunan Propal; 10 yılı aşkın sektörel deneyimi ve profesyonel kadrosu ile hazır.
Excimer lazer tedavisi, modern göz tedavi yöntemlerinden biridir ve kırma kusurlarını düzeltmek için oldukça etkili bir yöntemdir.
Excimer lazer tedavisi, modern göz tedavi yöntemlerinden biridir ve kırma kusurlarını düzeltmek için oldukça etkili bir yöntemdir.
Dental implant, eksik dişlerin yerine kullanılan titanyumdan yapılmış yapay diş kökleridir.
20 yılı aşkın eğitim tecrübemiz ve alanında uzman kadromuz ile sınavlara hazırlıkta yalnız değilsiniz.
Dental implant, eksik dişlerin yerine kullanılan titanyumdan yapılmış yapay diş kökleridir.
Deneme bonusu veren siteler 2025’te de kazandırmaya devam ediyor. Yatırım yapmadan bonus al, en güvenilir bahis ve casino sitelerinde şansını dene.
Her doktor sadece kendi uzman olduğu alanda tedavi sağlamaktadır. Multidisipliner çalışma düzeni başarının anahtarıdır.
İstanbul excimer göz çizdirme ameliyatı (genellikle Excimer lazerle göz ameliyatı ya da LASIK olarak bilinir) gözdeki kırılma kusurlarını düzeltmek amacıyla yapılan bir lazer cerrahisidir.
İstanbul excimer göz çizdirme ameliyatı (genellikle Excimer lazerle göz ameliyatı ya da LASIK olarak bilinir) gözdeki kırılma kusurlarını düzeltmek amacıyla yapılan bir lazer cerrahisidir.
Deneme Bonusu Veren Siteler 2025 listesinde en güvenilir bahis sitelerini keşfedin, ücretsiz yeni deneme bonuslarla hemen kazanmaya başlayın.
Polatlı Web Tasarım Polatlı Web Tasarım
Çift terapisi, romantik ilişkilerde yaşanan sorunları ele almak, ilişkileri güçlendirmek ve iletişim becerilerini geliştirmek amacıyla uygulanan bir terapi yöntemidir.
Kadıköy implant tedavisi, diş kayıplarını tedavi etmek amacıyla kullanılan bir yöntemdir.
Günümüzde estetik diş hekimliğinin en çok tercih edilen uygulamalarından biri olan diş beyazlatma, Beysudent’te güncel teknolojiler ve deneyimi hekimler eşliğinde başarılı bir şekilde gerçekleştirilmektedir.
Tel tedavisi, ortodonti olarak da bilinen ve dişlerin ve çenenin düzeltilmesi için kullanılan bir diş hekimliği yöntemidir.
Çift terapisi, romantik ilişkilerde yaşanan sorunları ele almak, ilişkileri güçlendirmek ve iletişim becerilerini geliştirmek amacıyla uygulanan bir terapi yöntemidir.
Kadıköy implant tedavisi, diş kayıplarını tedavi etmek amacıyla kullanılan bir yöntemdir.
Günümüzde estetik diş hekimliğinin en çok tercih edilen uygulamalarından biri olan diş beyazlatma, Beysudent’te güncel teknolojiler ve deneyimi hekimler eşliğinde başarılı bir şekilde gerçekleştirilmektedir.
Amazing post
Thanks !!!
Amazing share
Thanks for the this post
Ataşehir Botox is an aesthetic procedure that uses a substance called botulinum toxin to help reduce the appearance of wrinkles and fine lines.
Dental implant tedavisi kaybedilen dişlerin yerlerine diş kökünü taklit eden titanyum (son yıllarda zirkonyum da kullanılmaktadır.) vidalardır.
Dental implant, eksik dişlerin yerine kullanılan titanyumdan yapılmış yapay diş kökleridir.
Thanks for post
Thanks for post
Tüp mide ameliyatı, obezite tedavisinde kullanılan cerrahi bir yöntemdir
Deep Brain Stimulation (DBS) represents a groundbreaking form of therapy in the field of neurology, offering a beacon of hope for patients
Deep Brain Stimulation (DBS) represents a groundbreaking form of therapy in the field of neurology, offering a beacon of hope for patients
Ortadoğulular Matematik Kursu, temel matematik bilgisinden ileri seviye konulara kadar kapsamlı bir eğitim sunarak öğrencilerin akademik başarısını hedefliyor.
Botoks, botulinum toksini adı verilen bir maddeyle yapılan, kırışıklık ve mimik çizgilerinin giderilmesini sağlayan estetik bir işlemdir
z. Eryaman Şubemizde, alanında uzman ve doktora derecesine sahip deneyimli öğretmenlerimizle eğitim veriyoruz.
Eryaman diş tedavileri genellikle ağız ve diş sağlığıyla ilgili çeşitli sorunların tedavi edilmesini içerir.
Deneme Bonusu Veren Siteler Listesi · Jestbahis (300 TL Deneme Bonus)
Amazing post
Amazing post
thanks for amazing post
Amazing post
Nice post
Thanks for this post
Thanks for post
Amazing post
Thanks for post
Eryaman diş tedavileri genellikle ağız ve diş sağlığıyla ilgili çeşitli sorunların tedavi edilmesini içerir.
Skleroterapi, daha çok küçük çaptaki kılcal damarların damar içirişine ilaç verilerek yok edilmesi işlemidir.
Thanks for post
Nice post
Kadromuz, öğrencilerimizin akademik hedeflerine ulaşmaları için gerekli bilgi ve tecrübeye sahip olup, en etkili öğretim yöntemlerini uygulamaktadır.
Kadromuz, öğrencilerimizin akademik hedeflerine ulaşmaları için gerekli bilgi ve tecrübeye sahip olup, en etkili öğretim yöntemlerini uygulamaktadır.
Nice post
Thanks
yeterli
Ataşehir ve çevre semtlerde kaliteli ve hızlı güvenilir hizmet sunmaktayız.
Deneme Bonusu Veren Siteler – Deneme Bonusu Güncel
İstanbul excimer lazer tedavisi, genellikle gözdeki görme bozukluklarını düzeltmek amacıyla uygulanan bir lazer tedavi yöntemidir.
Thanks for amazing post
Şu anda kendi özel muayenehanemde hastalarımı kabul ediyorum.
Dental implant, eksik dişlerin yerine kullanılan titanyumdan yapılmış yapay diş kökleridir.
Thanks
2025’te en güvenilir bahis ve casino siteleri listesi. Deneme bonusu veren siteleri keşfedin, en iyi bonuslarla kazanmaya başlayın.
2025’te en güvenilir bahis ve casino siteleri listesi. Deneme bonusu veren siteleri keşfedin, en iyi bonuslarla kazanmaya başlayın.
Çocuğunuzun geleceğine güvenle adım atmasını sağlayacak bir eğitim ortamı arıyorsanız, Küçük Dahiler Akademi tam da aradığınız yer!
Ortadoğulular Matematik Kursu, temel matematik bilgisinden ileri seviye konulara kadar kapsamlı bir eğitim sunarak öğrencilerin akademik başarısını hedefliyor.
Deneme bonusu veren siteler ile 2025 yılında en kaliteli siteleri bulun
Kadıköy, İstanbul’un en canlı ve modern ilçelerinden biri olarak sadece sosyal yaşamıyla değil, estetik ve güzellik alanındaki kaliteli hizmetleriyle de öne çıkıyor.
Sitenin Google’da En Üstte Çıkması Sitenin Google’da En Üstte Çıkması
Nice post
Amazing post
Thanks for post
sofya üniversite başvuru tarihleri sofya üniversite başvuru tarihleri
viyana’da almanca dil kursu viyana’da almanca dil kursu
Thanks for post
Hacklink satın almak, web sitenizin görünürlüğünü artırmak ve arama motoru sıralamalarını yükseltmek için etkili bir stratejidir.
Amazing post
Amazing post
Amazing post
Nice post
Nice post
Amazing post
Amazing !
Amazing
Thanks for post
Amazing post
Thanks
Nice post
En güvenilir bahis siteleri arasında Efesbet, Enbet ve Betkare gibi yıllardır hizmet veren platformlar yer alır.
Diş kaybı, hem estetik hem de fonksiyonel olarak bireylerin yaşam kalitesini olumsuz etkileyebilir.
Günümüzde diş kayıplarının en sağlıklı ve uzun ömürlü çözümü olarak diş implantı öne çıkmaktadır.
Diş kayıpları, hem estetik hem de çiğneme fonksiyonu açısından günlük yaşamı olumsuz etkileyen önemli bir sorundur.
Botoks, botulinum toksini adı verilen bir maddeyle yapılan, kırışıklık ve mimik çizgilerinin giderilmesini sağlayan estetik bir işlemdir.
Ankara burun estetiği ameliyatı (rinoplasti), burun şeklini değiştirmek ve bazen burun fonksiyonlarını düzeltmek amacıyla yapılan cerrahi bir müdahaledir.
Jinekomasti günümüzde erkek hastaların en çok sıkıntı çektiği durumlardan birtanesi olarak söylemek yanlış olmaz.
Burun, soluduğumuz havayı belirli bir nem ve ısıya getirip akciğerlere filtreleyerek ulaştırılmasında görev alır.
Jinekomasti günümüzde erkek hastaların en çok sıkıntı çektiği durumlardan birtanesi olarak söylemek yanlış olmaz.
mükemmel
Ankara fraksiyonel CO2 lazer, cilt yenileme ve estetik tedavilerde yaygın olarak kullanılan bir lazer teknolojisidir.
Deneme bonusu veren siteler ve güncel deneme bonusu 2025 siteleri tam liste
Bu yılın listesinde öne çıkan siteler arasında Savabet, Millibahis, Casinofast, Royalbet ve Millicasino gibi güvenilir platformlar yer alıyor. Örneğin, Superbet
Burun, yüzün güzelliğini önemli ölçüde etkileyici bir yapı taşıdır.
İmplant tedavisi, eksik dişlerin yerine, çene kemiğine yerleştirilen yapay diş kökleridir.
İmplant tedavisi, eksik dişlerin yerine, çene kemiğine yerleştirilen yapay diş kökleridir.
Jinekomasti günümüzde erkek hastaların en çok sıkıntı çektiği durumlardan birtanesi olarak söylemek yanlış olmaz.
Thanks for post
Thanks for post
Nice post
Invisalign, şeffaf plaklar adı verilen, özel olarak tasarlanmış bir dizi plastik plak kullanarak dişleri hizalar. Bu plaklar, dişlerinizi kademeli olarak istenen konuma taşımak için hafif basınç uygular.
Dental implant, eksik dişlerin yerine kullanılan titanyumdan yapılmış yapay diş kökleridir.
Bahis sitelerinin sağladığı deneme bonuslarıyla birlikte ücretsiz bir şekilde bahis sitesini deneyimleyebilir, kazanç elde edebilirsiniz. Takipçilerimiz için
Invisalign, şeffaf plaklar adı verilen, özel olarak tasarlanmış bir dizi plastik plak kullanarak dişleri hizalar. Bu plaklar, dişlerinizi kademeli olarak istenen konuma taşımak için hafif basınç uygular.
Estetik diş hekimliği, sadece ağız sağlığınızı değil, aynı zamanda gülüşünüzü ve genel dış görünümünüzü iyileştirmeyi amaçlayan bir diş hekimliği dalıdır
Estetik diş hekimliği, sadece ağız sağlığınızı değil, aynı zamanda gülüşünüzü ve genel dış görünümünüzü iyileştirmeyi amaçlayan bir diş hekimliği dalıdır
Down sendromu (DS) tarama testlerinin geçmişi yaklaşık 25 yıl öncesine uzanmasına rağmen testlerin yaygınlaşması son 10-15 yıl içinde olmuştur.
Dental implant, eksik dişlerin yerine kullanılan titanyumdan yapılmış yapay diş kökleridir.
Düzenli olarak yapılan genel diş muayeneleri, sağlıklı bir ağız ve güzel bir gülüş için önemli bir adımdır.
Gülüş tasarımı, kişinin diş yapısı, diş etleri ve yüz hatlarına uygun bir şekilde gülüşünün estetik olarak düzenlenmesidir.
Bahis Siteleri 2025 listesiyle, 250 güvenilir bahis sitesinden deneme bonusu kazanın ve hemen kazanmaya başlayın
Eryaman, Ankara’nın hızla gelişen ve modernleşen semtlerinden biridir. Bu gelişimle birlikte sağlık alanında da önemli yatırımlar yapılmış ve birçok profesyonel diş kliniği hizmet vermeye başlamıştır.
Reflü, mide asidinin yemek borusuna geri kaçmasıyla ortaya çıkan ve yaşam kalitesini ciddi şekilde düşüren yaygın bir sindirim sistemi problemidir.
Gülüş tasarımı, kişinin diş yapısı, diş etleri ve yüz hatlarına uygun bir şekilde gülüşünün estetik olarak düzenlenmesidir.
Reflü, mide asidinin yemek borusuna geri kaçmasıyla ortaya çıkan ve yaşam kalitesini ciddi şekilde düşüren yaygın bir sindirim sistemi problemidir.
Ankara kapalı safra kesesi ameliyatı, tıpta laparoskopik kolesistektomi olarak bilinen bir cerrahi işlemdir ve genellikle safra kesesi taşları veya iltihabı gibi sorunların tedavisinde tercih edilir.
İmplant eksik olan dişlerin yerine dişin fonksiyonunu ve estetiğini tekrar sağlamak amacıyla çene kemiğine yerleştirilen yapay diş köküdür. Ağızdaki diş eksikliklerini tamamlamak amacıyla yapılan köprülerin yapılması için dişin küçültülmesi gerekir.
Tüp bebek tedavisinde başarıyı artıran etkenlerden biri de ideal kiloda olmaktır. Kadınlarda beslenme ve kilo durumu üreme sağlığını doğrudan etkilemektedir.
İmplantlar, çene kemiğine yerleştirilen ve üzerine diş yaprakları, köprüler veya protezler yerleştirilen titanyum veya seramik malzemelerden yapılan vidalar şeklindedir.
Ankara’nın gelişen bölgelerinden biri olan Eryaman, sadece modern yaşam olanaklarıyla değil, aynı zamanda kaliteli sağlık ve psikolojik destek hizmetleriyle de dikkat çekmektedir.
Düzenli olarak yapılan genel diş muayeneleri, sağlıklı bir ağız ve güzel bir gülüş için önemli bir adımdır.
İmplantlar, çene kemiğine yerleştirilen ve üzerine diş yaprakları, köprüler veya protezler yerleştirilen titanyum veya seramik malzemelerden yapılan vidalar şeklindedir.
İmplantlar, çene kemiğine yerleştirilen ve üzerine diş yaprakları, köprüler veya protezler yerleştirilen titanyum veya seramik malzemelerden yapılan vidalar şeklindedir.
Ankara’nın gelişen bölgelerinden biri olan Eryaman, sadece modern yaşam olanaklarıyla değil, aynı zamanda kaliteli sağlık ve psikolojik destek hizmetleriyle de dikkat çekmektedir.
Düzenli olarak yapılan genel diş muayeneleri, sağlıklı bir ağız ve güzel bir gülüş için önemli bir adımdır.
Diş eksiklikleri hem estetik hem de fonksiyonel açıdan ciddi sorunlara yol açabilir. Günümüzde bu soruna en kalıcı ve doğal çözüm, dental implant tedavisi ile sağlanmaktadır.
Septorinoplasti, burnun hem estetik hem de fonksiyonel olarak yeniden şekillendirilmesini amaçlayan cerrahi bir operasyondur.
Burun Ucu Estetiği (veya Tip Plasti), burnun uç bölgesinin şeklini ve görünümünü iyileştirmeye yönelik yapılan bir cerrahi işlemdir.
Diş eksiklikleri hem estetik hem de fonksiyonel açıdan ciddi sorunlara yol açabilir. Günümüzde bu soruna en kalıcı ve doğal çözüm, dental implant tedavisi ile sağlanmaktadır.
Burun Ucu Estetiği (veya Tip Plasti), burnun uç bölgesinin şeklini ve görünümünü iyileştirmeye yönelik yapılan bir cerrahi işlemdir.
Burun dolgusu, estetik görünümü iyileştirmek amacıyla son yıllarda giderek popüler hale gelen minimal invaziv bir kozmetik işlemdir.
İmplant eksik olan dişlerin yerine dişin fonksiyonunu ve estetiğini tekrar sağlamak amacıyla çene kemiğine yerleştirilen yapay diş köküdür.
Meme büyütme operasyonu, memelerini küçük bulan kadınların kurtarıcısı haline gelen estetik bir cerrahi operasyondur.
İstanbul excimer lazer tedavisi, genellikle gözdeki görme bozukluklarını düzeltmek amacıyla uygulanan bir lazer tedavi yöntemidir.
Meme büyütme operasyonu, memelerini küçük bulan kadınların kurtarıcısı haline gelen estetik bir cerrahi operasyondur.
Nice
Amazing
Nice post
nice
amazing post
nice
nice post
Thank you..
amazing post
nice post
amazing
Amazing post
Herkesin ihtiyaçları farklıdır, bu nedenle dişlerinizi ne sıklıkta kontrol ettirmeniz gerektiği konusunda diş hekiminizle sohbet edin. ağzınızın, dişlerinizin ve diş etlerinizin durumu.
Düzenli olarak yapılan genel diş muayeneleri, sağlıklı bir ağız ve güzel bir gülüş için önemli bir adımdır.
Invisalign, şeffaf plaklar adı verilen, özel olarak tasarlanmış bir dizi plastik plak kullanarak dişleri hizalar.
İstanbul diş kliniği hizmetleri, ağız ve diş sağlığını korumak ve tedavi etmek amacıyla sunulan geniş bir yelpazeye sahiptir. Bu hizmetler, diş sağlığını iyileştirmeyi, estetik açıdan daha güzel bir gülüş elde etmeyi ve ağız hastalıklarını tedavi etmeyi hedefler.
Göz kapağı estetiği, göz çevresinin şekillendirmesini amaçlayan cerrahi bir işlemdir.
Invisalign, şeffaf plaklar adı verilen, özel olarak tasarlanmış bir dizi plastik plak kullanarak dişleri hizalar.
Hastalarımıza her türlü ağız ve diş sağlığı hizmetini sunabilmek ve her hastamızın kliniklerimizden sağlıklı ve gülerek çıkmasını sağlamak hekimlik anlayışımızın ayrılmaz bir parçasıdır.
İstanbul diş kliniği hizmetleri, ağız ve diş sağlığını korumak ve tedavi etmek amacıyla sunulan geniş bir yelpazeye sahiptir. Bu hizmetler, diş sağlığını iyileştirmeyi, estetik açıdan daha güzel bir gülüş elde etmeyi ve ağız hastalıklarını tedavi etmeyi hedefler.
Göz kapağı estetiği, göz çevresinin şekillendirmesini amaçlayan cerrahi bir işlemdir.
Hastalarımıza her türlü ağız ve diş sağlığı hizmetini sunabilmek ve her hastamızın kliniklerimizden sağlıklı ve gülerek çıkmasını sağlamak hekimlik anlayışımızın ayrılmaz bir parçasıdır.
Ein 7 MW Solarpark hatte erhebliche Zellfehler, die die gesamte Energieproduktion beeinträchtigten.
Çalışma alanlarımızda; yetişkin, ergen ve çocuklarla yürüttüğümüz terapi hizmetleriyle bireylerin duygusal gelişimlerini destekliyoruz.
Çalışma alanlarımızda; yetişkin, ergen ve çocuklarla yürüttüğümüz terapi hizmetleriyle bireylerin duygusal gelişimlerini destekliyoruz.
Günümüzde estetik diş hekimliği, bireylerin gülüşlerini iyileştirme ve özgüvenlerini artırma konusunda önemli çözümler sunmaktadır.
Çukurambar implant tedavisi, diş kaybı yaşayan bireylerde eksik dişlerin yerine uygulanan bir tedavi yöntemidir.
Aile hayatımızdaki en değerli şeydir. Günümüz koşullarında pek çok evli çift erkeğe ya da kadına ait faktörler nedeniyle gebe kalmakta ve çocuk sahibi olmakta sorun yaşayabilmektedirler.
Günümüzde estetik diş hekimliği, bireylerin gülüşlerini iyileştirme ve özgüvenlerini artırma konusunda önemli çözümler sunmaktadır.
Çukurambar implant tedavisi, diş kaybı yaşayan bireylerde eksik dişlerin yerine uygulanan bir tedavi yöntemidir.
Eryaman’da modern diş hekimliği uygulamaları arasında en çok tercih edilen tedavilerden biri implant diş tedavisidir.
Pendik, İstanbul’un hızla gelişen ve nüfusu artan semtlerinden biri olarak sağlık hizmetlerinde de önemli bir merkez haline gelmiştir.
Tüp mide ameliyatı, obezite tedavisinde kullanılan cerrahi bir yöntemdir. Bu işlem, midenin yaklaşık ’inin çıkarılmasıyla gerçekleştirilir ve kalan midenin tüp şeklinde küçültülmesini sağlar.
An English speaking lawyer in Turkey ensures smooth legal communication for foreigners facing business, property, or immigration-related matters.
anal tedavisi, dişin iç yapısında meydana gelen enfeksiyonlar veya ciddi çürükler nedeniyle uygulanan önemli bir diş tedavisidir. Bu prosedür, dişin doğal yapısını koruyarak çekilmesini önler ve uzun süre sağlıklı kalmasını sağlar.
Tüp bebek tedavisinde başarıyı artıran etkenlerden biri de ideal kiloda olmaktır.
Perfect global news. Thanks for site.
Deneme Bonusu Veren Siteler – 2025 En İyiler
Çift terapisi, ilişkilerde yaşanan zorlukları aşmak ve sağlıklı bir iletişim kurmak amacıyla yürütülen bir süreçtir.
Riskli gebelik takibi, tüp bebek tedavileri, prenatal tanı uygulamaları ve laparoskopik cerrahi konularında uzmanlaşmıştır.
Çift terapisi, ilişkilerde yaşanan zorlukları aşmak ve sağlıklı bir iletişim kurmak amacıyla yürütülen bir süreçtir.
Kaş arası botoksu, botulinum toksini içeren bir enjeksiyon yöntemidir.
Yenimahallede diş polikinliğimizle hastalarımıza hizmet vermekteyiz.
Yenimahallede diş polikinliğimizle hastalarımıza hizmet vermekteyiz.
viyana üniversitesi başvuru tarihleri viyana üniversitesi başvuru tarihleri
Eryaman Diş beyazlatma, dişlerinin renginden memnun olmayan kişilere önerilen estetik bir çözümdür.
Diş eksikliği, hem estetik hem de fonksiyonel açıdan yaşam kalitesini olumsuz etkileyen önemli bir problemdir.
Septorinoplasti, burnun hem estetik hem de fonksiyonel olarak yeniden şekillendirilmesini amaçlayan cerrahi bir operasyondur.
Vajinoplasti, vajinanın anatomik yapısının cerrahi olarak yeniden şekillendirildiği bir ameliyat türüdür.
Lüks ve konforu bir arada sunan şoförlü VIP araç kiralama hizmetimizle, seyahatlerinizi keyfe dönüştürün.
Göz çevresi, yaşlanmanın etkilerini ilk gösteren bölgelerden biridir.
Perfect global news. Thanks for site.
Genital estetik işlemleri bu sorunların giderilmesini ve kişinin yaşam kalitesinin artırılmasını sağlar.
istanbul dudak dolgusu alanında uzman hekimler tarafından gerçekleştirilir.
Genital estetik işlemleri bu sorunların giderilmesini ve kişinin yaşam kalitesinin artırılmasını sağlar.
istanbul dudak dolgusu alanında uzman hekimler tarafından gerçekleştirilir.
Gülüş tasarımı, sadece dişlerin görünümünü değil, aynı zamanda kişinin estetik tercihlerine uygun şekilde genel gülüş estetiğini iyileştirmeyi amaçlar.
Modern diş klinikleri ise yalnızca tedavi değil, aynı zamanda koruyucu sağlık hizmetleriyle de bireylerin yaşam kalitesini artırmayı amaçlar.
Yaşlandıkça, ince çizgilerin ve kırışıklıkların oluşması, yaşlılık lekelerinin ortaya çıkması ve cildin gevşeyip sarkması gibi zamanın geçtiğini gösteren belirtiler yüzümüzde kaçınılmaz olarak ortaya çıkar.
Septorinoplasti, burnun hem estetik hem de fonksiyonel olarak yeniden şekillendirilmesini amaçlayan cerrahi bir operasyondur.
Diş sağlığı, bireyin hem estetik görünümünü hem de yaşam kalitesini doğrudan etkileyen önemli bir unsurdur
Modern diş klinikleri ise yalnızca tedavi değil, aynı zamanda koruyucu sağlık hizmetleriyle de bireylerin yaşam kalitesini artırmayı amaçlar.
Düzenli olarak yapılan genel diş muayeneleri, sağlıklı bir ağız ve güzel bir gülüş için önemli bir adımdır.
Tel tedavisi, ortodonti olarak da bilinen ve dişlerin ve çenenin düzeltilmesi için kullanılan bir diş hekimliği yöntemidir.
Düzenli olarak yapılan genel diş muayeneleri, sağlıklı bir ağız ve güzel bir gülüş için önemli bir adımdır.
Bireysel yetenekleri keşfetmeye odaklanan programımızla, öğrencilerimizin potansiyelini en üst düzeye çıkarıyoruz.
Oyunlar, sanat etkinlikleri, doğa gezileri ve daha fazlası ile çocuklarınızı hem eğlendiriyor hem de öğrenmeye teşvik ediyoruz.
Tel tedavisi, ortodonti olarak da bilinen ve dişlerin ve çenenin düzeltilmesi için kullanılan bir diş hekimliği yöntemidir.
Herkesin ihtiyaçları farklıdır, bu nedenle dişlerinizi ne sıklıkta kontrol ettirmeniz gerektiği konusunda diş hekiminizle sohbet edin.
Polikliniğimiz multidisipliner çalışma anlayışını benimsemiş, kendini sürekli geliştiren, vizyon sahibi, teknolojiyi takip eden, nitelikli bir uzman kadrosuna sahiptir.
İç dudakların sarkıklığı veya asimetrisi düzeltilir.
Polikliniğimiz multidisipliner çalışma anlayışını benimsemiş, kendini sürekli geliştiren, vizyon sahibi, teknolojiyi takip eden, nitelikli bir uzman kadrosuna sahiptir.
İç dudakların sarkıklığı veya asimetrisi düzeltilir.
Junior Tattoo, which offers reliable service in the Izmit Tattoo sector, perfects your tattoo experience in a hygienic environment. Make an appointment now.
Bu uzmanlık alanı, diş hekimliğinin önemli bir parçasını oluşturur ve çeşitli cerrahi işlemleri kapsamaktadır.
Deneme Bonusu Veren Siteler 2025 – Güvenilir Bahis Siteleri
Bu uzmanlık alanı, diş hekimliğinin önemli bir parçasını oluşturur ve çeşitli cerrahi işlemleri kapsamaktadır.
amazing
Çocuklarınızın gelişimi, onların geleceği için attığınız en önemli adımlardan biridir. Küçük Dahiler Batıkent, miniklerinizi güvenle emanet edebileceğiniz, eğitimli ve deneyimli kadrosuyla onların her yönünü destekleyen bir eğitim yuvasıdır.
Çocuğunuzun geleceğine güvenle adım atmasını sağlayacak bir eğitim ortamı arıyorsanız, Küçük Dahiler Akademi tam da aradığınız yer!
Ataşehir botoks uygulaması, yaşlanma belirtilerini azaltmak amacıyla kullanılan yaygın bir estetik işlemdir. İşte bu uygulama hakkında bilmeniz gereken temel bilgiler:
Liposuction işlemi cilt altındaki yağların vakum yardımlı kanüllerle emilmesiyle gerçekleştirilir. Ciltte küçük kesiler açılarak ucu künt kanüller yardımıyla yağ dokular uzaklaştırılır.
Kanal tedavisi, dişin iç yapısında meydana gelen enfeksiyonlar veya ciddi çürükler nedeniyle uygulanan önemli bir diş tedavisidir.
thx
viyana üniversitesi kabul şartları viyana üniversitesi kabul şartları viyana üniversitesi kabul şartları
viyana ekonomi üniversitesi kabul şartları viyana ekonomi üniversitesi kabul şartları viyana ekonomi üniversitesi kabul şartları
kadıköy botoks doktoru
kadıköy botoks doktoru
kadıköy botoks doktoru
kadıköy botoks doktoru
kadıköy botoks doktoru
vajina estetiği ankara
vajina estetiği ankara
vajina estetiği ankara
vajina estetiği ankara
vajina estetiği ankara
vajina estetiği ankara
vajina estetiği ankara
vajina estetiği ankara
vajina estetiği ankara
vajina estetiği ankara
Ankara psikolog, insanların düşünce, duygu ve davranışlarını inceleyen ve bunlarla ilgili çeşitli problemleri çözmeye yardımcı olan bir uzmandır.
hastalarının doğal görünümlerini koruyarak en iyi sonuçları elde etmeyi hedeflemektedir.
Reflü, mide asidinin yemek borusuna geri kaçmasıyla ortaya çıkan ve yaşam kalitesini ciddi şekilde düşüren yaygın bir sindirim sistemi problemidir. İ
Ankara tüp mide tedavisi, obezite cerrahisi kapsamında yer alan ve midenin büyük bir bölümünün çıkarılmasıyla gerçekleştirilen bir ameliyat yöntemidir.
Benler, ciltte pigment üreten melanosit hücrelerinin birikmesiyle oluşan genellikle iyi huylu lezyonlardır.
Kaliteli bir saç proteziyle saçlandırma; deneyimli uzmanlar tarafından ölçülendirilen ve 0 insan saçından gelişmiş
Yükseköğretim Kurumları Sınavı (YKS), Türkiye’deki üniversitelere giriş için en önemli aşamadır. YKS, temel yeterlilik testi (TYT) ve alan yeterlilik testi (AYT) olmak üzere iki ana aşamadan oluşur.
Reflü, mide asidinin yemek borusuna geri kaçmasıyla ortaya çıkan ve yaşam kalitesini ciddi şekilde düşüren yaygın bir sindirim sistemi problemidir. İ
Benler, ciltte pigment üreten melanosit hücrelerinin birikmesiyle oluşan genellikle iyi huylu lezyonlardır.
With our Izmit web yazılım expertise, we deliver tailor-made web solutions that meet your business needs, improving both functionality and user engagement.
ataşehir dudak dolgusu alanında uzman hekimler tarafından gerçekleştirili.
vajina estetiği ankara
vajina estetiği ankara
vajina estetiği ankara
vajina estetiği ankara
vajina estetiği ankara
Tüm Ürünlerde İndirim
Deneme Bonusu kullanıcılarına ilk kayıtları veya ilk bahisleri için ekstra bir ödül sunarak denemelerini teşvik eder.
Tüp mide ameliyatı, obezite tedavisinde kullanılan cerrahi bir yöntemdir. Bu işlem, midenin yaklaşık ’inin çıkarılmasıyla gerçekleştirilir ve kalan midenin tüp şeklinde küçültülmesini sağlar.
Tüp bebek tedavisinde başarıyı artıran etkenlerden biri de ideal kiloda olmaktır. Kadınlarda beslenme ve kilo durumu üreme sağlığını doğrudan etkilemektedir.
Ankara’nın hızla gelişen ilçelerinden biri olan Gölbaşı, hem doğal güzellikleriyle hem de sağlık alanındaki yatırımlarıyla dikkat çekmektedir.
Pendik, İstanbul’un hızla gelişen ve nüfusu artan semtlerinden biri olarak sağlık hizmetlerinde de önemli bir merkez haline gelmiştir
İstanbul’un canlı ve dinamik semtlerinden biri olan Kadıköy, sağlık alanında da sunduğu kaliteli hizmetlerle öne çıkmaktadır.
Ankara’nın gelişen bölgelerinden biri olan Eryaman, sadece modern yaşam olanaklarıyla değil, aynı zamanda kaliteli sağlık ve psikolojik destek hizmetleriyle de dikkat çekmektedir.
Tüp mide ameliyatı, obezite tedavisinde kullanılan cerrahi bir yöntemdir. Bu işlem, midenin yaklaşık ’inin çıkarılmasıyla gerçekleştirilir ve kalan midenin tüp şeklinde küçültülmesini sağlar.
Ankara’nın hızla gelişen ilçelerinden biri olan Gölbaşı, hem doğal güzellikleriyle hem de sağlık alanındaki yatırımlarıyla dikkat çekmektedir.
Pendik, İstanbul’un hızla gelişen ve nüfusu artan semtlerinden biri olarak sağlık hizmetlerinde de önemli bir merkez haline gelmiştir
İstanbul’un canlı ve dinamik semtlerinden biri olan Kadıköy, sağlık alanında da sunduğu kaliteli hizmetlerle öne çıkmaktadır.
Ankara’nın gelişen bölgelerinden biri olan Eryaman, sadece modern yaşam olanaklarıyla değil, aynı zamanda kaliteli sağlık ve psikolojik destek hizmetleriyle de dikkat çekmektedir.
bahis sitesi kiralama adminlik
kiralık Bahis Sitesi Adminlik
Egzama, cildin iltihaplanmasıyla karakterize akut veya kronik bir deri hastalığıdır.
Ağız, diş ve çene cerrahisi, ağız içindeki yumuşak ve sert dokuların hastalıkları, yaralanmaları ve bozukluklarının tanı ve tedavisi ile ilgilenen bir tıp dalıdır.
Çukurambar diş poliklinikleri, ağız ve diş sağlığına yönelik çeşitli tedavi ve bakım hizmetleri sunan sağlık kuruluşlarıdır.
Ağız, diş ve çene cerrahisi, ağız içindeki yumuşak ve sert dokuların hastalıkları, yaralanmaları ve bozukluklarının tanı ve tedavisi ile ilgilenen bir tıp dalıdır.
Ağız, diş ve çene cerrahisi, ağız içindeki yumuşak ve sert dokuların hastalıkları, yaralanmaları ve bozukluklarının tanı ve tedavisi ile ilgilenen bir tıp dalıdır.
Çukurambar Diş İmplantı: Estetik ve Fonksiyonel Bir Çözüm
Çukurambar Diş İmplantı: Estetik ve Fonksiyonel Bir Çözüm
Turizm sektöründe yılların verdiği deneyim ve uzmanlıkla, her türlü ulaşım ihtiyacınızı karşılamak için Shuttle-Transfer hizmeti sunuyoruz.
Diş eksiklikleri, hem estetik hem de fonksiyonel açıdan kişilerin yaşam kalitesini olumsuz etkileyebilir.
Burun, yüzün güzelliğini önemli ölçüde etkileyici bir yapı taşıdır. Boyutunda veya şeklindeki küçük bir değişiklik bile kişinin görünüşünü büyük ölçüde değiştirebilir.
dental tedavilerin yapılabilmesi için sedasyon veya genel anestezi uygulanabilir
Bu derslerimizde, hikaye oluşturma, rol yapma, doğaçlama gibi tekniklerle çocuklarımızın bütünsel gelişimlerine katkı sağlıyoruz.
Bu derslerimizde, hikaye oluşturma, rol yapma, doğaçlama gibi tekniklerle çocuklarımızın bütünsel gelişimlerine katkı sağlıyoruz.
Burun, yüzün güzelliğini önemli ölçüde etkileyici bir yapı taşıdır. Boyutunda veya şeklindeki küçük bir değişiklik bile kişinin görünüşünü büyük ölçüde değiştirebilir.
dental tedavilerin yapılabilmesi için sedasyon veya genel anestezi uygulanabilir
dental tedavilerin yapılabilmesi için sedasyon veya genel anestezi uygulanabilir
Bu derslerimizde, hikaye oluşturma, rol yapma, doğaçlama gibi tekniklerle çocuklarımızın bütünsel gelişimlerine katkı sağlıyoruz.
Bu derslerimizde, hikaye oluşturma, rol yapma, doğaçlama gibi tekniklerle çocuklarımızın bütünsel gelişimlerine katkı sağlıyoruz.
İmplant eksik dişleri tamamlamak için çene kemiğine yerleştirilen bir tür vidadır.
İmplant uygulamaları, kaybedilen dişlerin yerine, çene kemiğine yerleştirilen titanyum vida şeklindeki yapay diş köklerinin kullanılması işlemidir
Ağız ve diş sağlığı, genel sağlığımızın ayrılmaz bir parçasıdır. Modern diş klinikleri ise yalnızca tedavi değil, aynı zamanda koruyucu sağlık hizmetleriyle de bireylerin yaşam kalitesini artırmayı amaçlar.
Ağız ve diş sağlığı, genel sağlığımızın ayrılmaz bir parçasıdır. Modern diş klinikleri ise yalnızca tedavi değil, aynı zamanda koruyucu sağlık hizmetleriyle de bireylerin yaşam kalitesini artırmayı amaçlar.
Ağız ve diş sağlığı, genel sağlığımızın ayrılmaz bir parçasıdır. Modern diş klinikleri ise yalnızca tedavi değil, aynı zamanda koruyucu sağlık hizmetleriyle de bireylerin yaşam kalitesini artırmayı amaçlar.
İngilizce öğrenmede farklı teknikler içeren elektik metodunu tercih ediyoruz.
Bu plaklar, dişlerinizi kademeli olarak istenen konuma taşımak için hafif basınç uygular.
Ağız, diş ve çene cerrahisi, ağız içindeki yumuşak ve sert dokuların hastalıkları, yaralanmaları ve bozukluklarının tanı ve tedavisi ile ilgilenen bir tıp dalıdır.
İngilizce öğrenmede farklı teknikler içeren elektik metodunu tercih ediyoruz.
Hair transplantation is a surgical procedure designed to provide a permanent solution for individuals experiencing hair loss.
Öğrencilerimiz yaşayarak öğrenmenin gerektirdiği atölye sisteminden faydalanırlar.
Kreşimizde uygulanan eğitim sistemi, çocukların bilişsel, duygusal, sosyal ve fiziksel gelişimlerini desteklemek amacıyla özel olarak tasarlanmıştır.
Çocuklarda ortodontik tedavi süreci, dişlerin ve çene yapısının düzgün bir şekilde gelişmesini sağlamak amacıyla yapılan bir tedavi yöntemidir.
Eryaman birebir etüt, öğretmen ve öğrenci arasında tek kişilik özel dersler şeklinde gerçekleşen bir eğitim modelidir.
The most commonly used hair transplant methods today include:
Septorinoplasti, burnun hem estetik hem de fonksiyonel olarak yeniden şekillendirilmesini amaçlayan cerrahi bir operasyondur.
Öğrencilerimiz yaşayarak öğrenmenin gerektirdiği atölye sisteminden faydalanırlar.
Kreşimizde uygulanan eğitim sistemi, çocukların bilişsel, duygusal, sosyal ve fiziksel gelişimlerini desteklemek amacıyla özel olarak tasarlanmıştır.
Çocuklarda ortodontik tedavi süreci, dişlerin ve çene yapısının düzgün bir şekilde gelişmesini sağlamak amacıyla yapılan bir tedavi yöntemidir.
The most commonly used hair transplant methods today include:
Septorinoplasti, burnun hem estetik hem de fonksiyonel olarak yeniden şekillendirilmesini amaçlayan cerrahi bir operasyondur.
Çağdaş eğitim yaklaşımında bireyi öğrenme sürecinde etkili kılan,
Çağdaş eğitim yaklaşımında bireyi öğrenme sürecinde etkili kılan,
Rinoplasti ve septorinoplasti ameliyatı burnun şeklinin ve fonksiyonunun düzeltilmesi amacıyla yapılan cerrahi bir işlemdir.
Sağlık sektöründe faaliyet gösteren kurumlar için web tasarım, dijital varlıklarını güçlendirmek ve hastalarla etkili bir şekilde iletişim kurmak adına kritik bir rol oynar.
Sağlık sektöründe faaliyet gösteren kurumlar için web tasarım, dijital varlıklarını güçlendirmek ve hastalarla etkili bir şekilde iletişim kurmak adına kritik bir rol oynar.
Diş eksikliği, hem estetik hem de fonksiyonel açıdan yaşam kalitesini olumsuz etkileyen önemli bir problemdir.
Diş eksikliği, hem estetik hem de fonksiyonel açıdan yaşam kalitesini olumsuz etkileyen önemli bir problemdir.
Burun, yüzün güzelliğini önemli ölçüde etkileyici bir yapı taşıdır.
Sağlık sektöründe faaliyet gösteren kurumlar için web tasarım, dijital varlıklarını güçlendirmek ve hastalarla etkili bir şekilde iletişim kurmak adına kritik bir rol oynar.
Burun, yüzün güzelliğini önemli ölçüde etkileyici bir yapı taşıdır.
Eksozom, hücre dışı veziküllerin (extracellular vesicles) bir alt türü olan ve birçok biyolojik süreçte önemli rol oynayan küçük, hücre kaynaklı partiküllerdir.
Ankara fraksiyonel CO2 lazer, cilt yenileme ve estetik tedavilerde yaygın olarak kullanılan bir lazer teknolojisidir
Eksozom, hücre dışı veziküllerin (extracellular vesicles) bir alt türü olan ve birçok biyolojik süreçte önemli rol oynayan küçük, hücre kaynaklı partiküllerdir.
Septorinoplasti, burnun hem estetik hem de fonksiyonel olarak yeniden şekillendirilmesini amaçlayan cerrahi bir operasyondur.
Binlerce oyun arasindan dilediginizi secerek bahis oynamanin keyfine varabilirsiniz. Casibom oyunlari size yeter.
Diş eksikliği, hem estetik hem de fonksiyonel açıdan yaşam kalitesini olumsuz etkileyen önemli bir problemdir.
Kepçe kulak estetiği (otoplasti cerrahi), kulakların normalden daha büyük, daha çıkık veya asimetrik olmasını düzelten bir cerrahi müdahaledir.
Septorinoplasti, burnun hem estetik hem de fonksiyonel olarak yeniden şekillendirilmesini amaçlayan cerrahi bir operasyondur.
Septorinoplasti, burnun hem estetik hem de fonksiyonel olarak yeniden şekillendirilmesini amaçlayan cerrahi bir operasyondur.
İmplant eksik dişleri tamamlamak için çene kemiğine yerleştirilen bir tür vidadır.
Nazolabial dolgu, estetik ve plastik cerrahi alanında sıklıkla tercih edilen bir uygulamadır.
Akne, cildin yağ bezlerinin aşırı sebum (yağ) üretmesi ve ölü cilt hücrelerinin gözenekleri tıkaması sonucu ortaya çıkan yaygın bir cilt hastalığıdır.
Akne, cildin yağ bezlerinin aşırı sebum (yağ) üretmesi ve ölü cilt hücrelerinin gözenekleri tıkaması sonucu ortaya çıkan yaygın bir cilt hastalığıdır.
Sarkmış ve şişmiş göz kapakları tüm yüzün yaşlı, hüzünlü ve yorgun gözükmesine neden olur.
A wire that travels under the skin connects this device to the electrodes in the brain.
Eryaman, Ankara’nın hızla gelişen semtlerinden biri olarak, eğitim alanında da büyük bir ivme kazanmış durumdadır. Özellikle son yıllarda, öğrencilerin eğitim ihtiyaçlarını karşılamak adına birçok dershane ve kurs merkezi açılmıştır.
Katarakt cerrahisi, gözdeki katarakt adı verilen bulanıklaşmış merceğin cerrahi olarak çıkarılması işlemidir.
Dudak dolgusu, dudakların şeklinin iyileştirilmesi, hacminin artırılması ve daha belirgin hale getirilmesi amacıyla yapılan estetik bir işlemdir.
Dudak dolgusu, dudakların şeklinin iyileştirilmesi, hacminin artırılması ve daha belirgin hale getirilmesi amacıyla yapılan estetik bir işlemdir.
Batıkent’te hizmet veren psikologlar; bireysel terapi, çift terapisi, aile danışmanlığı, çocuk ve ergen terapisi gibi birçok alanda danışanlarına yardımcı olur.
Ayrıca danışan-psikolog arasında güvene dayalı bir iletişim kurulması, terapinin başarısını büyük ölçüde etkiler.
Ortodontistiniz, dişlerinizin ve çenenizin detaylı bir incelemesini yapar ve Invisalign tedavisinin sizin için uygun olup olmadığını belirler.
Eryaman Diş beyazlatma, dişlerinin renginden memnun olmayan kişilere önerilen estetik bir çözümdür.
Diş beyazlatma (bleaching), diş yüzeyinde oluşan renklenmeleri özel jeller ve ışık teknolojileriyle gidererek diş rengini birkaç ton açmayı amaçlayan kozmetik bir uygulamadır.
Modern Orta Doğu Koleji Anaokulu, çocukların keşfetme, öğrenme ve kendini ifade etme yolculuğuna özel olarak tasarlanmış bir eğitim ortamı sunar.
Modern Orta Doğu Koleji Anaokulu, çocukların keşfetme, öğrenme ve kendini ifade etme yolculuğuna özel olarak tasarlanmış bir eğitim ortamı sunar.
Eksik dişler, hem estetik açıdan hem de çiğneme ve konuşma fonksiyonları açısından önemli sorunlara yol açabilir.
Dental implant tedavisi kaybedilen dişlerin yerlerine diş kökünü taklit eden titanyum (son yıllarda zirkonyum da kullanılmaktadır.) vidalardır.
Eryaman diş beyazlatma, diş minesinin rengini açarak dişleri daha beyaz ve parlak hale getirme işlemidir.
Eksik dişler, hem estetik açıdan hem de çiğneme ve konuşma fonksiyonları açısından önemli sorunlara yol açabilir.
Dental implant tedavisi kaybedilen dişlerin yerlerine diş kökünü taklit eden titanyum (son yıllarda zirkonyum da kullanılmaktadır.) vidalardır.
Ramadabet giriş seçenekleriyle 1000₺ deneme bonusunuzu almayı unutmayın.
Eryaman diş beyazlatma, diş minesinin rengini açarak dişleri daha beyaz ve parlak hale getirme işlemidir.
Özellikle estetik kaygısı olan yetişkinler ve gençler için mükemmel bir alternatiftir.
Yüzümüzün genel görünümünde kulaklarımızın yeri sanıldığından çok daha önemlidir.
Jinekomasti ameliyatı, erkeklerde meme dokusunun aşırı büyümesi durumunun düzeltmesi için yapılan cerrahi bir işlemdir.
kadıköy botoks doktoru
kadıköy botoks doktoru
kadıköy botoks doktoru
Özellikle estetik kaygısı olan yetişkinler ve gençler için mükemmel bir alternatiftir.
kadıköy botoks doktoru
kadıköy botoks doktoru
kadıköy botoks doktoru
Jinekomasti ameliyatı, erkeklerde meme dokusunun aşırı büyümesi durumunun düzeltmesi için yapılan cerrahi bir işlemdir.
Burun, soluduğumuz havayı belirli bir nem ve ısıya getirip akciğerlere filtreleyerek ulaştırılmasında görev alır.
Ankara’da lüks, konfor ve güvenliği bir araya getiren VIP transfer hizmetleri, hem yerli hem de yabancı misafirler için ulaşımda ayrıcalıklı bir alternatif sunuyor.
Burun, soluduğumuz havayı belirli bir nem ve ısıya getirip akciğerlere filtreleyerek ulaştırılmasında görev alır.
Ankara’da lüks, konfor ve güvenliği bir araya getiren VIP transfer hizmetleri, hem yerli hem de yabancı misafirler için ulaşımda ayrıcalıklı bir alternatif sunuyor.
Bişektomi son yıllarda sıklıkla uygulanmaya başlayan bir estetik operasyondur, yanak inceltme ameliyatı diye de isimlendirilebilir.
Kepçe kulak, kulakların başa normalden daha açık bir açıyla durması durumudur. Bu durum genellikle genetik faktörlere bağlıdır
Meme büyütme ameliyatı, estetik görünümünü iyileştirmek isteyen kadınlar için etkili ve kalıcı bir çözümdür.
Bişektomi son yıllarda sıklıkla uygulanmaya başlayan bir estetik operasyondur, yanak inceltme ameliyatı diye de isimlendirilebilir.
Kepçe kulak, kulakların başa normalden daha açık bir açıyla durması durumudur. Bu durum genellikle genetik faktörlere bağlıdır
Yükseköğretim Kurumları Sınavı (YKS), Türkiye’deki üniversitelere giriş için en önemli aşamadır. YKS, temel yeterlilik testi (TYT) ve alan yeterlilik testi (AYT) olmak üzere iki ana aşamadan oluşur.
Yüzümüzün genel görünümünde kulaklarımızın yeri sanıldığından çok daha önemlidir.
Kreşimizde uygulanan eğitim sistemi, çocukların bilişsel, duygusal, sosyal ve fiziksel gelişimlerini desteklemek amacıyla özel olarak tasarlanmıştır.
Invisalign, şeffaf plaklar adı verilen, özel olarak tasarlanmış bir dizi plastik plak kullanarak dişleri hizalar.
Yüzümüzün genel görünümünde kulaklarımızın yeri sanıldığından çok daha önemlidir.
Kreşimizde uygulanan eğitim sistemi, çocukların bilişsel, duygusal, sosyal ve fiziksel gelişimlerini desteklemek amacıyla özel olarak tasarlanmıştır.
Eksozomlar, hücreler arası iletişimi sağlayan ve vücudun doğal onarım süreçlerinde önemli rol oynayan mikroveziküllerdir.
Bu derslerimizde, hikaye oluşturma, rol yapma, doğaçlama gibi tekniklerle çocuklarımızın bütünsel gelişimlerine katkı sağlıyoruz.
Bu derslerimizde, hikaye oluşturma, rol yapma, doğaçlama gibi tekniklerle çocuklarımızın bütünsel gelişimlerine katkı sağlıyoruz.
Eksozomlar, hücreler arası iletişimi sağlayan ve vücudun doğal onarım süreçlerinde önemli rol oynayan mikroveziküllerdir.
Küçük Dahiler Akademi’de eğitim programı, çocuklarımızı gelecekteki dünyaya hazırlarken onların 21. yy. becerileri ile donatılmasını hedefler.
Küçük Dahiler Akademi’de eğitim programı, çocuklarımızı gelecekteki dünyaya hazırlarken onların 21. yy. becerileri ile donatılmasını hedefler.
Ankara eksozom tedavisi, son yıllarda birçok tıbbi alanda umut verici bir tedavi yöntemi olarak ortaya çıkmıştır.
Çocuğunuzun geleceğine güvenle adım atmasını sağlayacak bir eğitim ortamı arıyorsanız, Küçük Dahiler Akademi tam da aradığınız yer!
Özellikle son yıllarda artan psikolojik destek arayışı, Etimesgut’taki psikolog ve terapi merkezlerine olan ilgiyi artırdı.
Ankara eksozom tedavisi, son yıllarda birçok tıbbi alanda umut verici bir tedavi yöntemi olarak ortaya çıkmıştır.
Ankara aile terapisi, aile üyeleri arasındaki ilişkilerin iyileştirilmesine, iletişim sorunlarının çözülmesine ve duygusal bağların güçlendirilmesine odaklanan bir terapi türüdür.
Eksozomlar, hücreler arası iletişimi sağlayan ve vücudun doğal onarım süreçlerinde önemli rol oynayan mikroveziküllerdir.
Yenimahalle implant tedavisi, diş eksikliğini gidermek için kullanılan modern bir dental tedavi yöntemidir. İşte implant tedavisi hakkında genel bilgiler:
Eksik dişlerin en doğal ve uzun ömürlü tedavi yöntemlerinden biri implant tedavisidir.
Ağız, diş ve çene cerrahisi, ağız içindeki yumuşak ve sert dokuların hastalıkları, yaralanmaları ve bozukluklarının tanı ve tedavisi ile ilgilenen bir tıp dalıdır.
Diş eksikliği, hem estetik hem de fonksiyonel açıdan önemli sorunlara yol açabilir. Günümüzde bu sorunu kalıcı ve güvenilir bir şekilde çözen yöntemlerden biri implant tedavisidir.
Çocukların doğal merakını teşvik eden, yaratıcılık ve problem çözme becerilerini geliştiren etkinlikler.
Diş eksikliği, hem estetik hem de fonksiyonel açıdan önemli sorunlara yol açabilir. Günümüzde bu sorunu kalıcı ve güvenilir bir şekilde çözen yöntemlerden biri implant tedavisidir.
grandpashabet deneme bonusu ve üyelik işlemleri için gerçek adres
Ortodonti de çene tedavileri çocuklarda ve erişkinlerde farklılık göstermektedir.
2025’in en güçlü deneme bonusu veren siteleri burada. Çevrimsiz, yatırımsız ve freespin içeren bonuslarla anında kazanmaya başlayın
Ortodonti de çene tedavileri çocuklarda ve erişkinlerde farklılık göstermektedir.
Sağlık Turizmi Reklam Ajansı olarak, uluslararası sağlık hizmeti sağlayıcılarını dünya çapında tanıtmak ve sağlık turizmi sektöründe fark yaratmak için buradayız.
karın estetiği, genital estetik ve ameliyatsız estetik işlemler başta olmak üzere tüm estetik cerrahi işlemlerde yoğunlaşmış olup hastalarının doğal görünümlerini koruyarak en iyi sonuçları elde etmeyi hedeflemektedir.
Eksozom cilt tedavisi, son yıllarda popülerlik kazanan ve cilt yenilenmesi, saç dökülmesi gibi estetik ve tıbbi amaçlarla kullanılan bir biyolojik tedavi yöntemidir.
Burun, yüzün güzelliğini önemli ölçüde etkileyici bir yapı taşıdır. Boyutunda veya şeklindeki küçük bir değişiklik bile kişinin görünüşünü büyük ölçüde değiştirebilir
Casino siteleri, güvenilir ve canlı casino adresleri için casino siteleri sayfamızı hemen ziyaret edin ve casino siteleri listemize göz atın.
Sarkmış ve şişmiş göz kapakları tüm yüzün yaşlı, hüzünlü ve yorgun gözükmesine neden olur.
Yüz germe ameliyatı yılların getirdiği yaşlanma belirtilerini azaltmak ve daha dinç bir görünüm elde etmek isteyenler için etkili bir çözümdür.
Ağız, diş ve çene cerrahisi, ağız içindeki yumuşak ve sert dokuların hastalıkları, yaralanmaları ve bozukluklarının tanı ve tedavisi ile ilgilenen bir tıp dalıdır.
Tel tedavisi, ortodonti olarak da bilinen ve dişlerin ve çenenin düzeltilmesi için kullanılan bir diş hekimliği yöntemidir.
Çukurambar diş poliklinikleri, ağız ve diş sağlığına yönelik çeşitli tedavi ve bakım hizmetleri sunan sağlık kuruluşlarıdır.
Ağız, diş ve çene cerrahisi, ağız içindeki yumuşak ve sert dokuların hastalıkları, yaralanmaları ve bozukluklarının tanı ve tedavisi ile ilgilenen bir tıp dalıdır.
Tel tedavisi, ortodonti olarak da bilinen ve dişlerin ve çenenin düzeltilmesi için kullanılan bir diş hekimliği yöntemidir.
Kadıköy implant tedavisi, eksik dişlerin yerine yerleştirilen yapay diş kökleridir.
Diş kaybı, estetik kaygıların yanı sıra, çiğneme fonksiyonunu da olumsuz yönde etkileyen bir sorundur.
Diş kaybı, estetik kaygıların yanı sıra, çiğneme fonksiyonunu da olumsuz yönde etkileyen bir sorundur.
Dental implant, eksik dişlerin yerine kullanılan titanyumdan yapılmış yapay diş kökleridir.
Kadıköy implant tedavisi, eksik dişlerin yerine yerleştirilen yapay diş kökleridir.
şeffaf plaklar adı verilen, özel olarak tasarlanmış bir dizi plastik plak kullanarak dişleri hizalar.
Diş eksikliği, hem estetik hem de fonksiyonel açıdan yaşam kalitesini olumsuz etkileyen önemli bir problemdir.
Diş eksikliği, hem estetik hem de fonksiyonel açıdan yaşam kalitesini olumsuz etkileyen önemli bir problemdir.
Diş kaybı, estetik kaygıların yanı sıra, çiğneme fonksiyonunu da olumsuz yönde etkileyen bir sorundur.
Diş kaybı, estetik kaygıların yanı sıra, çiğneme fonksiyonunu da olumsuz yönde etkileyen bir sorundur.
Jinekomasti günümüzde erkek hastaların en çok sıkıntı çektiği durumlardan birtanesi olarak söylemek yanlış olmaz.
Jinekomasti günümüzde erkek hastaların en çok sıkıntı çektiği durumlardan birtanesi olarak söylemek yanlış olmaz.
şeffaf plaklar adı verilen, özel olarak tasarlanmış bir dizi plastik plak kullanarak dişleri hizalar.
Ağız, diş ve çene cerrahisi, ağız içindeki yumuşak ve sert dokuların hastalıkları, yaralanmaları ve bozukluklarının tanı ve tedavisi ile ilgilenen bir tıp dalıdır.
İmplant tedavisi, eksik dişlerin yerine, çene kemiğine yerleştirilen yapay diş kökleridir.
Vizyonumuz, eğitim-öğretimde kalitesi ve başarılı çalışmaları ile fark yaratan seçkin bir kurum olmaktır.
Şu anda hayallerini yaşayan öğrencilerimiz, sizin gibi burada başladılar!
İmplant tedavisi, eksik dişlerin yerine, çene kemiğine yerleştirilen yapay diş kökleridir.
Şu anda hayallerini yaşayan öğrencilerimiz, sizin gibi burada başladılar!
Diş kaybı, estetik kaygıların yanı sıra, çiğneme fonksiyonunu da olumsuz yönde etkileyen bir sorundur.
Ağız, diş ve çene cerrahisi, ağız içindeki yumuşak ve sert dokuların hastalıkları, yaralanmaları ve bozukluklarının tanı ve tedavisi ile ilgilenen bir tıp dalıdır.
Vizyonumuz, eğitim-öğretimde kalitesi ve başarılı çalışmaları ile fark yaratan seçkin bir kurum olmaktır.
Geniz eti ameliyatı, burun arkasında bulunan geniz etinin cerrahi olarak çıkarılması işlemidir.
Burun, soluduğumuz havayı belirli bir nem ve ısıya getirip akciğerlere filtreleyerek ulaştırılmasında görev alır.
Vergi mükellefleri için en stresli dönemlerden biri, vergi incelemesi sürecidir. Özellikle İstanbul gibi büyükşehirlerde faaliyet gösteren işletmeler, sık sık denetime tabi tutulur. Bu süreçte yapılacak en küçük hata dahi ciddi sonuçlar doğurabilir. Bir İstanbul vergi avukatı, inceleme sürecinin her aşamasında mükellefi temsil eder, haklarını savunur ve eksiksiz bir savunma dosyası hazırlar. Vergi müfettişlerinin sorularına doğru cevapların verilmesi, belgelerin zamanında ve eksiksiz sunulması büyük önem taşır. Ayrıca, rapor değerlendirme komisyonu süreçleri, düzeltme başvuruları ve mahkemeye intikal edecek durumlar da bu sürecin bir parçasıdır. Bu noktada İstanbul vergi avukatı, deneyimiyle süreci hukuka uygun şekilde yönlendirir ve mükellefi temsil eder. Özellikle vergi ziyaı cezası, usulsüzlük cezası ve kaçakçılık suçu gibi durumlar söz konusuysa, uzman bir avukat desteği alınması hayati önem taşır. İstanbul’da vergi davalarına bakan avukatlar, bölgesel uygulamalara, yerel mahkemelerin karar eğilimlerine ve mevzuattaki güncel değişikliklere hakimdir. Bu da mükellefin haklarını etkili biçimde savunabilmesini sağlar. Vergi incelemesinde doğru strateji, hem idari işlemlerde başarı şansını artırır hem de dava açılması halinde güçlü bir savunma zemini oluşturur.
Eryaman’da ortodonti uzmanı arayışında olanlar için bu alandaki uzman desteği, hem sağlıklı hem de özgüven dolu bir gülüşe kavuşmanın anahtarıdır.
Diş kayıpları, hem estetik açıdan hem de çiğneme fonksiyonu açısından yaşam kalitesini olumsuz etkileyen ciddi bir sorundur.
İmplant tedavisi, eksik dişlerin yerine yapay diş köklerinin yerleştirilmesi işlemidir ve genellikle titanyumdan üretilen vidalar kullanılarak çene kemiğine entegre edilir.
Kadıköy diş beyazlatma, dişlerin rengini açmaya yönelik yapılan bir estetik diş tedavisidir.
Diş kaybı, estetik kaygıların yanı sıra, çiğneme fonksiyonunu da olumsuz yönde etkileyen bir sorundur.
Eryaman’da ortodonti uzmanı arayışında olanlar için bu alandaki uzman desteği, hem sağlıklı hem de özgüven dolu bir gülüşe kavuşmanın anahtarıdır.
Diş eksikliği, hem estetik hem de fonksiyonel açıdan yaşam kalitesini olumsuz etkileyen önemli bir problemdir.
Kadıköy diş beyazlatma, dişlerin rengini açmaya yönelik yapılan bir estetik diş tedavisidir.
Diş kaybı, estetik kaygıların yanı sıra, çiğneme fonksiyonunu da olumsuz yönde etkileyen bir sorundur.
Eryaman’da ortodonti uzmanı arayışında olanlar için bu alandaki uzman desteği, hem sağlıklı hem de özgüven dolu bir gülüşe kavuşmanın anahtarıdır.
Diş kayıpları, hem estetik açıdan hem de çiğneme fonksiyonu açısından yaşam kalitesini olumsuz etkileyen ciddi bir sorundur.
Eksik dişlerin en doğal ve uzun ömürlü tedavi yöntemlerinden biri implant tedavisidir.
Ataşehir dudak dolgusu, dudaklara daha dolgun, hacimli ve şekilli bir görünüm vermek için uygulanan bir estetik işlemdir.
Eksik dişlerin en doğal ve uzun ömürlü tedavi yöntemlerinden biri implant tedavisidir.
Ataşehir dudak dolgusu, dudaklara daha dolgun, hacimli ve şekilli bir görünüm vermek için uygulanan bir estetik işlemdir.
batıkent anaokulu
batıkent anaokulu
batıkent anaokulu
batıkent anaokulu
batıkent anaokulu
batıkent anaokulu
batıkent anaokulu
ankara dermatoloji uzmanı ankara dermatoloji uzmanı ankara dermatoloji uzmanı ankara dermatoloji uzmanı ankara dermatoloji uzmanı ankara dermatoloji uzmanı
ankara dermatoloji uzmanı ankara dermatoloji uzmanı ankara dermatoloji uzmanı ankara dermatoloji uzmanı ankara dermatoloji uzmanı ankara dermatoloji uzmanı
Küçük Dahiler Akademi’de eğitim programı, çocuklarımızı gelecekteki dünyaya hazırlarken onların 21. yy. becerileri ile donatılmasını hedefler.
İmplant tedavisi, eksik dişlerin yerine titanyumdan yapılan vidaların çene kemiğine yerleştirilmesi ve üzerine protez dişlerin takılmasıyla gerçekleşir
Ağız içinde oluşan lezyonlar; ağrı, hassasiyet, yutma güçlüğü ve günlük yaşam kalitesinde düşüş gibi çeşitli sorunlara neden olabilir.
Kemik augmentasyonu, kaybedilen ya da yetersiz kemik dokusunu yeniden oluşturarak dental implant veya protez gibi tedaviler için uygun bir zemin hazırlamayı amaçlayan cerrahi bir işlemdir.
Gülüşünüzdeki eksik dişler, hem estetik kaygılara yol açabilir hem de çiğneme fonksiyonlarınızı olumsuz etkileyebilir.
Suadiye Diş Polikliniği, diş sağlığına önem veren bireyler için en iyi hizmetleri sunan bir merkezdir.
Ağız ve diş sağlığı, genel sağlığımızın ayrılmaz bir parçasıdır. Modern diş klinikleri ise yalnızca tedavi değil, aynı zamanda koruyucu sağlık hizmetleriyle de bireylerin yaşam kalitesini artırmayı amaçlar.
Meme büyütme ve yeniden şekillendirme operasyonlarında, hem cerrahların hem de hastaların beklentilerini karşılayacak yüksek kaliteli çözümler sunar.
Yüzümüzün genel görünümünde kulaklarımızın yeri sanıldığından çok daha önemlidir.
Küçük Dahiler Akademi’de eğitim programı, çocuklarımızı gelecekteki dünyaya hazırlarken onların 21. yy. becerileri ile donatılmasını hedefler.
İmplant tedavisi, eksik dişlerin yerine titanyumdan yapılan vidaların çene kemiğine yerleştirilmesi ve üzerine protez dişlerin takılmasıyla gerçekleşir
Kemik augmentasyonu, kaybedilen ya da yetersiz kemik dokusunu yeniden oluşturarak dental implant veya protez gibi tedaviler için uygun bir zemin hazırlamayı amaçlayan cerrahi bir işlemdir.
Ağız ve diş sağlığı, genel sağlığımızın ayrılmaz bir parçasıdır. Modern diş klinikleri ise yalnızca tedavi değil, aynı zamanda koruyucu sağlık hizmetleriyle de bireylerin yaşam kalitesini artırmayı amaçlar.
Gülüşünüzdeki eksik dişler, hem estetik kaygılara yol açabilir hem de çiğneme fonksiyonlarınızı olumsuz etkileyebilir.
Suadiye Diş Polikliniği, diş sağlığına önem veren bireyler için en iyi hizmetleri sunan bir merkezdir.
Meme büyütme ve yeniden şekillendirme operasyonlarında, hem cerrahların hem de hastaların beklentilerini karşılayacak yüksek kaliteli çözümler sunar.
Yüzümüzün genel görünümünde kulaklarımızın yeri sanıldığından çok daha önemlidir.
kepçe kulak ameliyetı
kepçe kulak ameliyetı
kepçe kulak ameliyetı
kepçe kulak ameliyetı
kepçe kulak ameliyetı
kepçe kulak ameliyetı
vajina estetiği ankara
vajina estetiği ankara
vajina estetiği ankara
vajina estetiği ankara
vajina estetiği ankara
vajina estetiği ankara
vajina estetiği ankara
Ortodonti de çene tedavileri çocuklarda ve erişkinlerde farklılık göstermektedir.
Diş kaybı, estetik kaygıların yanı sıra, çiğneme fonksiyonunu da olumsuz yönde etkileyen bir sorundur.
Ağız ve diş sağlığı, genel sağlığımızın ayrılmaz bir parçasıdır. Modern diş klinikleri ise yalnızca tedavi değil, aynı zamanda koruyucu sağlık hizmetleriyle de bireylerin yaşam kalitesini artırmayı amaçlar.
Kreşimizde uygulanan eğitim sistemi, çocukların bilişsel, duygusal, sosyal ve fiziksel gelişimlerini desteklemek amacıyla özel olarak tasarlanmıştır.
ankara ppf kaplama ankara ppf kaplama ankara ppf kaplama ankara ppf kaplama ankara ppf kaplama ankara ppf kaplama
ankara oto detailing ankara oto detailing ankara oto detailing ankara oto detailing ankara oto detailing
Kreşimizde uygulanan eğitim sistemi, çocukların bilişsel, duygusal, sosyal ve fiziksel gelişimlerini desteklemek amacıyla özel olarak tasarlanmıştır.
Üsküdar implant tedavisi, ağızda eksik olan dişlerin yerine, çene kemiğine yerleştirilen titanyumdan yapılmış vida benzeri yapay diş kökleri ile yapılan bir diş tedavi yöntemidir
Düzenli olarak yapılan genel diş muayeneleri, sağlıklı bir ağız ve güzel bir gülüş için önemli bir adımdır.
Üsküdar implant tedavisi, ağızda eksik olan dişlerin yerine, çene kemiğine yerleştirilen titanyumdan yapılmış vida benzeri yapay diş kökleri ile yapılan bir diş tedavi yöntemidir
Dental implantların tedavideki fonksiyonu; yapılacak olan protezler için diş kökü gibi ayak olması ya da protezi desteklemesidir.
Daha fazla beyaz dişlere sahip olmak kişinin özgüvenini yerine getirerek sağlıklı gülümsemelerini sağlamaktadır.
Günümüzde diş kayıplarının en sağlıklı ve uzun ömürlü çözümü olarak diş implantı öne çıkmaktadır.
hem sağlık hem de estetik kaygı yaratan durumlar için tercih edilir.
Septorinoplasti, hem estetik hem de fonksiyonel amaçlarla uygulanan cerrahi bir işlemdir. Burun şeklini iyileştirirken aynı zamanda burundaki nefes alma sorunlarını giderme hedefi taşır.
hem sağlık hem de estetik kaygı yaratan durumlar için tercih edilir.
Septorinoplasti, hem estetik hem de fonksiyonel amaçlarla uygulanan cerrahi bir işlemdir. Burun şeklini iyileştirirken aynı zamanda burundaki nefes alma sorunlarını giderme hedefi taşır.
Beytepe Koleji’nde eğitim yaklaşımı, öğrencilerin özgün düşünme ve akılcı karar verme becerilerini geliştirmeye yöneliktir.
Öğrencilerini teorikte değil pratikte hayata hazırlama hedefi ile yola çıkan Çayyolu Dershane, eğitim sistemi ile farklılığını ortaya koymaktadır.
Diş implantları, eksik dişlerin yerine konulması için kullanılan modern ve etkili bir tedavi yöntemidir.
İmplant eksik dişleri tamamlamak için çene kemiğine yerleştirilen bir tür vidadır.
mezun grupları programı, mezun öğrencilere yönelik sağladığı etkin ve verimli çalışmalar ile sınavlarda yüksek başarıyı mümkün kılmaktadır.
Ankara’nın gelişmiş ilçelerinden biri olan Yenimahalle, özellikle Batıkent semtiyle birlikte eğitim alanında büyük bir ivme kazanmış durumda.
Büyük ve sarkık memeler kadınların yaşam kalitesini olumsuz etkileyen bir problemdir. Omuz ağrıları, duruş bozuklukları ve günlük aktivitelerde zorluklarla birleştiğinde bu soruna meme küçültme ameliyatı etkili bir çözüm sunar
İmplant tedavisi, eksik dişlerin yerine konulmasında en etkili ve kalıcı çözümlerden biri olarak öne çıkmaktadır.
Beytepe Koleji’nde eğitim yaklaşımı, öğrencilerin özgün düşünme ve akılcı karar verme becerilerini geliştirmeye yöneliktir.
Öğrencilerini teorikte değil pratikte hayata hazırlama hedefi ile yola çıkan Çayyolu Dershane, eğitim sistemi ile farklılığını ortaya koymaktadır.
Diş implantları, eksik dişlerin yerine konulması için kullanılan modern ve etkili bir tedavi yöntemidir.
İmplant eksik dişleri tamamlamak için çene kemiğine yerleştirilen bir tür vidadır.
mezun grupları programı, mezun öğrencilere yönelik sağladığı etkin ve verimli çalışmalar ile sınavlarda yüksek başarıyı mümkün kılmaktadır.
kepçe kulak ameliyetı
kepçe kulak ameliyetı
kepçe kulak ameliyetı
kepçe kulak ameliyetı
kepçe kulak ameliyetı
ataşehir dudak dolgusu alanında uzman hekimler tarafından gerçekleştirili.
İstanbul akıllı lens ameliyatı, genellikle gözlük ya da kontakt lens kullanımına alternatif olarak, görme kusurlarını düzeltmek için yapılan bir cerrahi işlemdir.
Dental implant, eksik dişlerin yerine kullanılan titanyumdan yapılmış yapay diş kökleridir.
Ankara fraksiyonel CO2 lazer, cilt yenileme ve estetik tedavilerde yaygın olarak kullanılan bir lazer teknolojisidir. Bu lazer, cildin alt katmanlarına etki ederek hasarlı veya yaşlanmış cilt dokusunun yenilenmesine yardımcı olur.
İmplant tedavisi, eksik dişlerin yerine konulmasında en etkili ve kalıcı çözümlerden biri olarak öne çıkmaktadır.
Ankara fraksiyonel CO2 lazer, cilt yenileme ve estetik tedavilerde yaygın olarak kullanılan bir lazer teknolojisidir. Bu lazer, cildin alt katmanlarına etki ederek hasarlı veya yaşlanmış cilt dokusunun yenilenmesine yardımcı olur.
Botoks, son yılların en popüler kozmetik uygulamalarından biri olmasının yanı sıra, çeşitli tıbbi durumların tedavisinde de kullanılan güçlü bir proteindir.
Botoks, son yılların en popüler kozmetik uygulamalarından biri olmasının yanı sıra, çeşitli tıbbi durumların tedavisinde de kullanılan güçlü bir proteindir.
Güncel ve güvenilir deneme bonusu veren siteler listesi. En iyi bahis siteleri bonus fırsatlarıyla kazanmaya hemen başlayın.
insan kaçakçılığı
insan kaçakçılığı
escort fiyat
escort fiyat
watch people hey google. alert button
insan kaçakçılığı
denizli escort
polat alemdar
watch die people
kill watch
polat alemdar
adana escort
insan kaçakçılığı
child porn
child porn
kid porno
porn hey google. alert button
escort fiyat
Ağız ve Diş Sağlığı Polikliniği olarak, modern teknoloji ve deneyimli hekim kadromuzla hastalarımıza kaliteli ve güvenilir diş tedavileri sunuyoruz.
12. sınıflarımız müfredat yanında kolejimize özgü üniversite hazırlık programına dahil edilir.
Sterilizasyon ve hijyen standartlarını en üst seviyede tutarak, hasta memnuniyetini her zaman ön planda tutuyoruz.
12. sınıflarımız müfredat yanında kolejimize özgü üniversite hazırlık programına dahil edilir.
Sterilizasyon ve hijyen standartlarını en üst seviyede tutarak, hasta memnuniyetini her zaman ön planda tutuyoruz.
Sterilizasyon ve hijyen standartlarını en üst seviyede tutarak, hasta memnuniyetini her zaman ön planda tutuyoruz.
Hastalarımıza her türlü ağız ve diş sağlığı hizmetini sunabilmek ve her hastamızın kliniklerimizden sağlıklı ve gülerek çıkmasını sağlamak hekimlik anlayışımızın ayrılmaz bir parçasıdır.
Modern eğitimin gereksinimlerini karşılayan, öğrenci merkezli yaklaşımıyla öne çıkan okulumuz, ortaokul ve lise kademelerinde kaliteli eğitim hizmeti sunmaktadır.
Modern eğitimin gereksinimlerini karşılayan, öğrenci merkezli yaklaşımıyla öne çıkan okulumuz, ortaokul ve lise kademelerinde kaliteli eğitim hizmeti sunmaktadır.
Hastalarımıza her türlü ağız ve diş sağlığı hizmetini sunabilmek ve her hastamızın kliniklerimizden sağlıklı ve gülerek çıkmasını sağlamak hekimlik anlayışımızın ayrılmaz bir parçasıdır.
Etimesgut implant tedavisi, eksik dişlerin fonksiyon ve estetiğini tekrar kazanabilmek amacıyla çene kemiğinin içerisine yerleştirilen yapay diş kökleri ile yapılan bir tedavi yöntemidir.
Eryaman implant tedavisi, eksik dişlerin yerine yapay diş kökleri yerleştirerek doğal diş işlevini yeniden kazandırmayı amaçlayan cerrahi bir işlemdir.
Eryaman Göksu bölgesinde diş sağlığı hizmeti arayanlar için kliniğimiz, modern teknolojilerle donatılmış altyapısı ve deneyimli diş hekimi kadrosuyla hizmet vermektedir.
Eryaman implant tedavisi, eksik dişlerin yerine yapay diş kökleri yerleştirerek doğal diş işlevini yeniden kazandırmayı amaçlayan cerrahi bir işlemdir.
Ankara’nın seçkin bölgelerinden Yaşamkent’te yer alan Beytepe Koleji, çağdaş eğitim anlayışıyla öğrencilerini sadece bugüne değil, yarının dünyasına da hazırlıyor
Erenköy diş beyazlatma, dişlerin rengini açmak ve daha parlak bir görünüm elde etmek için uygulanan yöntemlerdir.
Sağlıklı gülüşleriniz için buradayız…
Kadıköy implant tedavisi, eksik dişlerin yerine yerleştirilen yapay diş kökleridir.
Ankara’nın seçkin bölgelerinden Yaşamkent’te yer alan Beytepe Koleji, çağdaş eğitim anlayışıyla öğrencilerini sadece bugüne değil, yarının dünyasına da hazırlıyor
Etimesgut implant tedavisi, eksik dişlerin fonksiyon ve estetiğini tekrar kazanabilmek amacıyla çene kemiğinin içerisine yerleştirilen yapay diş kökleri ile yapılan bir tedavi yöntemidir.
kepçe kulak ameliyetı
kepçe kulak ameliyetı
kepçe kulak ameliyetı
kepçe kulak ameliyetı
kepçe kulak ameliyetı
kepçe kulak ameliyetı
Bahis Siteleri 2025 listesiyle, 250 güvenilir bahis sitesinden deneme bonusu kazanın ve hemen kazanmaya başlayın
Deneme bonusu veren sitelerin en güncel listesi burada. Güvenilir bahis siteleri ve en cazip deneme bonusu fırsatlarıyla kazancınızı artırın
Eksik dişler, hem estetik hem de fonksiyonel problemlere yol açabilen yaygın bir sorundur.
Dolgu işlemi, hastaların cildinde oluşan kırışıklık veya çukurluklara eriyebilen ve vücuda hiçbir şekilde zararı olmayan bir madde uygulanması olarak açıklanabilir.
Dolgu işlemi, hastaların cildinde oluşan kırışıklık veya çukurluklara eriyebilen ve vücuda hiçbir şekilde zararı olmayan bir madde uygulanması olarak açıklanabilir.
Ankara implant tedavisi, diş kaybı yaşayan bireyler için uygulanan modern bir diş tedavi yöntemidir.
pendik implant tedavisi
pendik implant tedavisi
pendik implant tedavisi
pendik implant tedavisi
pendik implant tedavisi
pendik implant tedavisi
pendik implant tedavisi
Ankara implant tedavisi, diş kaybı yaşayan bireyler için uygulanan modern bir diş tedavi yöntemidir.
dermatolog ankara
dermatolog ankara
dermatolog ankara
dermatolog ankara
dermatolog ankara
dermatolog ankara
dermatolog ankara
dermatolog ankara
Güncel ve güvenilir deneme bonusu veren siteler listesi. En iyi bahis siteleri bonus fırsatlarıyla kazanmaya hemen başlayın
Çift terapisi, ilişkilerde yaşanan zorlukları aşmak ve sağlıklı bir iletişim kurmak amacıyla yürütülen bir süreçtir.
Ancak bu performansın sürdürülebilmesi için düzenli periyodik bakım büyük önem taşır
Ancak bu performansın sürdürülebilmesi için düzenli periyodik bakım büyük önem taşır
Çift terapisi, ilişkilerde yaşanan zorlukları aşmak ve sağlıklı bir iletişim kurmak amacıyla yürütülen bir süreçtir.
Ancak bu performansın sürdürülebilmesi için düzenli periyodik bakım büyük önem taşır
YBS Hukuk, İş, Miras ve Sigorta Hukuku hakkında merak ettiğiniz tüm soruları sizler için yanıtladı.
Tooth whitening is a treatment method aimed at restoring the natural whiteness of teeth or achieving a whiter appearance.
Her çocuk biriciktir ve her çocuğun öğrenme biçimi, ilgisi, gelişim süreci farklıdır.
Kreşimizde uygulanan eğitim sistemi, çocukların bilişsel, duygusal, sosyal ve fiziksel gelişimlerini desteklemek amacıyla özel olarak tasarlanmıştır.
Tooth whitening is a treatment method aimed at restoring the natural whiteness of teeth or achieving a whiter appearance.
Her çocuk biriciktir ve her çocuğun öğrenme biçimi, ilgisi, gelişim süreci farklıdır.
Ortaokul kadememizde, öğrencilerimizi hem akademik hem de sosyal anlamda bir üst öğretim seviyesine hazırlıyoruz.
Yükseköğretim Kurumları Sınavı (YKS), Türkiye’deki üniversitelere giriş için en önemli aşamadır.
Ortaokul kadememizde, öğrencilerimizi hem akademik hem de sosyal anlamda bir üst öğretim seviyesine hazırlıyoruz.
Tooth whitening is a treatment method aimed at restoring the natural whiteness of teeth or achieving a whiter appearance.
Kreşimizde uygulanan eğitim sistemi, çocukların bilişsel, duygusal, sosyal ve fiziksel gelişimlerini desteklemek amacıyla özel olarak tasarlanmıştır.
Her çocuk biriciktir ve her çocuğun öğrenme biçimi, ilgisi, gelişim süreci farklıdır.
Eryaman zirkonyum kaplama, estetik ve dayanıklılık açısından son yıllarda diş hekimliğinde sıkça tercih edilen bir tedavi yöntemidir.
Neyse ki modern diş hekimliği, bu soruna köprü ve hareketli protezlere kıyasla çok daha kalıcı, doğal ve fonksiyonel bir çözüm sunuyor
Batıkent psikolog hizmetleri, bireylerin ruh sağlığını korumak ve geliştirmek amacıyla sunulan kapsamlı destek hizmetleridir.
Çocuk terapisinde hedefimiz, çocukların özgüvenlerini artırmak, duygusal farkındalık kazanmalarını sağlamak ve sosyal ilişkilerde daha güçlü bireyler olmalarına rehberlik etmektir.
Septorinoplasti, burnun hem estetik hem de fonksiyonel olarak yeniden şekillendirilmesini amaçlayan cerrahi bir operasyondur.
Batıkent psikolog hizmetleri, bireylerin ruh sağlığını korumak ve geliştirmek amacıyla sunulan kapsamlı destek hizmetleridir.
Çocuk terapisinde hedefimiz, çocukların özgüvenlerini artırmak, duygusal farkındalık kazanmalarını sağlamak ve sosyal ilişkilerde daha güçlü bireyler olmalarına rehberlik etmektir.
Özellikle estetik kaygısı olan yetişkinler ve gençler için mükemmel bir alternatiftir.
İmplant tedavisi, eksik dişlerin yerine, çene kemiğine yerleştirilen yapay diş kökleridir.
Özellikle estetik kaygısı olan yetişkinler ve gençler için mükemmel bir alternatiftir.
İmplant tedavisi, eksik dişlerin yerine, çene kemiğine yerleştirilen yapay diş kökleridir.
Ankara fraksiyonel lazer, cilt sorunlarını tedavi etmek ve cilt dokusunu yenilemek amacıyla kullanılan modern bir lazer tedavi yöntemidir.
Ankara fraksiyonel lazer, cilt sorunlarını tedavi etmek ve cilt dokusunu yenilemek amacıyla kullanılan modern bir lazer tedavi yöntemidir.
Yaşlandıkça, ince çizgilerin ve kırışıklıkların oluşması, yaşlılık lekelerinin ortaya çıkması ve cildin gevşeyip sarkması gibi zamanın geçtiğini gösteren belirtiler yüzümüzde kaçınılmaz olarak ortaya çıkar.
Reflü (Gastroözofageal Reflü Hastalığı), midedeki asit ve sindirim enzimlerinin yemek borusuna geri kaçması sonucu ortaya çıkan kronik bir durumdur. Aşağıda bu hastalığı ayrıntılı şekilde ele alıyoruz:
Eryaman ortodontistler, diş ve çene yapılarındaki bozuklukların teşhis ve tedavisi konusunda uzmanlaşmış diş hekimleridir.
İmplant eksik olan dişlerin yerine dişin fonksiyonunu ve estetiğini tekrar sağlamak amacıyla çene kemiğine yerleştirilen yapay diş köküdür.
Bir veli olarak çocuğunuzun eğitimi için en doğru kararı vermek istiyorsunuz; biz de bu süreçte yanınızda olmak istiyoruz.
Eryaman, Ankara’nın hızla gelişen ve modernleşen semtlerinden biri olarak, eğitim alanında da önemli yatırımlara ev sahipliği yapıyor.
Bir veli olarak çocuğunuzun eğitimi için en doğru kararı vermek istiyorsunuz; biz de bu süreçte yanınızda olmak istiyoruz.
Eryaman, Ankara’nın hızla gelişen ve modernleşen semtlerinden biri olarak, eğitim alanında da önemli yatırımlara ev sahipliği yapıyor.
Liposuction, vücudun belirli bölgelerindeki fazla yağın alınması için tasarlanmış kozmetik bir cerrahi işlemdir.
Diş eksiklikleri, hem estetik hem de fonksiyonel açıdan kişilerin yaşam kalitesini olumsuz etkileyebilir.
Ortodonti de çene tedavileri çocuklarda ve erişkinlerde farklılık göstermektedir.
Reflü (Gastroözofageal Reflü Hastalığı), midedeki asit ve sindirim enzimlerinin yemek borusuna geri kaçması sonucu ortaya çıkan kronik bir durumdur. Aşağıda bu hastalığı ayrıntılı şekilde ele alıyoruz:
Ankara ortodonti uzmanı, diş hekimliği alanında eğitim almış ve ardından ortodonti (dişlerin ve çenelerin düzgün hizalanması) konusunda özel bir eğitim almış olan, bu alanda uzmanlaşmış bir diş hekimidir.
Ankara ortodonti uzmanı, diş hekimliği alanında eğitim almış ve ardından ortodonti (dişlerin ve çenelerin düzgün hizalanması) konusunda özel bir eğitim almış olan, bu alanda uzmanlaşmış bir diş hekimidir.
Diş kaybı, hem estetik hem de fonksiyonel açıdan yaşam kalitesini olumsuz etkileyen bir durumdur.
Diş kaybı, hem estetik hem de fonksiyonel açıdan yaşam kalitesini olumsuz etkileyen bir durumdur.
Diş eksiklikleri, hem estetik hem de fonksiyonel açıdan kişilerin yaşam kalitesini olumsuz etkileyebilir.
Kreşimizde uygulanan eğitim sistemi, çocukların bilişsel, duygusal, sosyal ve fiziksel gelişimlerini desteklemek amacıyla özel olarak tasarlanmıştır.
Bursa diş beyazlatma işlemi iki farklı yöntemle ya da bu iki yöntemin kombine kullanılmasıyla yapılabilir.
İmplant eksik olan dişlerin yerine dişin fonksiyonunu ve estetiğini tekrar sağlamak amacıyla çene kemiğine yerleştirilen yapay diş köküdür.
Dikmen implant tedavisi, kaybedilen dişlerin yerine yerleştirilen yapay diş kökleri ile yapılan bir tedavi yöntemidir.
It is performed by applying layers of zirconium oxide onto the tooth
Batıkent Doruk Koleji, bu alanda öne çıkan; hem akademik hem de sosyal gelişimi esas alan eğitim modeliyle ailelerin güvenle tercih ettiği bir eğitim kurumudur.
Batıkent’te hizmet veren psikologlar; bireysel terapi, çift terapisi, aile danışmanlığı, çocuk ve ergen terapisi gibi birçok alanda danışanlarına yardımcı olur.
Bu terapi, çocuğun ya da ergenin iç dünyasını anlamayı, duygularını ifade etmeyi öğrenmesini ve yaşadığı güçlüklerle baş etme becerilerini geliştirmesini hedefler.
Öveçler implant tedavisi, eksik dişlerin yerine yapılan modern bir diş tedavi yöntemidir.
Her çocuk biriciktir ve her çocuğun öğrenme biçimi, ilgisi, gelişim süreci farklıdır.
Bu terapi, çocuğun ya da ergenin iç dünyasını anlamayı, duygularını ifade etmeyi öğrenmesini ve yaşadığı güçlüklerle baş etme becerilerini geliştirmesini hedefler.
Öveçler implant tedavisi, eksik dişlerin yerine yapılan modern bir diş tedavi yöntemidir.
Eksik dişler, sadece estetik bir sorun olmanın ötesinde çiğneme fonksiyonlarını, konuşmayı ve genel ağız sağlığını olumsuz etkileyen ciddi bir durumdur.
Hastalarımıza her türlü ağız ve diş sağlığı hizmetini sunabilmek ve her hastamızın kliniklerimizden sağlıklı ve gülerek çıkmasını sağlamak hekimlik anlayışımızın ayrılmaz bir parçasıdır.
Ankara’nın gelişen bölgelerinden biri olan Eryaman, sadece modern yaşam olanaklarıyla değil, aynı zamanda kaliteli sağlık ve psikolojik destek hizmetleriyle de dikkat çekmektedir.
Ankara’nın gelişen bölgelerinden biri olan Eryaman, sadece modern yaşam olanaklarıyla değil, aynı zamanda kaliteli sağlık ve psikolojik destek hizmetleriyle de dikkat çekmektedir.
TYT AYT kursu, YKS sınavına yönelik hazırlık yapmak isteyen öğrencilere sunulan, genellikle kapsamlı bir eğitim programıdır.
Seyhan Diyetisyen
Boşanma terapisi, evlilik sürecinde ayrılık kararı alan ya da boşanma sürecini yaşayan çiftlerin, bu dönemi daha sağlıklı ve yapıcı bir şekilde atlatmalarına yardımcı olan psikoterapötik bir destek sürecidir.
Ağız ve diş sağlığı, genel sağlığımızın ayrılmaz bir parçasıdır.
Boşanma terapisi, evlilik sürecinde ayrılık kararı alan ya da boşanma sürecini yaşayan çiftlerin, bu dönemi daha sağlıklı ve yapıcı bir şekilde atlatmalarına yardımcı olan psikoterapötik bir destek sürecidir.
Kurs merkezleri, öğrencilerin belirli bir plan doğrultusunda ilerlemelerini sağlayarak düzenli çalışmayı teşvik eder.
Her çocuk biriciktir ve her çocuğun öğrenme biçimi, ilgisi, gelişim süreci farklıdır.
Ağız ve diş sağlığı, genel sağlığımızın ayrılmaz bir parçasıdır.
Yüzümüzün genel görünümünde kulaklarımızın yeri sanıldığından çok daha önemlidir.
Kulaklar normalden daha önde ve açık durduğunda, bu durum halk arasında kepçe kulak olarak bilinir.
Üsküdar burun estetiği, tıbbi adıyla rinoplasti, burnun şekil ve boyutunun cerrahi olarak yeniden düzenlenmesi işlemidir.
Kahveye olan tutkumuz, küçük bir fincan espressoyla başladı.
Kahveye olan tutkumuz, küçük bir fincan espressoyla başladı.
Vücudun farklı bölgelerde botox tedavisi yapılabilir.
Septorinoplasti, burnun hem estetik hem de fonksiyonel olarak yeniden şekillendirilmesini amaçlayan cerrahi bir operasyondur.
Tosya Oto Kurtarma
Vücudun farklı bölgelerde botox tedavisi yapılabilir.
Üsküdar burun estetiği, tıbbi adıyla rinoplasti, burnun şekil ve boyutunun cerrahi olarak yeniden düzenlenmesi işlemidir.
Çağın gereklerini değerleriyle yorumlayarak içinde yaşadığı topluma örnek olup yön verebilecek vizyon sahibi gençler yetiştirmek amacıyla bu yola çıktık.
Çağın gereklerini değerleriyle yorumlayarak içinde yaşadığı topluma örnek olup yön verebilecek vizyon sahibi gençler yetiştirmek amacıyla bu yola çıktık.
SEO Ajansı
Türkiye’nin Profesyonel
I don’t think the title of your article matches the content lol. Just kidding, mainly because I had some doubts after reading the article.
Bu terapi, çocuğun ya da ergenin iç dünyasını anlamayı, duygularını ifade etmeyi öğrenmesini ve yaşadığı güçlüklerle baş etme becerilerini geliştirmesini hedefler.
gölbaşı özel diş
Kreşimizde uygulanan eğitim sistemi, çocukların bilişsel, duygusal, sosyal ve fiziksel gelişimlerini desteklemek amacıyla özel olarak tasarlanmıştır.
gölbaşı özel diş
rinoplasti ankara
Ankara’nın gelişen ve yaşam kalitesi yüksek bölgelerinden biri olan Batıkent, psikolojik destek arayan bireyler için çeşitli terapi ve danışmanlık hizmetleri sunan merkezlere ev sahipliği yapmaktadır.
pendik implant tedavisi
yenimahalle özel okul
pendik implant tedavisi
yenimahalle özel okul
Ancak, iktidarsızlık sadece yaşlı erkekleri etkilemez; stres, yaşam tarzı faktörleri ve bazı sağlık sorunları genç erkeklerde de bu duruma yol açabilir.
Kadıköy implant tedavisi
Kadıköy implant tedavisi, diş kayıplarını tedavi etmek amacıyla kullanılan bir yöntemdir. Diş implantları, çene kemiğine yerleştirilen yapay diş kökleridir.
ankara dermatolog
Kadıköy implant tedavisi, diş kayıplarını tedavi etmek amacıyla kullanılan bir yöntemdir. Diş implantları, çene kemiğine yerleştirilen yapay diş kökleridir.
Liposuction, vücudun belirli bölgelerindeki fazla yağın alınması için tasarlanmış kozmetik bir cerrahi işlemdir.
Meme büyütme ameliyatı, estetik görünümünü iyileştirmek isteyen kadınlar için etkili ve kalıcı bir çözümdür.
Eryaman ortodontistler, diş ve çene yapılarındaki bozuklukların teşhis ve tedavisi konusunda uzmanlaşmış diş hekimleridir
Meme büyütme ameliyatı, estetik görünümünü iyileştirmek isteyen kadınlar için etkili ve kalıcı bir çözümdür.
Eryaman ortodontistler, diş ve çene yapılarındaki bozuklukların teşhis ve tedavisi konusunda uzmanlaşmış diş hekimleridir
Bu dönemde bireyler hem çocukluktan kopuş hem de yetişkinliğe geçiş sancıları yaşarken;
It offers an aesthetically pleasing appearance and improves dental function.
Düzenli olarak yapılan genel diş muayeneleri, sağlıklı bir ağız ve güzel bir gülüş için önemli bir adımdır.
Eksik dişler, hem estetik açıdan hem de çiğneme ve konuşma fonksiyonları açısından önemli sorunlara yol açabilir.
It offers an aesthetically pleasing appearance and improves dental function.
Eksik dişler, hem estetik açıdan hem de çiğneme ve konuşma fonksiyonları açısından önemli sorunlara yol açabilir.
pendik diş kliniği
Ankara’da 8.sınıf matematik özel derslerimiz ile LGS’de matematik sorularını çözemeyen kalmayacak.
Amaç; tarafların birbirini daha iyi anlamasını, empati kurmasını ve ilişkilerini daha sağlıklı bir zemine oturtmalarını sağlamaktır.
ankara boya koruma
Ankara’da 8.sınıf matematik özel derslerimiz ile LGS’de matematik sorularını çözemeyen kalmayacak.
Amaç; tarafların birbirini daha iyi anlamasını, empati kurmasını ve ilişkilerini daha sağlıklı bir zemine oturtmalarını sağlamaktır.
ankara boya koruma
Göbek Kordonu Ne Zaman Düşer
Liposuction, vücudun belirli bölgelerindeki fazla yağın alınması için tasarlanmış kozmetik bir cerrahi işlemdir.
Matematik, eğitim hayatının her aşamasında öğrencilerin karşısına çıkan ve başarının anahtar derslerinden biridir.
Liposuction, vücudun belirli bölgelerindeki fazla yağın alınması için tasarlanmış kozmetik bir cerrahi işlemdir.
Matematik, eğitim hayatının her aşamasında öğrencilerin karşısına çıkan ve başarının anahtar derslerinden biridir.
Çift terapisi, ilişkilerde yaşanan zorlukları aşmak ve sağlıklı bir iletişim kurmak amacıyla yürütülen bir süreçtir.
TYT AYT kursu, YKS sınavına yönelik hazırlık yapmak isteyen öğrencilere sunulan, genellikle kapsamlı bir eğitim programıdır.
Çift terapisi, ilişkilerde yaşanan zorlukları aşmak ve sağlıklı bir iletişim kurmak amacıyla yürütülen bir süreçtir.
Eksozom tedavisi, eksozom adı verilen hücre dışı vezikülleri kullanarak gerçekleştirilen bir biyoterapi yöntemidir.
Çift terapisi, ilişkilerde yaşanan zorlukları aşmak ve sağlıklı bir iletişim kurmak amacıyla yürütülen bir süreçtir.
TYT AYT kursu, YKS sınavına yönelik hazırlık yapmak isteyen öğrencilere sunulan, genellikle kapsamlı bir eğitim programıdır.
Eksozom tedavisi, eksozom adı verilen hücre dışı vezikülleri kullanarak gerçekleştirilen bir biyoterapi yöntemidir.
Ankara evlilik terapisi, çiftlerin karşılaştıkları ilişkisel zorlukları aşmalarına, iletişim becerilerini geliştirmelerine ve evlilik içindeki duygusal bağlarını güçlendirmelerine yönelik uygulanan bir psikoterapi sürecidir.
Eryaman zirkonyum kaplama, dişlerin estetik ve fonksiyonel iyileştirilmesi amacıyla uygulanan bir diş kaplama yöntemidir.
Pedodonti ya da Pediatrik Diş hekimliği (Çocuk Diş hekimliği), çocuklarda süt ve genç daimi dişlerin hastalıkları ve tedavisi ile ilgilenen bilim dalıdır.
Eryaman zirkonyum kaplama, dişlerin estetik ve fonksiyonel iyileştirilmesi amacıyla uygulanan bir diş kaplama yöntemidir.
Batıkent’te hizmet veren psikologlar; bireysel terapi, çift terapisi, aile danışmanlığı, çocuk ve ergen terapisi gibi birçok alanda danışanlarına yardımcı olur.
ppf kaplama ankara
Telegram’da Ekran Görüntüsü Almayı Engelleme
ppf kaplama ankara
gölbaşı diş
batıkent özel okul
batıkent özel okul
Liposuction, vücudun belirli bölgelerindeki fazla yağın alınması için tasarlanmış kozmetik bir cerrahi işlemdir.
İmplant eksik olan dişlerin yerine dişin fonksiyonunu ve estetiğini tekrar sağlamak amacıyla çene kemiğine yerleştirilen yapay diş köküdür. Ağızdaki diş eksikliklerini tamamlamak amacıyla yapılan köprülerin yapılması için dişin küçültülmesi gerekir
istanbul çene cerrahisi uzmanı
ankara rinoplasti doktoru
İmplant eksik olan dişlerin yerine dişin fonksiyonunu ve estetiğini tekrar sağlamak amacıyla çene kemiğine yerleştirilen yapay diş köküdür. Ağızdaki diş eksikliklerini tamamlamak amacıyla yapılan köprülerin yapılması için dişin küçültülmesi gerekir
ankara rinoplasti doktoru
Kreşimizde uygulanan eğitim sistemi, çocukların bilişsel, duygusal, sosyal ve fiziksel gelişimlerini desteklemek amacıyla özel olarak tasarlanmıştır.
İmplant eksik dişleri tamamlamak için çene kemiğine yerleştirilen bir tür vidadır.
ankara ppf kaplama
rinoplasti ankara
Canlı Casino ve Bahis Siteleri. Deneme Bonusu Veren Siteler arasında yatırım şartsız deneme bonusu sunanlar, bahis severler için oldukça cazip fırsatlar
Ankara’nın gelişen ilçelerinden biri olan Etimesgut, yalnızca yaşam alanlarıyla değil, sunduğu sağlık hizmetleriyle de dikkat çekiyor.
Ankara’nın gelişen ilçelerinden biri olan Etimesgut, yalnızca yaşam alanlarıyla değil, sunduğu sağlık hizmetleriyle de dikkat çekiyor.
9. Sınıftan itibaren 10-12 kişilik sınıflarda;
Ortadoğulular Matematik Kursu, temel matematik bilgisinden ileri seviye konulara kadar kapsamlı bir eğitim sunarak öğrencilerin akademik başarısını hedefliyor.
Eksik dişlerin en doğal ve uzun ömürlü tedavi yöntemlerinden biri implant tedavisidir. İmplant, çene kemiğine yerleştirilen titanyum vidalar sayesinde eksik dişlerin fonksiyon ve estetiğinin yeniden kazandırıldığı modern bir diş tedavisidir.
Doruk Eğitim Kurumları dinamik, deneyimli ve güçlü kadrosuyla yenilikçi eğitim programları ve alanında öncü bir sınav sistemiyle hayallerinize ulaştırmakta ve etkin rehberlik sistemiyle size en büyük yardımcıdır.
Batıkent Doruk Koleji, bu alanda öne çıkan; hem akademik hem de sosyal gelişimi esas alan eğitim modeliyle ailelerin güvenle tercih ettiği bir eğitim kurumudur.
9. Sınıftan itibaren 10-12 kişilik sınıflarda;
Doruk Eğitim Kurumları dinamik, deneyimli ve güçlü kadrosuyla yenilikçi eğitim programları ve alanında öncü bir sınav sistemiyle hayallerinize ulaştırmakta ve etkin rehberlik sistemiyle size en büyük yardımcıdır.
9. Sınıftan itibaren 10-12 kişilik sınıflarda;
Eksik dişlerin en doğal ve uzun ömürlü tedavi yöntemlerinden biri implant tedavisidir. İmplant, çene kemiğine yerleştirilen titanyum vidalar sayesinde eksik dişlerin fonksiyon ve estetiğinin yeniden kazandırıldığı modern bir diş tedavisidir.
Batıkent Doruk Koleji, bu alanda öne çıkan; hem akademik hem de sosyal gelişimi esas alan eğitim modeliyle ailelerin güvenle tercih ettiği bir eğitim kurumudur.
Gelişimsel, kapsayıcı, önleyici ve çözüm odaklı rehberlik anlayışını temel alan Beytepe Koleji Rehberlik Bölümümüz, öğrencilerimizin bireysel ihtiyaçlarını da dikkate alarak etkinliklerini yürütür.
Invisalign, şeffaf plaklar adı verilen, özel olarak tasarlanmış bir dizi plastik plak kullanarak dişleri hizalar.
Invisalign, şeffaf plaklar adı verilen, özel olarak tasarlanmış bir dizi plastik plak kullanarak dişleri hizalar.
Diş eksiklikleri hem estetik hem de fonksiyonel açıdan ciddi sorunlara yol açabilir. Günümüzde bu soruna en kalıcı ve doğal çözüm, dental implant tedavisi ile sağlanmaktadır.
Antalya BNC Dental, modern teknolojilerle donatılmış kliniğinde hastalarına güvenilir ve kaliteli diş sağlığı hizmeti sunmaktadır
Boyutunda veya şeklindeki küçük bir değişiklik bile kişinin görünüşünü büyük ölçüde değiştirebilir.
Antalya BNC Dental, modern teknolojilerle donatılmış kliniğinde hastalarına güvenilir ve kaliteli diş sağlığı hizmeti sunmaktadır
Gelişimsel, kapsayıcı, önleyici ve çözüm odaklı rehberlik anlayışını temel alan Beytepe Koleji Rehberlik Bölümümüz, öğrencilerimizin bireysel ihtiyaçlarını da dikkate alarak etkinliklerini yürütür.
istanbul çene cerrahisi uzmanı
Bu sayfada meme küçültme ameliyatının faydalarını, sürecini ve iyileşme dönemini ele alacağız.
Antalya BNC Dental, modern teknolojilerle donatılmış kliniğinde hastalarına güvenilir ve kaliteli diş sağlığı hizmeti sunmaktadır
TYT AYT kursu, YKS sınavına yönelik hazırlık yapmak isteyen öğrencilere sunulan, genellikle kapsamlı bir eğitim programıdır
Eryaman implant tedavisi, eksik dişlerin yerine yapay diş kökleri yerleştirerek doğal diş işlevini yeniden kazandırmayı amaçlayan cerrahi bir işlemdir.
Kreşimizde uygulanan eğitim sistemi, çocukların bilişsel, duygusal, sosyal ve fiziksel gelişimlerini desteklemek amacıyla özel olarak tasarlanmıştır.
TYT AYT kursu, YKS sınavına yönelik hazırlık yapmak isteyen öğrencilere sunulan, genellikle kapsamlı bir eğitim programıdır
Bu sayfada meme küçültme ameliyatının faydalarını, sürecini ve iyileşme dönemini ele alacağız.
Eryaman implant tedavisi, eksik dişlerin yerine yapay diş kökleri yerleştirerek doğal diş işlevini yeniden kazandırmayı amaçlayan cerrahi bir işlemdir.
Ankara’nın gelişen bölgelerinden biri olan Eryaman, sadece modern yaşam olanaklarıyla değil, aynı zamanda kaliteli sağlık ve psikolojik destek hizmetleriyle de dikkat çekmektedir.
Yükseköğretim Kurumları Sınavı (YKS), Türkiye’deki üniversitelere giriş için en önemli aşamadır. YKS, temel yeterlilik testi (TYT) ve alan yeterlilik testi (AYT) olmak üzere iki ana aşamadan oluşur.
Ankara’nın hızla gelişen ilçelerinden biri olan Yenimahalle, sadece sosyal yaşam ve ulaşım olanaklarıyla değil, aynı zamanda profesyonel psikolojik danışmanlık hizmetleriyle de dikkat çekiyor
Ankara’nın hızla gelişen ilçelerinden biri olan Yenimahalle, sadece sosyal yaşam ve ulaşım olanaklarıyla değil, aynı zamanda profesyonel psikolojik danışmanlık hizmetleriyle de dikkat çekiyor
Fazla kilolardan kurtulmak, fit bir görünüme kavuşmak ve kendini daha enerjik hissetmek isteyenler için geliştirildi.
Ankara’nın gelişen bölgelerinden biri olan Eryaman, sadece modern yaşam olanaklarıyla değil, aynı zamanda kaliteli sağlık ve psikolojik destek hizmetleriyle de dikkat çekmektedir.
Fazla kilolardan kurtulmak, fit bir görünüme kavuşmak ve kendini daha enerjik hissetmek isteyenler için geliştirildi.
Batıkent Doruk Koleji, bu alanda öne çıkan; hem akademik hem de sosyal gelişimi esas alan eğitim modeliyle ailelerin güvenle tercih ettiği bir eğitim kurumudur.
Çocuk ve ergen terapisi, genç bireylerin duygusal ve zihinsel gelişimlerini desteklemek için tasarlanmış özel bir süreçtir.
Ankara’da psikolog arayışında olan bireyler için doğru terapisti bulmak, ruh sağlığı yolculuğunda atılacak en önemli adımlardan biridir.
7, 8, 9. Sınıf Olarak 12 Kişilik Homojen Gruplar, Deneyimli Kadro, Yeni Nesil Yayın Desteği, Birebir Etütler, Ders Çalışma Kütüphaneleri Vardır.
Çocuk ve ergen terapisi, genç bireylerin duygusal ve zihinsel gelişimlerini desteklemek için tasarlanmış özel bir süreçtir.
Bir veli olarak çocuğunuzun eğitimi için en doğru kararı vermek istiyorsunuz; biz de bu süreçte yanınızda olmak istiyoruz.
Dental implant, eksik dişlerin yerine kullanılan titanyumdan yapılmış yapay diş kökleridir.
Batıkent Doruk Koleji, bu alanda öne çıkan; hem akademik hem de sosyal gelişimi esas alan eğitim modeliyle ailelerin güvenle tercih ettiği bir eğitim kurumudur.
Pedodonti, çocuk diş hekimliği olarak bilinen, 0-14 yaş arasındaki çocukların ağız ve diş sağlığını koruma ve tedavi etme alanında uzmanlaşmış bir diş hekimliği dalıdır.
Çayyolu Psikolog Desteği: Ruh Sağlığınız İçin Güvenilir Bir Adres
Ankara’nın Yenimahalle bölgesinde özel okul seçenekleri, ailelerin eğitim tercihlerinde büyük rol oynamaktadır
Diş implantları, eksik dişlerin yerine kullanılan yapay diş kökleridir.
Bursa implant tedavisi fiyatları, çeşitli faktörlere bağlı olarak değişiklik göstermektedir. Bu faktörler şunlardır:
Bursa Gülüş Tasarımı sayesinde gülümsemenin hayatımızdaki yeri daha önemli bir yer almaktadır. Kişinin özgürce gülümsemesi stres hormonunu azaltır.
Suadiye diş klinikleri, diş sağlığını korumak ve tedavi etmek amacıyla çeşitli hizmetler sunar.
Gelişmiş teknolojiler, uzman diş hekimleri ve kişiye özel yaklaşımlarla donatılmış diş klinikleri, her yaştan hastaya kapsamlı çözümler sunmaktadır.
Meme dikleştirme ameliyatı, tıbbi adıyla mastopeksi, memelerde zamanla oluşan sarkma ve form kaybını düzeltmek amacıyla yapılan estetik cerrahi bir işlemdir.
Günümüzde eğitim, her öğrencinin ihtiyaçlarına göre şekillenmesi gereken bir süreç olarak öne çıkıyor.
Ankara’da seyahat etmek hiç bu kadar konforlu olmamıştı! Ankara Şoförlü Araç Kiralama hizmetimizle, hem iş hem de tatil amaçlı yolculuklarınızı daha keyifli hale getiriyoruz.
Diş implantları, eksik dişlerin yerine kullanılan yapay diş kökleridir.
Meme dikleştirme ameliyatı, tıbbi adıyla mastopeksi, memelerde zamanla oluşan sarkma ve form kaybını düzeltmek amacıyla yapılan estetik cerrahi bir işlemdir.
Ankara’da seyahat etmek hiç bu kadar konforlu olmamıştı! Ankara Şoförlü Araç Kiralama hizmetimizle, hem iş hem de tatil amaçlı yolculuklarınızı daha keyifli hale getiriyoruz.
Pedodonti, çocuk diş hekimliği olarak bilinen, 0-14 yaş arasındaki çocukların ağız ve diş sağlığını koruma ve tedavi etme alanında uzmanlaşmış bir diş hekimliği dalıdır.
Çayyolu Psikolog Desteği: Ruh Sağlığınız İçin Güvenilir Bir Adres
Diş implantları, eksik dişlerin yerine kullanılan yapay diş kökleridir.
Suadiye diş klinikleri, diş sağlığını korumak ve tedavi etmek amacıyla çeşitli hizmetler sunar.
Gelişmiş teknolojiler, uzman diş hekimleri ve kişiye özel yaklaşımlarla donatılmış diş klinikleri, her yaştan hastaya kapsamlı çözümler sunmaktadır.
Zirkonyum kaplama, estetik ve dayanıklılığı bir arada sunan modern bir diş kaplama yöntemidir.
Zirkonyum kaplama, estetik ve dayanıklılığı bir arada sunan modern bir diş kaplama yöntemidir.
Matematik, birçok öğrenci için zorlayıcı bir ders olabilir. Bu noktada, İncek Matematik Özel Ders hizmetleri, öğrencilere akademik başarı sağlamak amacıyla profesyonel bir çözüm sunmaktadır.
Yükseköğretim Kurumları Sınavı (YKS), Türkiye’deki üniversitelere giriş için en önemli aşamadır. YKS, temel yeterlilik testi (TYT) ve alan yeterlilik testi (AYT) olmak üzere iki ana aşamadan oluşur
Rinoplasti, burun estetiği veya burun ameliyatı olarak da bilinen cerrahi bir prosedürdür.
Kadıköy implant tedavisi, eksik dişlerin yerine yerleştirilen yapay diş kökleridir.
Meme küçültme ameliyatı için iyi adaylar genellikle aşırı büyük göğüsler nedeniyle fiziksel rahatsızlık veya sınırlamalar yaşayan kişilerin yanı sıra daha orantılı ve dengeli bir meme görünümü arzulayan kişileri içerir.
Geniz eti ameliyatı, burun arkasında bulunan geniz etinin cerrahi olarak çıkarılması işlemidir.
Meme küçültme ameliyatı için iyi adaylar genellikle aşırı büyük göğüsler nedeniyle fiziksel rahatsızlık veya sınırlamalar yaşayan kişilerin yanı sıra daha orantılı ve dengeli bir meme görünümü arzulayan kişileri içerir.
BMW ve Mini Cooper araçlar, yüksek mühendislik kalitesi ve sürüş keyfiyle öne çıkar.
şeffaf plaklar adı verilen, özel olarak tasarlanmış bir dizi plastik plak kullanarak dişleri hizalar.
Eğitim, her öğrencinin farklı öğrenme tarzlarına ve hızına sahip olduğu bir süreçtir.
BMW ve Mini Cooper araçlar, yüksek mühendislik kalitesi ve sürüş keyfiyle öne çıkar.
şeffaf plaklar adı verilen, özel olarak tasarlanmış bir dizi plastik plak kullanarak dişleri hizalar.
Matematik, birçok öğrenci için zorlayıcı bir ders olabilir. Bu noktada, İncek Matematik Özel Ders hizmetleri, öğrencilere akademik başarı sağlamak amacıyla profesyonel bir çözüm sunmaktadır.
Rinoplasti, burun estetiği veya burun ameliyatı olarak da bilinen cerrahi bir prosedürdür.
Ağız ve diş sağlığınızı ihmal etmeden, profesyonel ellere teslim etmek istiyorsanız Pendik’teki diş klinikleri sizin için doğru adres olabilir.
Eryaman birebir etüt, öğretmen ve öğrenci arasında tek kişilik özel dersler şeklinde gerçekleşen bir eğitim modelidir.
Ağız ve diş sağlığınızı ihmal etmeden, profesyonel ellere teslim etmek istiyorsanız Pendik’teki diş klinikleri sizin için doğru adres olabilir.
Estetik diş hekimliği, sadece ağız sağlığınızı değil, aynı zamanda gülüşünüzü ve genel dış görünümünüzü iyileştirmeyi amaçlayan bir diş hekimliği dalıdır.
Diş implantları, eksik dişlerin yerine kullanılan modern ve etkili bir tedavi yöntemidir.
Gastroözofageal reflü hastalığı (GERD), mide içeriğinin yemek borusuna kaçarak yanma, ekşime ve bazen göğüs ağrısı gibi şikâyetlere yol açtığı kronik bir durumdur.
Gastroözofageal reflü hastalığı (GERD), mide içeriğinin yemek borusuna kaçarak yanma, ekşime ve bazen göğüs ağrısı gibi şikâyetlere yol açtığı kronik bir durumdur.
Diş implantları, eksik dişlerin yerine kullanılan modern ve etkili bir tedavi yöntemidir.
Gastroözofageal reflü hastalığı (GERD), mide içeriğinin yemek borusuna kaçarak yanma, ekşime ve bazen göğüs ağrısı gibi şikâyetlere yol açtığı kronik bir durumdur.
Yemek borusu (özofagus) ile mide arasında bulunan alt yemek borusu sfinkteri (Lower Esophageal Sphincter, LES), normalde kasılı kalarak mide içeriğinin yukarı kaçmasını önler.
Çocuk ve ergen terapisi, genç bireylerin duygusal ve zihinsel gelişimlerini desteklemek için tasarlanmış özel bir süreçtir.
Eksik dişler, hem estetik hem de fonksiyonel problemlere yol açabilen yaygın bir sorundur.
Ankara’nın gözde semtlerinden biri olan Çayyolu, sadece yaşam kalitesiyle değil, aynı zamanda sunduğu profesyonel sağlık hizmetleriyle de dikkat çekmektedir.
Turizm sektöründe yılların verdiği deneyim ve uzmanlıkla, her türlü ulaşım ihtiyacınızı karşılamak için Shuttle-Transfer hizmeti sunuyoruz.
Lüks ve konforu bir arada sunan şoförlü VIP araç kiralama hizmetimizle, seyahatlerinizi keyfe dönüştürün. Özel tasarlanmış araçlarımız ve deneyimli şoförlerimizle
Turizm sektöründe yılların verdiği deneyim ve uzmanlıkla, her türlü ulaşım ihtiyacınızı karşılamak için Shuttle-Transfer hizmeti sunuyoruz.
Yeni Batı Dinamik Diş polikliniği, ağız ve diş sağlığına yönelik çeşitli tanı ve tedavi hizmetleri sunan sağlık kuruluşudur.
BMW, sadece bir otomobil değil; sürüş keyfi, teknoloji ve mühendisliğin mükemmel birleşimidir.
Ankara’nın gözde semtlerinden biri olan Çayyolu, sadece yaşam kalitesiyle değil, aynı zamanda sunduğu profesyonel sağlık hizmetleriyle de dikkat çekmektedir.
Lüks ve konforu bir arada sunan şoförlü VIP araç kiralama hizmetimizle, seyahatlerinizi keyfe dönüştürün. Özel tasarlanmış araçlarımız ve deneyimli şoförlerimizle
BMW, sadece bir otomobil değil; sürüş keyfi, teknoloji ve mühendisliğin mükemmel birleşimidir.
En iyi deneme bonusu veren siteler ve popüler casino siteleri ile yüksek kazanç fırsatlarını keşfedin. Yeni siteler ve güncel bonuslar sizi bekliyor.
royalbet güncel giriş adresi ile ayrıcalıklı deneme bonusu veren sitelerden faydalan.
Eğitim, her öğrencinin farklı öğrenme tarzlarına ve hızına sahip olduğu bir süreçtir.
Eğitim, her öğrencinin farklı öğrenme tarzlarına ve hızına sahip olduğu bir süreçtir.
Düzenli olarak yapılan genel diş muayeneleri, sağlıklı bir ağız ve güzel bir gülüş için önemli bir adımdır.
Gaziantep Oto Tamirci
Çocukların ağız ve diş sağlığı, yaşam boyu sürecek sağlıklı bir gülüşün temelini oluşturur.
İmplant eksik olan dişlerin yerine dişin fonksiyonunu ve estetiğini tekrar sağlamak amacıyla çene kemiğine yerleştirilen yapay diş köküdür.
Çocukların ağız ve diş sağlığı, yaşam boyu sürecek sağlıklı bir gülüşün temelini oluşturur.
Modern Orta Doğu Koleji Anaokulu, çocukların keşfetme, öğrenme ve kendini ifade etme yolculuğuna özel olarak tasarlanmış bir eğitim ortamı sunar.
Modern Orta Doğu Koleji Anaokulu, çocukların keşfetme, öğrenme ve kendini ifade etme yolculuğuna özel olarak tasarlanmış bir eğitim ortamı sunar.
Ankara’nın gelişen ve yaşam kalitesi yüksek bölgelerinden biri olan Batıkent, psikolojik destek arayan bireyler için çeşitli terapi ve danışmanlık hizmetleri sunan merkezlere ev sahipliği yapmaktadır.
Bademcik ameliyatı, bademciklerin cerrahi olarak çıkarılması işlemidir.
Superbet’e saniyeler içinde güvenli giriş yapmak ve yeni hesap açmak için doğru yerdesiniz.
Ankara’nın gelişen ve yaşam kalitesi yüksek bölgelerinden biri olan Batıkent, psikolojik destek arayan bireyler için çeşitli terapi ve danışmanlık hizmetleri sunan merkezlere ev sahipliği yapmaktadır.
Yaşlandıkça, ince çizgilerin ve kırışıklıkların oluşması, yaşlılık lekelerinin ortaya çıkması ve cildin gevşeyip sarkması gibi zamanın geçtiğini gösteren belirtiler yüzümüzde kaçınılmaz olarak ortaya çıkar.
Bademcikler, boğazın her iki yanında bulunan ve lenfoid dokudan oluşan iki küçük organdır.
Bursa implant tedavisi son yıllarda popülerliğini arttıran bir tedavi yöntemi olmuştur.
Bademcikler, boğazın her iki yanında bulunan ve lenfoid dokudan oluşan iki küçük organdır.
Bursa implant tedavisi son yıllarda popülerliğini arttıran bir tedavi yöntemi olmuştur.
Ankara fraksiyonel CO2 lazer, cilt yenileme ve estetik tedavilerde yaygın olarak kullanılan bir lazer teknolojisidir.
Maskot üretimi kurumsal firmamız Vizyon Maskot tarafından gerçekleştirilen temel faaliyetlerden biridir.
Maskot üretimi kurumsal firmamız Vizyon Maskot tarafından gerçekleştirilen temel faaliyetlerden biridir.
güvenilir slot siteleri ve deneme bonusu rehberi 2025
Maskot üretimi kurumsal firmamız Vizyon Maskot tarafından gerçekleştirilen temel faaliyetlerden biridir.
Akne, cildin yağ bezlerinin aşırı sebum (yağ) üretmesi ve ölü cilt hücrelerinin gözenekleri tıkaması sonucu ortaya çıkan yaygın bir cilt hastalığıdır
Akne, cildin yağ bezlerinin aşırı sebum (yağ) üretmesi ve ölü cilt hücrelerinin gözenekleri tıkaması sonucu ortaya çıkan yaygın bir cilt hastalığıdır
Ağız, diş ve çene cerrahisi, ağız içindeki yumuşak ve sert dokuların hastalıkları, yaralanmaları ve bozukluklarının tanı ve tedavisi ile ilgilenen bir tıp dalıdır.
ankara cam filmi
Batıkent Doruk Koleji, bu alanda öne çıkan; hem akademik hem de sosyal gelişimi esas alan eğitim modeliyle ailelerin güvenle tercih ettiği bir eğitim kurumudur.
Diş eksikliği, hem estetik hem de fonksiyonel açıdan yaşam kalitesini olumsuz etkileyen önemli bir problemdir.
Batıkent Doruk Koleji, bu alanda öne çıkan; hem akademik hem de sosyal gelişimi esas alan eğitim modeliyle ailelerin güvenle tercih ettiği bir eğitim kurumudur.
dermatolog ankara
Batıkent Doruk Koleji, bu alanda öne çıkan; hem akademik hem de sosyal gelişimi esas alan eğitim modeliyle ailelerin güvenle tercih ettiği bir eğitim kurumudur.
yenimahalle özel okul
yenimahalle psikolog
Eksozom cilt tedavisi, son yıllarda popülerlik kazanan ve cilt yenilenmesi, saç dökülmesi gibi estetik ve tıbbi amaçlarla kullanılan bir biyolojik tedavi yöntemidir.
Eksozom cilt tedavisi, son yıllarda popülerlik kazanan ve cilt yenilenmesi, saç dökülmesi gibi estetik ve tıbbi amaçlarla kullanılan bir biyolojik tedavi yöntemidir.
Bir veli olarak çocuğunuzun eğitimi için en doğru kararı vermek istiyorsunuz; biz de bu süreçte yanınızda olmak istiyoruz.
Septorinoplasti, burnun hem estetik hem de fonksiyonel olarak yeniden şekillendirilmesini amaçlayan cerrahi bir operasyondur.
Gastroözofageal reflü hastalığı (GERD), mide içeriğinin yemek borusuna kaçarak yanma, ekşime ve bazen göğüs ağrısı gibi şikâyetlere yol açtığı kronik bir durumdur.
Gastroözofageal reflü hastalığı (GERD), mide içeriğinin yemek borusuna kaçarak yanma, ekşime ve bazen göğüs ağrısı gibi şikâyetlere yol açtığı kronik bir durumdur.
Modern Orta Doğu Koleji Anaokulu, çocukların keşfetme, öğrenme ve kendini ifade etme yolculuğuna özel olarak tasarlanmış bir eğitim ortamı sunar.
Deneme bonusu, bahis tutkunları yeni siteler keşfetme ve oyunları hiçbir risk almadan deneme şansı tanır. 2025 yılı itibarıyla bu bonuslar çok daha fazla
Kanal tedavisi, dişin iç kısmında yer alan pulpa dokusunun iltihaplanması ya da zarar görmesi durumunda uygulanan bir tedavi yöntemidir. Bu işlem, dişi çekmeden kurtarmayı hedefler. Genellikle lokal anestezi altında gerçekleştirilir ve ağrısız bir işlemdir.
Kanal tedavisi, dişin iç kısmında yer alan pulpa dokusunun iltihaplanması ya da zarar görmesi durumunda uygulanan bir tedavi yöntemidir. Bu işlem, dişi çekmeden kurtarmayı hedefler. Genellikle lokal anestezi altında gerçekleştirilir ve ağrısız bir işlemdir.
2 Sınıf İngilizce Testleri
Bostancı’da diş poliklinikleri, ağız ve diş sağlığı hizmetleri sunan bir sağlık kuruluşudur. Bu tür poliklinikler, genellikle birden fazla diş hekiminin birlikte çalıştığı ve en az iki diş ünitesinin bulunduğu yerlerdir.
Bostancı’da diş poliklinikleri, ağız ve diş sağlığı hizmetleri sunan bir sağlık kuruluşudur. Bu tür poliklinikler, genellikle birden fazla diş hekiminin birlikte çalıştığı ve en az iki diş ünitesinin bulunduğu yerlerdir.
istanbul seo ajansı
Bostancı’da diş poliklinikleri, ağız ve diş sağlığı hizmetleri sunan bir sağlık kuruluşudur. Bu tür poliklinikler, genellikle birden fazla diş hekiminin birlikte çalıştığı ve en az iki diş ünitesinin bulunduğu yerlerdir.
pendik diş
pendik diş
Ankara’nın gelişen ve yaşam kalitesi yüksek bölgelerinden biri olan Batıkent,
Egzama, cildin iltihaplanmasıyla karakterize akut veya kronik bir deri hastalığıdır.
Yükseköğretim Kurumları Sınavı (YKS), Türkiye’deki üniversitelere giriş için en önemli aşamadır. YKS, temel yeterlilik testi (TYT) ve alan yeterlilik testi (AYT) olmak üzere iki ana aşamadan oluşur.
Ankara’nın gelişen ve yaşam kalitesi yüksek bölgelerinden biri olan Batıkent,
Yükseköğretim Kurumları Sınavı (YKS), Türkiye’deki üniversitelere giriş için en önemli aşamadır. YKS, temel yeterlilik testi (TYT) ve alan yeterlilik testi (AYT) olmak üzere iki ana aşamadan oluşur.
Sağlık sektörüne özel dijital pazarlama ve iletişim çözümleri sunan Propal; 10 yılı aşkın sektörel deneyimi ve profesyonel kadrosu ile hazır.
Dijital dünyada güçlü bir görünürlük elde etmenin en etkili yolu arama motoru optimizasyonu (SEO) çalışmalarından geçer
Burun, yüzün güzelliğini önemli ölçüde etkileyici bir yapı taşıdır.
Burun estetiği (rinoplasti) burun yapılarının istenilen forma kavuşturulması amacı ile uygulanan cerrahi işlemlerin tümüdür.
Güvenilir bahis siteleri arasinda casibom görmek güzel
Ankara’dan İstanbul’a ambar nakliyesi pek çok farklı araçla yapılabilmektedir.
Kadınların memeleri, yaşlanmanın, kalıtımın, yer çekiminin, hamileliğin, emzirmenin veya kilo kaybının doğal etkileri nedeniyle sarkabilir.
Septum, burun boşluğunu ikiye ayıran kıkırdak ve kemikten oluşan bir perdedir. Bu perdede sağa, sola veya her iki yönde gelişen eğriliklere septum deviasyonu denir.
Ankara’dan İstanbul’a ambar nakliyesi pek çok farklı araçla yapılabilmektedir.
Septum, burun boşluğunu ikiye ayıran kıkırdak ve kemikten oluşan bir perdedir. Bu perdede sağa, sola veya her iki yönde gelişen eğriliklere septum deviasyonu denir.
Septorinoplasti, hem estetik hem de fonksiyonel sorunları aynı anda gidermek için yapılan kapsamlı bir burun ameliyatıdır.
Bursa implant tedavisi fiyatları, çeşitli faktörlere bağlı olarak değişiklik göstermektedir. Bu faktörler şunlardır:
Kadıköy implant tedavisi, eksik dişlerin yerine yerleştirilen yapay diş kökleridir.
Botoks, “Clostridium botulinum” bakterisinden toksinin saflaştırılmasıyla elde edilen bir ilaçtır.
Botoks, “Clostridium botulinum” bakterisinden toksinin saflaştırılmasıyla elde edilen bir ilaçtır.
avukat seo
Botoks, “Clostridium botulinum” bakterisinden toksinin saflaştırılmasıyla elde edilen bir ilaçtır.
Botoks, “Clostridium botulinum” bakterisinden toksinin saflaştırılmasıyla elde edilen bir ilaçtır.
yenimahalle özel okul
İmplant eksik dişleri tamamlamak için çene kemiğine yerleştirilen bir tür vidadır.
Yaşlandıkça, ince çizgilerin ve kırışıklıkların oluşması, yaşlılık lekelerinin ortaya çıkması ve cildin gevşeyip sarkması gibi zamanın geçtiğini gösteren belirtiler yüzümüzde kaçınılmaz olarak ortaya çıkar.
Your article and blog are great. We visit often. I wish you success.
İmplant eksik dişleri tamamlamak için çene kemiğine yerleştirilen bir tür vidadır.
Beytepe diş beyazlatma, dişlerde zamanla oluşan renklenme ve sararmaların giderilmesi için uygulanan estetik bir diş hekimliği işlemidir.
İmplant eksik dişleri tamamlamak için çene kemiğine yerleştirilen bir tür vidadır.
Tüp mide ameliyatı, obezite tedavisinde kullanılan cerrahi bir yöntemdir.
Beytepe diş beyazlatma, dişlerde zamanla oluşan renklenme ve sararmaların giderilmesi için uygulanan estetik bir diş hekimliği işlemidir.
Çocuk terapisi, çocukların duygusal, davranışsal, sosyal ve bilişsel gelişimlerini desteklemek amacıyla uygulanan psikoterapi yöntemidir.
Reflü (Gastroözofageal Reflü Hastalığı), midedeki asit ve sindirim enzimlerinin yemek borusuna geri kaçması sonucu ortaya çıkan kronik bir durumdur. Aşağıda bu hastalığı ayrıntılı şekilde ele alıyoruz:
Çocuk terapisi, çocukların duygusal, davranışsal, sosyal ve bilişsel gelişimlerini desteklemek amacıyla uygulanan psikoterapi yöntemidir.
Arkadaşım tavsiye etmişti, ben de denedim gerçekten casibom sorunsuz çalışıyor.
Arkadaşım tavsiye etmişti, ben de denedim gerçekten casibom sorunsuz çalışıyor.
Your article and blog are great. We visit often. I wish you success.
Meme büyütme ameliyatı, meme implantları veya yağ transferi yoluyla memelerin boyutunu ve dolgunluğunu artırmak amacıyla uygulanan bir estetik cerrahi işlemdir
TYT AYT kursu, YKS sınavına yönelik hazırlık yapmak isteyen öğrencilere sunulan, genellikle kapsamlı bir eğitim programıdır.
Invisalign, şeffaf plaklar adı verilen, özel olarak tasarlanmış bir dizi plastik plak kullanarak dişleri hizalar.
Çocuk terapisi, çocukların duygusal, davranışsal, sosyal ve bilişsel gelişimlerini desteklemek amacıyla uygulanan psikoterapi yöntemidir.
Reflü (Gastroözofageal Reflü Hastalığı), midedeki asit ve sindirim enzimlerinin yemek borusuna geri kaçması sonucu ortaya çıkan kronik bir durumdur. Aşağıda bu hastalığı ayrıntılı şekilde ele alıyoruz:
Meme büyütme ameliyatı, meme implantları veya yağ transferi yoluyla memelerin boyutunu ve dolgunluğunu artırmak amacıyla uygulanan bir estetik cerrahi işlemdir
ankara seramik kaplama
Botoks, “Clostridium botulinum” bakterisinden toksinin saflaştırılmasıyla elde edilen bir ilaçtır.
kadıköy avukat
Botoks, tıbbi adıyla botulinum toksini, kasların geçici olarak hareketini engelleyerek kırışıklıkların oluşmasını önleyen veya mevcut çizgileri azaltan bir enjeksiyon tedavisidir.
Botoks, tıbbi adıyla botulinum toksini, kasların geçici olarak hareketini engelleyerek kırışıklıkların oluşmasını önleyen veya mevcut çizgileri azaltan bir enjeksiyon tedavisidir.
Botoks, yüzümüzde oluşan kırışıklıkların tedavisinde altın standart yöntemdir.
Bir veli olarak çocuğunuzun eğitimi için en doğru kararı vermek istiyorsunuz; biz de bu süreçte yanınızda olmak istiyoruz.
Her çocuk biriciktir ve her çocuğun öğrenme biçimi, ilgisi, gelişim süreci farklıdır. Biz bu farklılıklara saygı duyarak, çocuk merkezli ve bütüncül bir eğitim anlayışı benimsiyoruz.
BMW ve Mini Cooper araçlar, yüksek mühendislik kalitesi ve sürüş keyfiyle öne çıkar
BMW ve Mini Cooper gibi premium segment araçlar, yüksek performanslı motor sistemleriyle öne çıkar.
BMW ve Mini Cooper araçlar, yüksek mühendislik kalitesi ve sürüş keyfiyle öne çıkar
Eğitim, her öğrencinin farklı öğrenme tarzlarına ve hızına sahip olduğu bir süreçtir.
İşlemler lokal anestezi altında yapılabilmektedir.
batıkent özel okul
Thanks for sharing this information.
İşlemler lokal anestezi altında yapılabilmektedir.
İmplant tedavisi, kaybolmuş dişlerin yerine yapay diş köklerinin yerleştirildiği bir diş tedavi yöntemidir.
Psöriazis kronik, immünite (bağışıklık) aracılı inflamatuar bir deri hastalığıdır.
Çocuk terapisi, çocukların duygusal, davranışsal, sosyal ve bilişsel gelişimlerini desteklemek amacıyla uygulanan psikoterapi yöntemidir.
İmplant tedavisi, kaybolmuş dişlerin yerine yapay diş köklerinin yerleştirildiği bir diş tedavi yöntemidir.
Çocuk terapisi, çocukların duygusal, davranışsal, sosyal ve bilişsel gelişimlerini desteklemek amacıyla uygulanan psikoterapi yöntemidir.
Ağız, diş ve çene cerrahisi, ağız içindeki yumuşak ve sert dokuların hastalıkları, yaralanmaları ve bozukluklarının tanı ve tedavisi ile ilgilenen bir tıp dalıdır.
Reflü (Gastroözofageal Reflü Hastalığı), midedeki asit ve sindirim enzimlerinin yemek borusuna geri kaçması sonucu ortaya çıkan kronik bir durumdur.
BMW ve Mini Cooper araçlar, yüksek mühendislik kalitesi ve sürüş keyfiyle öne çıkar
Ağız, diş ve çene cerrahisi, ağız içindeki yumuşak ve sert dokuların hastalıkları, yaralanmaları ve bozukluklarının tanı ve tedavisi ile ilgilenen bir tıp dalıdır.
Reflü (Gastroözofageal Reflü Hastalığı), midedeki asit ve sindirim enzimlerinin yemek borusuna geri kaçması sonucu ortaya çıkan kronik bir durumdur.
Düzenli olarak yapılan genel diş muayeneleri, sağlıklı bir ağız ve güzel bir gülüş için önemli bir adımdır.
Psöriazis kronik, immünite (bağışıklık) aracılı inflamatuar bir deri hastalığıdır.
Uzman Klinik Psikolog Pelin Bülbül Ümitköy Psikolog Çayyolu Psikolog Ankara Psikolog Evlilik Terapisti Evlilik Danışmanı Bireysel Terapi
Ankara Eryaman bölgesinde çocuk ortodonti hizmeti sunan uzman klinikler, çocukların sağlıklı ve estetik bir gülüşe kavuşmasını hedefler.
Ağız, diş ve çene cerrahisi, ağız içindeki yumuşak ve sert dokuların hastalıkları, yaralanmaları ve bozukluklarının tanı ve tedavisi ile ilgilenen bir tıp dalıdır
Eryaman diş implantı, eksik olan dişlerin yerine çene kemiğine yerleştirilen ve üzerine protez diş (kaplama) takılabilen, genellikle titanyumdan yapılan yapay bir diş köküdür.
Ağız, diş ve çene cerrahisi, ağız içindeki yumuşak ve sert dokuların hastalıkları, yaralanmaları ve bozukluklarının tanı ve tedavisi ile ilgilenen bir tıp dalıdır
Psöriazis kronik, immünite (bağışıklık) aracılı inflamatuar bir deri hastalığıdır
Psöriazis kronik, immünite (bağışıklık) aracılı inflamatuar bir deri hastalığıdır
İmplant tedavisi, kaybolmuş dişlerin yerine yapay diş köklerinin yerleştirildiği bir diş tedavi yöntemidir.
İmplant tedavisi, kaybedilen dişlerin yerine doğal diş görünümü ve fonksiyonuna en yakın çözümü sunan modern bir diş tedavi yöntemidir.
BMW ve Mini Cooper araçlar, yüksek mühendislik kalitesi ve sürüş keyfiyle öne çıkar.
Kanal tedavisi, dişin iç kısmında yer alan pulpa dokusunun iltihaplanması ya da zarar görmesi durumunda uygulanan bir tedavi yöntemidir.
İmplant tedavisi, kaybedilen dişlerin yerine doğal diş görünümü ve fonksiyonuna en yakın çözümü sunan modern bir diş tedavi yöntemidir.
Kanal tedavisi, dişin iç kısmında yer alan pulpa dokusunun iltihaplanması ya da zarar görmesi durumunda uygulanan bir tedavi yöntemidir.
Psöriazis kronik, immünite (bağışıklık) aracılı inflamatuar bir deri hastalığıdır
Dental implant, eksik dişlerin yerine kullanılan titanyumdan yapılmış yapay diş kökleridir.
Tüp mide ameliyatı, obezite tedavisinde kullanılan cerrahi bir yöntemdir.
İmplant tedavisi, kaybedilen dişlerin yerine doğal diş görünümü ve fonksiyonuna en yakın çözümü sunan modern bir diş tedavi yöntemidir.
20 yılı aşkın eğitim tecrübemiz ve alanında uzman kadromuz ile sınavlara hazırlıkta yalnız değilsiniz.
Tüp mide ameliyatı, obezite tedavisinde kullanılan cerrahi bir yöntemdir.
İmplant tedavisi, kaybedilen dişlerin yerine yapay diş kökleri yerleştirilmesi işlemidir.
Ankara implant tedavisi, diş kaybı yaşayan bireyler için uygulanan modern bir diş tedavi yöntemidir.
20 yılı aşkın eğitim tecrübemiz ve alanında uzman kadromuz ile sınavlara hazırlıkta yalnız değilsiniz.
Tüp mide ameliyatı, obezite tedavisinde kullanılan cerrahi bir yöntemdir.
İmplant tedavisi, kaybedilen dişlerin yerine yapay diş kökleri yerleştirilmesi işlemidir.
Göz sağlığı, yaşam kalitesini doğrudan etkileyen en önemli unsurlardan biridir.
Diş implantları, eksik dişlerin yerine kullanılan modern ve etkili bir tedavi yöntemidir.
Diş implantları, eksik dişlerin yerine kullanılan modern ve etkili bir tedavi yöntemidir.
Anaokulu olarak çocuklarımızın gelişimini çok yönlü desteklemeyi önemsiyoruz
Anaokulu olarak çocuklarımızın gelişimini çok yönlü desteklemeyi önemsiyoruz
Botoks, tıbbi adıyla Botulinum Toksini, estetik ve medikal amaçlarla kullanılan bir proteindir.
Botoks, tıbbi adıyla Botulinum Toksini, estetik ve medikal amaçlarla kullanılan bir proteindir.
Düzenli olarak yapılan genel diş muayeneleri, sağlıklı bir ağız ve güzel bir gülüş için önemli bir adımdır.
Botoks, “Clostridium botulinum” bakterisinden toksinin saflaştırılmasıyla elde edilen bir ilaçtır.
Your passion for this topic is contagious! After reading your blog post, I can’t wait to learn more.
I stumbled upon your blog post by accident, and I’m so glad I did! It’s rare to find such high-quality content online these days.
Your blog post was a real eye-opener for me. Thank you for challenging my preconceived notions and expanding my worldview.
Diagnostic Process of Head Tremor for Deep Brain Stimulation Surgery in Turkey
Anaokulu olarak çocuklarımızın gelişimini çok yönlü desteklemeyi önemsiyoruz.
Diagnostic Process of Head Tremor for Deep Brain Stimulation Surgery in Turkey
Vitroretinal cerrahi, gözün arka segmentinde yer alan retina ve vitreus adı verilen jelimsi yapının hastalıklarının tanı ve tedavisiyle ilgilenen ileri düzey bir göz cerrahisi alanıdır.
20 yılı aşkın eğitim tecrübemiz ve alanında uzman kadromuz ile sınavlara hazırlıkta yalnız değilsiniz.
Eryaman psikolog hizmetleri, bireylerin ruhsal, duygusal ve davranışsal sorunlarını anlamalarına, çözüm bulmalarına ve yaşam kalitelerini artırmalarına yardımcı olur.
Gülüş tasarımı, diş, diş eti, dudak ve yüz yapısının bir bütün olarak değerlendirilip kişiye özel estetik bir gülüş oluşturma işlemidir.
implant çukurambar
Gülüş tasarımı, diş, diş eti, dudak ve yüz yapısının bir bütün olarak değerlendirilip kişiye özel estetik bir gülüş oluşturma işlemidir.
Great post! Really enjoyed reading this.
BMW ve Mini Cooper gibi özel araçlar, özel ilgi ve uzmanlık gerektirir. Biz de tam olarak bu anlayışla yola çıktık.
BMW ve Mini Cooper gibi özel araçlar, özel ilgi ve uzmanlık gerektirir. Biz de tam olarak bu anlayışla yola çıktık.
Good insights, I’ll keep this in mind.
İmplant tedavisi, eksik dişlerin yerine yapay diş köklerinin yerleştirilmesi işlemidir ve genellikle titanyumdan üretilen vidalar kullanılarak çene kemiğine entegre edilir.
Nice article, keep up the good work!
Etimesgut ilçesine bağlı Bağlıca semtinde öğrencilere özel ders veren birçok eğitmen bulunmaktadır.
Etimesgut ilçesine bağlı Bağlıca semtinde öğrencilere özel ders veren birçok eğitmen bulunmaktadır.
Şu anda hayallerini yaşayan öğrencilerimiz, sizin gibi burada başladılar!
Göz sağlığı, yaşam kalitesini doğrudan etkileyen en önemli unsurlardan biridir.
Septorinoplasti, burnun hem estetik hem de fonksiyonel olarak yeniden şekillendirilmesini amaçlayan cerrahi bir operasyondur.
Psöriazis kronik, immünite (bağışıklık) aracılı inflamatuar bir deri hastalığıdır.
Bu durum, ciltte kabarık, pullu ve kaşıntılı plakların oluşmasına yol açar.
Very helpful, I learned something new today.
Bu durum, ciltte kabarık, pullu ve kaşıntılı plakların oluşmasına yol açar.
Şu anda hayallerini yaşayan öğrencilerimiz, sizin gibi burada başladılar!
Very helpful, I learned something new today.
ankara rinoplasti doktoru
batıkent özel okul
This is useful, thanks for writing it.
YBS Hukuk Büromuz, Adana’da mirasın reddi, tenkis ve vasiyetnamenin iptali davalarında Adana miras avukatı olarak hizmet vermektedir.
YBS Hukuk Bürosu, Adana Boşanma Avukatı olarak hassas boşanma süreçlerinizde haklarınızı koruyarak güvenilir hukuki danışmanlık sağlamaktadır.
Adana YBS Avukatlık Büromuz, Adana’daki ceza davalarında Adana Ceza Avukatı olarak müvekkillerine şeffaf ve sonuç odaklı avukatlık hizmeti vermektedir.
YBS Adana Avukatlık Bürosu, Adana’daki icra takibi ve alacak tahsili süreçlerinizde Adana İcra Avukatı olarak hızlı ve etkin çözümler sunar.
YBS Hukuk, işçi ve işveren uyuşmazlıklarında Adana En İyi İş Hukuku avukatı arayışınızda; Adanaİş Mahkemesi avukatları olarak hizmet vermektedir.
Miras paylaşımı ve veraset ilamı çıkarma gibi hassas süreçlerde, Adana miras hukuku avukatı ekibimizle yanınızdayız.
Trafik kazası sonrası değer kaybı ve hasar tazminatı taleplerinizde uzman Adana Sigorta avukatı kadromuzla hizmetinizdeyiz.
YBS Hukuk | Adana Avukatlık Bürosu, tecrübeli avukat kadrosuyla tüm davalarınızda etkin hukuki hizmet vermektedir.
Adana Avukatlık Büroları
Adana Avukat YBS Hukuk, Ceza, Boşanma, İcra, İş, Miras ve Sigorta Hukuku alanlarında uzman avukatlık hizmetleri sunar.
Hukuki sorunlarınızın çözümü için YBS Hukuk | Adana Avukatlık Bürosu ile iletişime geçin.
İhbar süresi hesaplama ve iş arama izni gibi haklarınızı bilin. 56 gün ihbar süresi olan işçinin hakları nelerdir? Adana İşçi Avukatı ve Adana İş Hukuku Avukatı’ndan bilgi alın.
İhbar süresinde iş arama izni, işçinin yasal hakkıdır. İş arama izni toplu kullanma şartları ve günlük iş arama izni kaç gün olduğu konusunda bilgi edinin.
Evlilik nedeniyle işten ayrılma veya sağlık nedeniyle işten ayrılma dilekçesi, işçinin haklı fesih sebepleri arasındadır. Adana İş Hukuku Avukatı ile süreci yönetin.
Ölüm izni kaç gündür ve kimlere verilir? İşçi haklarınızı tam öğrenin. YBS Hukuk, Adana İşçi Avukatı ve Adana İş Hukuku Avukatı olarak yasal süreçlerinizde yanınızdadır.
Tek celsede boşanma sebepleri, genellikle anlaşmalı davalarda görülür. Adana anlaşmalı boşanma avukatı, taraflar arası protokolü hukuki güvenceyle hazırlar.
boşanma davası nerede açılır
HAGB kararı nedir? Belirli şartlarda (hagb şartları) cezanın 5 yıl denetimle ertelenmesidir. Adli para cezası HAGB kararına da konu olabilir.
Adana ceza avukatı, uyuşturucu kullanma cezası ile uyuşturucu satma cezası arasındaki yasal ayrımı bilir. Uyuşturucu madde kullanma suçu ve ticareti farklı değerlendirilir.
Uyuşturucu davasında ilk mahkeme ne zaman olur? Süreç hızlı işleyebilir. Uyuşturucudan beraat edenler, genellikle güçlü savunma yapanlardır. Adana ceza avukatı desteği alın.
Mahkemede beraat etmek sonrası, haksız tutukluluk varsa beraat tazminatı gündeme gelir. Beraat tazminatı ne kadar? Bu, yasal şartlara ve sürelere göre değişir.
Her çocuk biriciktir ve her çocuğun öğrenme biçimi, ilgisi, gelişim süreci farklıdır.
Göz sağlığı, yaşam kalitesini doğrudan etkileyen en önemli unsurlardan biridir. Görme kusurları arasında yer alan katarakt ve refraktif bozukluklar, günümüzde gelişmiş cerrahi tekniklerle etkin şekilde tedavi edilebilmektedir.
Her çocuk biriciktir ve her çocuğun öğrenme biçimi, ilgisi, gelişim süreci farklıdır.
BMW araçlar, diğer otomobillere kıyasla daha hassas elektronik sistemlere ve yüksek teknolojili motor yapılarına sahiptir.
Taktik Tabanca Eğitimleri, modern atış teknikleri ve güvenli silah kullanımı esas alınarak tasarlanmış, her seviyede katılımcıya uygun kapsamlı programlardır.
Modern Orta Doğu Koleji Anaokulu, çocukların keşfetme, öğrenme ve kendini ifade etme yolculuğuna özel olarak tasarlanmış bir eğitim ortamı sunar.
Göz sağlığı, yaşam kalitesini doğrudan etkileyen en önemli unsurlardan biridir. Görme kusurları arasında yer alan katarakt ve refraktif bozukluklar, günümüzde gelişmiş cerrahi tekniklerle etkin şekilde tedavi edilebilmektedir.
Personel Takip Otomasyonu: İş Gücü Yönetiminde Dijital Dönüşüm İşletmelerin başarısında insan kaynağının verimli yönetimi kritik bir rol oynar.
İşletmelerde Verimliliğin Anahtarı Bir işletmede verimliliğin temel taşlarından biri, çalışanların çalışma düzeninin doğru şekilde takip edilmesidir.
Personel Takip Otomasyonu: İş Gücü Yönetiminde Dijital Dönüşüm İşletmelerin başarısında insan kaynağının verimli yönetimi kritik bir rol oynar.
gates of olympus dede ile bonus kazan
BMW araçlar, diğer otomobillere kıyasla daha hassas elektronik sistemlere ve yüksek teknolojili motor yapılarına sahiptir.
Merhaba, web sitenizi çok beğendim. Tekrar ziyaret edeceğim.
Merhaba, web sitenizi çok beğendim. Tekrar ziyaret edeceğim.
Dental implant, eksik dişlerin yerine kullanılan titanyumdan yapılmış yapay diş kökleridir.
Gülüş tasarımı, estetik diş hekimliğinin en popüler uygulamalarından biridir.
Düzenli olarak yapılan genel diş muayeneleri, sağlıklı bir ağız ve güzel bir gülüş için önemli bir adımdır.
Botoks, yüzümüzde oluşan kırışıklıkların tedavisinde altın standart yöntemdir.
Dental implant, eksik dişlerin yerine kullanılan titanyumdan yapılmış yapay diş kökleridir.
Botoks, yüzümüzde oluşan kırışıklıkların tedavisinde altın standart yöntemdir.
Ankara’nın hızla gelişen bölgelerinden biri olan Çakırlar, sadece doğa ile iç içe yapısı değil, aynı zamanda kaliteli eğitim kurumlarıyla da dikkat çekiyor.
Kreşimizde uygulanan eğitim sistemi, çocukların bilişsel, duygusal, sosyal ve fiziksel gelişimlerini desteklemek amacıyla özel olarak tasarlanmıştır.
Modern Orta Doğu Koleji Anaokulu, çocukların keşfetme, öğrenme ve kendini ifade etme yolculuğuna özel olarak tasarlanmış bir eğitim ortamı sunar.
İmplant tedavisi, kaybedilen dişlerin yerine doğal diş görünümü ve fonksiyonuna en yakın çözümü sunan modern bir diş tedavi yöntemidir.
Her çocuk biriciktir ve her çocuğun öğrenme biçimi, ilgisi, gelişim süreci farklıdır.
Modern Orta Doğu Koleji Anaokulu, çocukların keşfetme, öğrenme ve kendini ifade etme yolculuğuna özel olarak tasarlanmış bir eğitim ortamı sunar.
İmplant tedavisi, kaybedilen dişlerin yerine doğal diş görünümü ve fonksiyonuna en yakın çözümü sunan modern bir diş tedavi yöntemidir.
Gülüş tasarımı, estetik diş hekimliğinin en popüler uygulamalarından biridir.
Ankara’nın hızla gelişen bölgelerinden biri olan Çakırlar, sadece doğa ile iç içe yapısı değil, aynı zamanda kaliteli eğitim kurumlarıyla da dikkat çekiyor.
Yaşlandıkça, ince çizgilerin ve kırışıklıkların oluşması, yaşlılık lekelerinin ortaya çıkması
İmplant tedavisi, kaybedilen dişlerin yerine doğal diş görünümü ve fonksiyonuna en yakın çözümü sunan modern bir diş tedavi yöntemidir.
Avusturya Eğitim Danışmanlığı olarak misyonumuz, öğrencilere en iyi eğitim olanaklarını sunmak ve onları bu önemli karar sürecinde adım adım yönlendirmektir.
Çağın gereklerini değerleriyle yorumlayarak içinde yaşadığı topluma örnek olup yön verebilecek vizyon sahibi gençler yetiştirmek amacıyla bu yola çıktık.
LGS, öğrencilerin yalnızca akademik bilgilerini değil, aynı zamanda analitik düşünme, problem çözme ve zaman yönetimi becerilerini de ölçen bir sınavdır.
Yaşlandıkça, ince çizgilerin ve kırışıklıkların oluşması, yaşlılık lekelerinin ortaya çıkması
Modern Orta Doğu Koleji Anaokulu, çocukların keşfetme, öğrenme ve kendini ifade etme yolculuğuna özel olarak tasarlanmış bir eğitim ortamı sunar.
Avusturya Eğitim Danışmanlığı olarak misyonumuz, öğrencilere en iyi eğitim olanaklarını sunmak ve onları bu önemli karar sürecinde adım adım yönlendirmektir.
Çağın gereklerini değerleriyle yorumlayarak içinde yaşadığı topluma örnek olup yön verebilecek vizyon sahibi gençler yetiştirmek amacıyla bu yola çıktık.
LGS, öğrencilerin yalnızca akademik bilgilerini değil, aynı zamanda analitik düşünme, problem çözme ve zaman yönetimi becerilerini de ölçen bir sınavdır.
Bir işletmede insan kaynakları süreçlerinin en önemli parçalarından biri, çalışanların izin yönetimidir
Yaşlandıkça, ince çizgilerin ve kırışıklıkların oluşması,
Antalya Trafik Kazası Avukatı
Dental implant, eksik dişlerin yerine kullanılan titanyumdan yapılmış yapay diş kökleridir.
Tel tedavisi, ortodonti olarak da bilinen ve dişlerin ve çenenin düzeltilmesi için kullanılan bir diş hekimliği yöntemidir.
Tel tedavisi, ortodonti olarak da bilinen ve dişlerin ve çenenin düzeltilmesi için kullanılan bir diş hekimliği yöntemidir.
Tel tedavisi, ortodonti olarak da bilinen ve dişlerin ve çenenin düzeltilmesi için kullanılan bir diş hekimliği yöntemidir.
Thanks for sharing this information.
Dental implant, eksik dişlerin yerine kullanılan titanyumdan yapılmış yapay diş kökleridir.
Ankara’nın gelişen ve yaşam kalitesi yüksek bölgelerinden biri olan Batıkent, psikolojik destek arayan bireyler için çeşitli terapi ve danışmanlık hizmetleri sunan merkezlere ev sahipliği yapmaktadır
Loved this post, very informative.
Thanks! I found this very helpful.
Tüp mide ameliyatı, obezite tedavisinde kullanılan cerrahi bir yöntemdir.
Merhaba, web sitenizi çok beğendim. Tekrar ziyaret edeceğim.
Merhaba, web sitenizi çok beğendim. Tekrar ziyaret edeceğim.
Merhaba, web sitenizi çok beğendim. Tekrar ziyaret edeceğim.
Hello, I like your site very much. I will visit again.
Merhaba, web sitenizi çok beğendim. Tekrar ziyaret edeceğim.
Merhaba, web sitenizi çok beğendim. Tekrar ziyaret edeceğim.
Merhaba, web sitenizi çok beğendim. Tekrar ziyaret edeceğim.
Hello, I like your site very much. I will visit again.
Merhaba, web sitenizi çok beğendim. Tekrar ziyaret edeceğim.
Merhaba, web sitenizi çok beğendim. Tekrar ziyaret edeceğim.
Hello, I like your site very much. I will visit again.
Merhaba, web sitenizi çok beğendim. Tekrar ziyaret edeceğim.
Sıvı yüz germe (Liquid Facelift), cerrahi işlem gerektirmeden yüz hatlarını gençleştirmeyi, cilde hacim kazandırmayı ve sarkmaları toparlamayı amaçlayan modern bir estetik uygulamadır.
Botoks, yüzümüzde oluşan kırışıklıkların tedavisinde altın standart yöntemdir.
Ankara İstanbul arası ambar arıyorsanız muhtemelen kargo ile gönderemeyeceğiniz kadar büyük bir yüke sahipsiniz.
Göz sağlığı, yaşam kalitesini doğrudan etkileyen en önemli unsurlardan biridir.
Sarkmış ve şişmiş göz kapakları tüm yüzün yaşlı, hüzünlü ve yorgun gözükmesine neden olur.
Great post! Really enjoyed reading this.
Merhaba, web sitenizi çok beğendim. Tekrar ziyaret edeceğim.
Merhaba, web sitenizi çok beğendim. Tekrar ziyaret edeceğim.
Merhaba, web sitenizi çok beğendim. Tekrar ziyaret edeceğim.
Hello, I like your site very much. I will visit again.
Hello, I like your site very much. I will visit again.
Merhaba, web sitenizi çok beğendim. Tekrar ziyaret edeceğim.
Hello, I like your site very much. I will visit again.
Hello, I like your site very much. I will visit again.
Merhaba, web sitenizi çok beğendim. Tekrar ziyaret edeceğim.
Merhaba, web sitenizi çok beğendim. Tekrar ziyaret edeceğim.
Merhaba, web sitenizi çok beğendim. Tekrar ziyaret edeceğim.
Merhaba, web sitenizi çok beğendim. Tekrar ziyaret edeceğim.
Merhaba, web sitenizi çok beğendim. Tekrar ziyaret edeceğim.
Hello, I like your site very much. I will visit again.
Merhaba, web sitenizi çok beğendim. Tekrar ziyaret edeceğim.
Yapılan botoksun (BonTA) etkisi zamanla azalacak ve sinirler, çalışmaya veya kasılmaya başlamak için bu sinyalleri kaslara tekrar gönderebilecek.
Sıvı yüz germe (Liquid Facelift), cerrahi işlem gerektirmeden yüz hatlarını gençleştirmeyi, cilde hacim kazandırmayı ve sarkmaları toparlamayı amaçlayan modern bir estetik uygulamadır.
Kurum olarak başarının ancak güçlü bir kadro ile mümkün olacağı bilinciyle profesyonel eğitimin, alanında uzman deneyimli ve dinamik öğretmenlerle eğitimin doğru adresini oluşturur.
Yaşlandıkça, ince çizgilerin ve kırışıklıkların oluşması, yaşlılık lekelerinin ortaya çıkması ve cildin gevşeyip sarkması gibi zamanın geçtiğini gösteren belirtiler yüzümüzde kaçınılmaz olarak ortaya çıkar.
Yapılan botoksun (BonTA) etkisi zamanla azalacak ve sinirler, çalışmaya veya kasılmaya başlamak için bu sinyalleri kaslara tekrar gönderebilecek.
This is useful, thanks for writing it. 🙂
Thanks! I found this very helpful. 🙂
Thanks! I found this very helpful. 🙂
Appreciate it! I’ll take a look right away 🙂
Ankara fraksiyonel CO2 lazer, cilt yenileme ve estetik tedavilerde yaygın olarak kullanılan bir lazer teknolojisidir.
Çocuğunuzun geleceği için en doğru kararı vermek istiyorsanız, Ankara’daki kolej seçeneklerini değerlendirirken sadece akademik başarıya değil, eğitim anlayışına ve vizyonuna da dikkat etmelisiniz.
Her çocuk biriciktir ve her çocuğun öğrenme biçimi, ilgisi, gelişim süreci farklıdır.
Gülüş tasarımı, diş, diş eti, dudak ve yüz yapısının bir bütün olarak değerlendirilip kişiye özel estetik bir gülüş oluşturma işlemidir.
Eryaman psikolog hizmetleri, bireylerin ruhsal, duygusal ve davranışsal sorunlarını anlamalarına, çözüm bulmalarına ve yaşam kalitelerini artırmalarına yardımcı olur.
Ankara fraksiyonel CO2 lazer, cilt yenileme ve estetik tedavilerde yaygın olarak kullanılan bir lazer teknolojisidir.
Çocuğunuzun geleceği için en doğru kararı vermek istiyorsanız, Ankara’daki kolej seçeneklerini değerlendirirken sadece akademik başarıya değil, eğitim anlayışına ve vizyonuna da dikkat etmelisiniz.
Her çocuk biriciktir ve her çocuğun öğrenme biçimi, ilgisi, gelişim süreci farklıdır.
Çocuğunuzun geleceği için en doğru kararı vermek istiyorsanız, Ankara’daki kolej seçeneklerini değerlendirirken sadece akademik başarıya değil, eğitim anlayışına ve vizyonuna da dikkat etmelisiniz.
Her çocuk biriciktir ve her çocuğun öğrenme biçimi, ilgisi, gelişim süreci farklıdır.
Gülüş tasarımı, diş, diş eti, dudak ve yüz yapısının bir bütün olarak değerlendirilip kişiye özel estetik bir gülüş oluşturma işlemidir.
Kreşimizde uygulanan eğitim sistemi, çocukların bilişsel, duygusal, sosyal ve fiziksel gelişimlerini desteklemek amacıyla özel olarak tasarlanmıştır.
Ankara’da implant tedavisi, diş hekimliğinde kayıp dişlerin yerine konulan yapay diş kökleriyle gerçekleştirilen modern ve etkili bir tedavi yöntemidir.
Çocuğunuz için hem güvenli hem de eğitici bir ortam arıyorsanız, Etimesgut’a yakın konumuyla Küçük Dahiler Anaokulu, sizin ve çocuğunuzun beklentilerini fazlasıyla karşılayacak bir eğitim yuvasıdır.
Eksozom cilt tedavisi, son yıllarda popülerlik kazanan ve cilt yenilenmesi, saç dökülmesi gibi estetik ve tıbbi amaçlarla kullanılan bir biyolojik tedavi yöntemidir.
Eksozom cilt tedavisi, son yıllarda popülerlik kazanan ve cilt yenilenmesi, saç dökülmesi gibi estetik ve tıbbi amaçlarla kullanılan bir biyolojik tedavi yöntemidir.
Evet, estetik burun ameliyatlarının (rinoplastilerin) zorluk dereceleri birbirinden oldukça farklıdır.
Çocuğunuz için hem güvenli hem de eğitici bir ortam arıyorsanız, Etimesgut’a yakın konumuyla Küçük Dahiler Anaokulu, sizin ve çocuğunuzun beklentilerini fazlasıyla karşılayacak bir eğitim yuvasıdır.
Eksozom cilt tedavisi, son yıllarda popülerlik kazanan ve cilt yenilenmesi, saç dökülmesi gibi estetik ve tıbbi amaçlarla kullanılan bir biyolojik tedavi yöntemidir.
Diş implantları, eksik dişlerin yerine kullanılan modern ve etkili bir tedavi yöntemidir. Titanyumdan yapılan bu yapay diş kökleri, çene kemiğine yerleştirilerek doğal dişlere benzer bir görünüm ve işlev sağlar.
Evet, estetik burun ameliyatlarının (rinoplastilerin) zorluk dereceleri birbirinden oldukça farklıdır.
Septum, burun boşluğunu ikiye ayıran kıkırdak ve kemikten oluşan bir perdedir. Bu perdede sağa, sola veya her iki yönde gelişen eğriliklere septum deviasyonu denir.
İmplant tedavisi, kaybedilen dişlerin yerine doğal diş görünümü ve fonksiyonuna en yakın çözümü sunan modern bir diş tedavi yöntemidir.
Septum, burun boşluğunu ikiye ayıran kıkırdak ve kemikten oluşan bir perdedir. Bu perdede sağa, sola veya her iki yönde gelişen eğriliklere septum deviasyonu denir.
Doruk Eğitim Kurumları dinamik, deneyimli ve güçlü kadrosuyla yenilikçi eğitim programları ve alanında öncü bir sınav sistemiyle hayallerinize ulaştırmakta ve etkin rehberlik sistemiyle size en büyük yardımcıdır.
Konuların birbiri ile yakından bağlantılı olduğu matematik dersinde başarılı olabilmek için her bir konuyu öğrenmeniz gerekir.
Yüzümüzün genel görünümünde kulaklarımızın yeri sanıldığından çok daha önemlidir.
Meme büyütme ameliyatı, meme implantları veya yağ transferi yoluyla memelerin boyutunu ve dolgunluğunu artırmak amacıyla uygulanan bir estetik cerrahi işlemdir.
Konuların birbiri ile yakından bağlantılı olduğu matematik dersinde başarılı olabilmek için her bir konuyu öğrenmeniz gerekir.
Meme büyütme ameliyatı, meme implantları veya yağ transferi yoluyla memelerin boyutunu ve dolgunluğunu artırmak amacıyla uygulanan bir estetik cerrahi işlemdir.
thanks for content
Ancak bu performansın sürdürülebilmesi için düzenli periyodik bakım büyük önem taşır.
BMW ve Mini Cooper araçlar, yüksek mühendislik kalitesi ve sürüş keyfiyle öne çıkar.
BMW ve Mini Cooper araçlar, yüksek mühendislik kalitesi ve sürüş keyfiyle öne çıkar.
Ağız, diş ve çene cerrahisi, ağız içindeki yumuşak ve sert dokuların hastalıkları, yaralanmaları ve bozukluklarının tanı ve tedavisi ile ilgilenen bir tıp dalıdır.
Septum, burun boşluğunu ikiye ayıran kıkırdak ve kemikten oluşan bir perdedir. Bu perdede sağa, sola veya her iki yönde gelişen eğriliklere septum deviasyonu denir.
Botoks, tıbbi adıyla botulinum toksini, kasların geçici olarak hareketini engelleyerek kırışıklıkların oluşmasını önleyen veya mevcut çizgileri azaltan bir enjeksiyon tedavisidir.
Cilt lekeleri; güneş maruziyeti, hormonal değişiklikler, akne sonrası izler, yaşlanma ve genetik faktörler gibi birçok nedenle ortaya çıkabilen yaygın bir dermatolojik sorundur.
Ağız, diş ve çene cerrahisi, ağız içindeki yumuşak ve sert dokuların hastalıkları, yaralanmaları ve bozukluklarının tanı ve tedavisi ile ilgilenen bir tıp dalıdır.
Botoks, tıbbi adıyla botulinum toksini, kasların geçici olarak hareketini engelleyerek kırışıklıkların oluşmasını önleyen veya mevcut çizgileri azaltan bir enjeksiyon tedavisidir.
Ağız, diş ve çene cerrahisi, ağız içindeki yumuşak ve sert dokuların hastalıkları, yaralanmaları ve bozukluklarının tanı ve tedavisi ile ilgilenen bir tıp dalıdır.
Septum, burun boşluğunu ikiye ayıran kıkırdak ve kemikten oluşan bir perdedir. Bu perdede sağa, sola veya her iki yönde gelişen eğriliklere septum deviasyonu denir.
Diş implantları, eksik dişlerin yerine kullanılan modern ve etkili bir tedavi yöntemidir.
Gülüş tasarımı, estetik diş hekimliğinin en popüler uygulamalarından biridir.
Cilt lekeleri; güneş maruziyeti, hormonal değişiklikler, akne sonrası izler, yaşlanma ve genetik faktörler gibi birçok nedenle ortaya çıkabilen yaygın bir dermatolojik sorundur.
Diş implantları, eksik dişlerin yerine kullanılan modern ve etkili bir tedavi yöntemidir.
Ankara’nın gelişen ve yaşam kalitesi yüksek bölgelerinden biri olan Batıkent, psikolojik destek arayan bireyler için çeşitli terapi ve danışmanlık hizmetleri sunan merkezlere ev sahipliği yapmaktadır.
Ankara’nın gelişen ve yaşam kalitesi yüksek bölgelerinden biri olan Batıkent, psikolojik destek arayan bireyler için çeşitli terapi ve danışmanlık hizmetleri sunan merkezlere ev sahipliği yapmaktadır.
Özellikle estetik dermatoloji ve kozmetik tıpta yaygın olarak kullanılan, güvenli ve etkili bir yöntemdir.
Ankara implant tedavisi, diş kaybı yaşayan bireyler için uygulanan modern bir diş tedavi yöntemidir.
Özellikle estetik dermatoloji ve kozmetik tıpta yaygın olarak kullanılan, güvenli ve etkili bir yöntemdir.
Samsun mezoterapi, cildin ihtiyaç duyduğu vitamin, mineral, aminoasit, hyaluronik asit ve antioksidanların mikro iğneler aracılığıyla doğrudan dermis tabakasına verilmesi esasına dayanan modern bir cilt yenileme yöntemidir.
Ege’nin incisi İzmir’in tarihi ve kültürel zenginliklerinin yanı sıra, tatil planlarında altın alternatif olmasını sağlayan koy ve plajları; İzmir’i tatil severler için uğrak noktalardan biri haline getirmiştir.
Somon DNA Aşısı, cildin yaşlanma belirtilerini azaltmak, parlaklık ve nem kazandırmak amacıyla uygulanan anti-aging destekli bir mezoterapi yöntemidir.
İzmir Haberleri
Ege’nin incisi İzmir’in tarihi ve kültürel zenginliklerinin yanı sıra, tatil planlarında altın alternatif olmasını sağlayan koy ve plajları; İzmir’i tatil severler için uğrak noktalardan biri haline getirmiştir.
Ankara’da implant tedavisi, diş hekimliğinde kayıp dişlerin yerine konulan yapay diş kökleriyle gerçekleştirilen modern ve etkili bir tedavi yöntemidir. G
Diş implantı, kaybedilen dişlerin yerine doğal diş kökü görevini üstlenen titanyum vidalarla yapılan modern bir tedavi yöntemidir.
Ankara’da implant tedavisi, diş hekimliğinde kayıp dişlerin yerine konulan yapay diş kökleriyle gerçekleştirilen modern ve etkili bir tedavi yöntemidir. G
Diş implantı, kaybedilen dişlerin yerine doğal diş kökü görevini üstlenen titanyum vidalarla yapılan modern bir tedavi yöntemidir.
Eksozomlar, hücrelerin birbirleriyle haberleşmesini sağlayan mikroskobik veziküllerdir.
Matematik, öğrencilerin akademik başarı yolculuğunda en kritik derslerden biridir.
Şiddetli diş ağrısı, genellikle diş minesinde veya diş etlerinde meydana gelen problemlerden kaynaklanır.
Diş sağlığı, genel sağlığın ayrılmaz bir parçasıdır. Ümitköy’de hizmet veren diş polikliniğimizde, hem yetişkinlere hem de çocuklara yönelik kapsamlı ağız ve diş sağlığı çözümleri sunuyoruz.
Eğitim, her öğrencinin farklı öğrenme tarzlarına ve hızına sahip olduğu bir süreçtir.
Uzman Ders Öğretmenlerinden Sınırsız Birebir Etüt Verilir.
Rinoplasti, burun estetiği veya burun ameliyatı olarak da bilinen cerrahi bir prosedürdür. Bu işlem, kişinin burun şeklini ve boyutunu değiştirmeyi amaçlar
Matematik, eğitim hayatının her aşamasında önemli bir yere sahip olan, analitik düşünme ve problem çözme becerilerini geliştiren temel derslerden biridir.
Uzman Ders Öğretmenlerinden Sınırsız Birebir Etüt Verilir. Uzman Rehber Öğretmenlerinden Psikolojik Destek Verilir.
Ankara’nın hızla gelişen ilçelerinden biri olan Yenimahalle, sadece sosyal yaşam ve ulaşım olanaklarıyla değil, aynı zamanda profesyonel psikolojik danışmanlık hizmetleriyle de dikkat çekiyor.
BMW ve Mini Cooper gibi özel araçlar, özel ilgi ve uzmanlık gerektirir. Biz de tam olarak bu anlayışla yola çıktık.
Çocuğunuzun geleceği için en doğru kararı vermek istiyorsanız,
Matematik, eğitim hayatının her aşamasında önemli bir yere sahip olan, analitik düşünme ve problem çözme becerilerini geliştiren temel derslerden biridir.
BMW ve Mini Cooper gibi özel araçlar, özel ilgi ve uzmanlık gerektirir. Biz de tam olarak bu anlayışla yola çıktık.
Diş kaybı, hem estetik hem de fonksiyonel açıdan yaşam kalitesini önemli ölçüde etkileyen bir durumdur
türkiyenin en iyi smm paneli
Diş kaybı, hem estetik hem de fonksiyonel açıdan yaşam kalitesini önemli ölçüde etkileyen bir durumdur
Uzman Ders Öğretmenlerinden Sınırsız Birebir Etüt Verilir.
Ankara’nın hızla gelişen ilçelerinden biri olan Yenimahalle, sadece sosyal yaşam ve ulaşım olanaklarıyla değil, aynı zamanda profesyonel psikolojik danışmanlık hizmetleriyle de dikkat çekiyor.
Göz altı ışık dolgusu, göz çevresindeki yorgun, çökmüş ve koyu halkalı görünümü azaltmayı amaçlayan modern bir estetik uygulamadır.
Rinoplasti ve septorinoplasti ameliyatı burnun şeklinin ve fonksiyonunun düzeltilmesi amacıyla yapılan cerrahi bir işlemdir.
Göz altı ışık dolgusu, göz çevresindeki yorgun, çökmüş ve koyu halkalı görünümü azaltmayı amaçlayan modern bir estetik uygulamadır.
Rinoplasti ve septorinoplasti ameliyatı burnun şeklinin ve fonksiyonunun düzeltilmesi amacıyla yapılan cerrahi bir işlemdir.
Ev ortamına yakın oluşturulmuş uyuma ortamında, gece uyku ile ilişkili tüm kayıtların, daha sonra incelenmek üzere bilgisayara kaydedildiği merkezdir.
Ankara’da çocuğunuz için en doğru özel okulu seçmek, onun akademik başarısı kadar kişisel gelişimi açısından da büyük önem taşır.
Kadıköy Kozyatağı diş implantı, eksik dişlerin yerine konulan yapay diş kökleridir. Titanium veya zirkonyum gibi biyouyumlu malzemelerden üretilen bu vidalar, çene kemiğine cerrahi olarak yerleştirilir ve doğal dişlerin işlevini yerine getirir.
Diş implantı, eksik dişlerin yerine konması amacıyla çene kemiğine yerleştirilen yapay diş kökleridir. Genellikle titanyum gibi biyolojik olarak uyumlu malzemelerden üretilir ve bu sayede vücut tarafından kabul edilir.
Botoks, yüzümüzde oluşan kırışıklıkların tedavisinde altın standart yöntemdir.
Reflü tedavisinin amacı, hastanın yaşam kalitesini artırmak, komplikasyon riskini azaltmak ve semptomları kontrol altına almaktır.
Botoks, tıbbi adıyla botulinum toksini, kasların geçici olarak hareketini engelleyerek kırışıklıkların oluşmasını önleyen veya mevcut çizgileri azaltan bir enjeksiyon tedavisidir.
Botoks, yüzümüzde oluşan kırışıklıkların tedavisinde altın standart yöntemdir.
Reflü tedavisinin amacı, hastanın yaşam kalitesini artırmak, komplikasyon riskini azaltmak ve semptomları kontrol altına almaktır.
Diş sağlığında bazı durumlar beklemeye gelmez.
Ev ortamına yakın oluşturulmuş uyuma ortamında, gece uyku ile ilişkili tüm kayıtların, daha sonra incelenmek üzere bilgisayara kaydedildiği merkezdir.
Diş sağlığında bazı durumlar beklemeye gelmez.
Reflü tedavisinin amacı, hastanın yaşam kalitesini artırmak, komplikasyon riskini azaltmak ve semptomları kontrol altına almaktır.
Botoks, tıbbi adıyla botulinum toksini, kasların geçici olarak hareketini engelleyerek kırışıklıkların oluşmasını önleyen veya mevcut çizgileri azaltan bir enjeksiyon tedavisidir.
Ferah bekleme salonu, hijyenik klinikleri ve alanında uzman diş hekimlerimiz ile diş tedavileriniz için güvenle başvurabileceğiniz bir sağlık merkezi olmak en büyük hedefimizdir.
Akne, cildin yağ bezlerinin aşırı sebum (yağ) üretmesi ve ölü cilt hücrelerinin gözenekleri tıkaması sonucu ortaya çıkan yaygın bir cilt hastalığıdır.
Ferah bekleme salonu, hijyenik klinikleri ve alanında uzman diş hekimlerimiz ile diş tedavileriniz için güvenle başvurabileceğiniz bir sağlık merkezi olmak en büyük hedefimizdir.
Eksozom cilt tedavisi, son yıllarda popülerlik kazanan ve cilt yenilenmesi, saç dökülmesi gibi estetik ve tıbbi amaçlarla kullanılan bir biyolojik tedavi yöntemidir.
Kanal tedavisi, dişin iç kısmında yer alan sinir ve damar dokusunun (pulpa) iltihaplanması veya enfekte olması durumunda uygulanan bir tedavi yöntemidir.
Türkiye’de gerçekleştirilen mal ve hizmet teslimleri katma değer vergisine tabiidir.
Ankara’nın hızla gelişen bölgelerinden biri olan Çakırlar, sadece doğa ile iç içe yapısı değil, aynı zamanda kaliteli eğitim kurumlarıyla da dikkat çekiyor
Ankara’nın hızla gelişen bölgelerinden biri olan Çakırlar, sadece doğa ile iç içe yapısı değil, aynı zamanda kaliteli eğitim kurumlarıyla da dikkat çekiyor
Ferah bekleme salonu, hijyenik klinikleri ve alanında uzman diş hekimlerimiz ile diş tedavileriniz için güvenle başvurabileceğiniz bir sağlık merkezi olmak en büyük hedefimizdir.
Türkiye’de gerçekleştirilen mal ve hizmet teslimleri katma değer vergisine tabiidir.
Uzman Ders Öğretmenlerinden Sınırsız Birebir Etüt Verilir. Uzman Rehber Öğretmenlerinden Psikolojik Destek Verilir.
Dental implant tedavisi kaybedilen dişlerin yerlerine diş kökünü taklit eden titanyum (son yıllarda zirkonyum da kullanılmaktadır.) vidalardır
Eryaman psikolog hizmetleri, bireylerin ruhsal, duygusal ve davranışsal sorunlarını anlamalarına, çözüm bulmalarına ve yaşam kalitelerini artırmalarına yardımcı olur.
Kadıköy, İstanbul’un en hareketli ve popüler semtlerinden biri olmasının yanı sıra, estetik ve güzellik alanında da birçok yeniliği barındırıyor
7, 8, 9. Sınıf Olarak 12 Kişilik Homojen Gruplar, Deneyimli Kadro, Yeni Nesil Yayın Desteği, Birebir Etütler, Ders Çalışma Kütüphaneleri Vardır.
Dental implant tedavisi kaybedilen dişlerin yerlerine diş kökünü taklit eden titanyum (son yıllarda zirkonyum da kullanılmaktadır.) vidalardır
Almanca dil seviyenizi doğru bir şekilde belirlemek, size en uygun eğitim programını seçmenize yardımcı olur.
Eryaman psikolog hizmetleri, bireylerin ruhsal, duygusal ve davranışsal sorunlarını anlamalarına, çözüm bulmalarına ve yaşam kalitelerini artırmalarına yardımcı olur.
7, 8, 9. Sınıf Olarak 12 Kişilik Homojen Gruplar, Deneyimli Kadro, Yeni Nesil Yayın Desteği, Birebir Etütler, Ders Çalışma Kütüphaneleri Vardır.
Almanca dil seviyenizi doğru bir şekilde belirlemek, size en uygun eğitim programını seçmenize yardımcı olur.
Landini alternatör
Psikolojik sorunlar sadece travma ya da ağır depresyon durumlarında değil, günlük yaşamda karşılaştığımız kaygı, stres, ilişki sorunları, iş yorgunluğu ve özgüven problemleri gibi durumlarda da ortaya çıkabilir.
Dental implant tedavisi kaybedilen dişlerin yerlerine diş kökünü taklit eden titanyum (son yıllarda zirkonyum da kullanılmaktadır.) vidalardır
Eryaman psikolog hizmetleri, bireylerin ruhsal, duygusal ve davranışsal sorunlarını anlamalarına, çözüm bulmalarına ve yaşam kalitelerini artırmalarına yardımcı olur.
Kadıköy, İstanbul’un en hareketli ve popüler semtlerinden biri olmasının yanı sıra, estetik ve güzellik alanında da birçok yeniliği barındırıyor
Psikolojik sorunlar sadece travma ya da ağır depresyon durumlarında değil, günlük yaşamda karşılaştığımız kaygı, stres, ilişki sorunları, iş yorgunluğu ve özgüven problemleri gibi durumlarda da ortaya çıkabilir.
7, 8, 9. Sınıf Olarak 12 Kişilik Homojen Gruplar, Deneyimli Kadro, Yeni Nesil Yayın Desteği, Birebir Etütler, Ders Çalışma Kütüphaneleri Vardır.
Dental implantların tedavideki fonksiyonu; yapılacak olan protezler için diş kökü gibi ayak olması ya da protezi desteklemesidir.
Almanca dil seviyenizi doğru bir şekilde belirlemek, size en uygun eğitim programını seçmenize yardımcı olur.
Eksozom cilt tedavisi, son yıllarda popülerlik kazanan ve cilt yenilenmesi, saç dökülmesi gibi estetik ve tıbbi amaçlarla kullanılan bir biyolojik tedavi yöntemidir.
Sıvı yüz germe (Liquid Facelift), cerrahi işlem gerektirmeden yüz hatlarını gençleştirmeyi, cilde hacim kazandırmayı ve sarkmaları toparlamayı amaçlayan modern bir estetik uygulamadır.
Yemek borusu (özofagus) ile mide arasında bulunan alt yemek borusu sfinkteri (Lower Esophageal Sphincter, LES), normalde kasılı kalarak mide içeriğinin yukarı kaçmasını önler.
İzmir Havalimanı transfer hizmeti de en mühim ihtiyaçlar arasında yer almaktadır.
Eksozom cilt tedavisi, son yıllarda popülerlik kazanan ve cilt yenilenmesi, saç dökülmesi gibi estetik ve tıbbi amaçlarla kullanılan bir biyolojik tedavi yöntemidir.
Sıvı yüz germe (Liquid Facelift), cerrahi işlem gerektirmeden yüz hatlarını gençleştirmeyi, cilde hacim kazandırmayı ve sarkmaları toparlamayı amaçlayan modern bir estetik uygulamadır.
İzmir Havalimanı transfer hizmeti de en mühim ihtiyaçlar arasında yer almaktadır.
Test
thanks very good content
thanks for content
thanks for content
Meme dikleştirme ameliyatı, tıbbi adıyla mastopeksi, memelerde zamanla oluşan sarkma ve form kaybını düzeltmek amacıyla yapılan estetik cerrahi bir işlemdir.
İzmir Havalimanı Vip Transfer hizmeti veren firmamızın getirdiği avantajlar ve sunulan hizmetler şu şekildedir:
İzmir Havalimanı Vip Transfer hizmeti veren firmamızın getirdiği avantajlar ve sunulan hizmetler şu şekildedir:
Bursa Gülüş Tasarımı sayesinde gülümsemenin hayatımızdaki yeri daha önemli bir yer almaktadır.
Safra kesesi ameliyatı, safra kesesinde oluşan taşlar, iltihaplanma (kolesistit), polipler veya safra yollarını tıkayan yapısal sorunlar nedeniyle uygulanan cerrahi bir işlemdir.
Özellikle estetik dermatoloji ve kozmetik tıpta yaygın olarak kullanılan, güvenli ve etkili bir yöntemdir.
İdrar kaçırma, kişinin istemi dışında idrarını tutamaması durumudur.
TYT AYT kursu, YKS sınavına yönelik hazırlık yapmak isteyen öğrencilere sunulan, genellikle kapsamlı bir eğitim programıdır.
Düzenli olarak yapılan genel diş muayeneleri, sağlıklı bir ağız ve güzel bir gülüş için önemli bir adımdır
İmplant tedavisi, eksik dişlerin yerine titanyumdan yapılmış yapay diş köklerinin çene kemiğine yerleştirilmesi işlemidir.
Safra kesesi ameliyatı, safra kesesinde oluşan taşlar, iltihaplanma (kolesistit), polipler veya safra yollarını tıkayan yapısal sorunlar nedeniyle uygulanan cerrahi bir işlemdir.
İdrar kaçırma, kişinin istemi dışında idrarını tutamaması durumudur.
İmplant tedavisi, eksik dişlerin yerine titanyumdan yapılmış yapay diş köklerinin çene kemiğine yerleştirilmesi işlemidir.
İdrar kaçırma, kişinin istemi dışında idrarını tutamaması durumudur.
Düzenli olarak yapılan genel diş muayeneleri, sağlıklı bir ağız ve güzel bir gülüş için önemli bir adımdır
İmplant tedavisi, eksik dişlerin yerine titanyumdan yapılmış yapay diş köklerinin çene kemiğine yerleştirilmesi işlemidir.
sıvı yüz germe
Reflü (Gastroözofageal Reflü Hastalığı), midedeki asit ve sindirim enzimlerinin yemek borusuna geri kaçması sonucu ortaya çıkan kronik bir durumdur.
Liposuction, vücudun belirli bölgelerindeki fazla yağın alınması için tasarlanmış kozmetik bir cerrahi işlemdir.
İlk ameliyatın aksine, revizyon rinoplasti genellikle daha karmaşık ve zorlu bir süreçtir.
İlk ameliyatın aksine, revizyon rinoplasti genellikle daha karmaşık ve zorlu bir süreçtir.
Kadın ürolojisi, kadınlarda görülen idrar yolları ve genital bölgeyle ilgili sorunların tanı, tedavi ve takibini yapan ürolojinin özel bir alt dalıdır.
Eryaman psikolog hizmetleri, bireylerin ruhsal, duygusal ve davranışsal sorunlarını anlamalarına, çözüm bulmalarına ve yaşam kalitelerini artırmalarına yardımcı olur.
Batıkent Doruk Koleji, bu alanda öne çıkan; hem akademik hem de sosyal gelişimi esas alan eğitim modeliyle ailelerin güvenle tercih ettiği bir eğitim kurumudur.
Kadın ürolojisi, kadınlarda görülen idrar yolları ve genital bölgeyle ilgili sorunların tanı, tedavi ve takibini yapan ürolojinin özel bir alt dalıdır.
Elektronik mühür, elektronik belgenin veya verinin elektronik mühür sahibi tarafından oluşturulduğunu, belgenin veya verinin kaynağını ve bütünlüğünü garanti eden delil kaydıdır.
En İyi PDF Kitap İndir Sitesi 1kitap1.com! Kitapların görsel efektleri ve temaları büyüleyici.
Terapi desteği almak istiyor ama psikoloğunuzu tanımadan sürece başlamak konusunda tereddüt mü yaşıyorsunuz? Batıkent İz Psikoloji ailesi olarak sizlere güzel bir yenilik sunuyoruz:
Yaşlandıkça, ince çizgilerin ve kırışıklıkların oluşması, yaşlılık lekelerinin ortaya çıkması ve cildin gevşeyip sarkması gibi zamanın geçtiğini gösteren belirtiler yüzümüzde kaçınılmaz olarak ortaya çıkar.
Dental implant tedavisi kaybedilen dişlerin yerlerine diş kökünü taklit eden titanyum (son yıllarda zirkonyum da kullanılmaktadır.) vidalardır.
Terapi desteği almak istiyor ama psikoloğunuzu tanımadan sürece başlamak konusunda tereddüt mü yaşıyorsunuz? Batıkent İz Psikoloji ailesi olarak sizlere güzel bir yenilik sunuyoruz:
Terapi desteği almak istiyor ama psikoloğunuzu tanımadan sürece başlamak konusunda tereddüt mü yaşıyorsunuz? Batıkent İz Psikoloji ailesi olarak sizlere güzel bir yenilik sunuyoruz:
Septorinoplasti, burnun hem estetik hem de fonksiyonel olarak yeniden şekillendirilmesini amaçlayan cerrahi bir operasyondur.
izmir vip transfer
Taktik Tabanca Eğitimleri, modern atış teknikleri ve güvenli silah kullanımı esas alınarak tasarlanmış, her seviyede katılımcıya uygun kapsamlı programlardır.
Dental implant tedavisi kaybedilen dişlerin yerlerine diş kökünü taklit eden titanyum (son yıllarda zirkonyum da kullanılmaktadır.) vidalardır.
Reflü (Gastroözofageal Reflü Hastalığı), midedeki asit ve sindirim enzimlerinin yemek borusuna geri kaçması sonucu ortaya çıkan kronik bir durumdur.
Etimesgut zirkonyum kaplama, estetik diş hekimliğinde son yıllarda en çok tercih edilen tedavi yöntemlerinden biridir.
Reflü (Gastroözofageal Reflü Hastalığı), midedeki asit ve sindirim enzimlerinin yemek borusuna geri kaçması sonucu ortaya çıkan kronik bir durumdur.
Çocuk terapisi, çocukların duygusal, davranışsal, sosyal ve bilişsel gelişimlerini desteklemek amacıyla uygulanan psikoterapi yöntemidir.
Ankara’nın hızla gelişen ilçelerinden biri olan Yenimahalle, sadece sosyal yaşam ve ulaşım olanaklarıyla değil, aynı zamanda profesyonel psikolojik danışmanlık hizmetleriyle de dikkat çekiyor.
Eryaman, Ankara’nın hızla gelişen ve popülerleşen semtlerinden biridir. Bu bölge, hem sosyal imkanları hem de eğitim olanaklarıyla dikkat çekiyor
Eryaman, Ankara’nın hızla gelişen ve popülerleşen semtlerinden biridir. Bu bölge, hem sosyal imkanları hem de eğitim olanaklarıyla dikkat çekiyor
Uzunluk, basınç, enerji, viskozite, sıcaklık ve daha fazlası… Tek ekrandan anında dönüştür.
Meme büyütme ameliyatı, meme implantları veya yağ transferi yoluyla memelerin boyutunu ve dolgunluğunu artırmak amacıyla uygulanan bir estetik cerrahi işlemdir.
Yaklaşık 6 yıldır kendi özel muayenehanemde hastalarıma hizmet vermekteyim.
Kadıköy Kozyatağı diş implantı, eksik dişlerin yerine konulan yapay diş kökleridir.
Equipped Tactical Academy olarak taktik tabanca eğitim programlarımızı, hem bireysel katılımcıların hem de kurumsal yapıların ihtiyaçlarına yanıt verecek şekilde yapılandırdık.
Eryaman, Ankara’nın hızla gelişen ve popülerleşen semtlerinden biridir. Bu bölge, hem sosyal imkanları hem de eğitim olanaklarıyla dikkat çekiyor.
Kadıköy Kozyatağı diş implantı, eksik dişlerin yerine konulan yapay diş kökleridir.
Equipped Tactical Academy olarak taktik tabanca eğitim programlarımızı, hem bireysel katılımcıların hem de kurumsal yapıların ihtiyaçlarına yanıt verecek şekilde yapılandırdık.
Uzunluk, basınç, enerji, viskozite, sıcaklık ve daha fazlası… Tek ekrandan anında dönüştür.
eryaman dişçi
Eryaman, Ankara’nın hızla gelişen ve popülerleşen semtlerinden biridir. Bu bölge, hem sosyal imkanları hem de eğitim olanaklarıyla dikkat çekiyor.
Anaokulu olarak çocuklarımızın gelişimini yalnızca akademik açıdan değil; duygusal, fiziksel ve psikolojik yönleriyle bir bütün olarak ele alıyoruz.
Taktik Tabanca Eğitimleri, modern atış teknikleri ve güvenli silah kullanımı esas alınarak tasarlanmış, her seviyede katılımcıya uygun kapsamlı programlardır.
Taktik Tabanca Eğitimleri, modern atış teknikleri ve güvenli silah kullanımı esas alınarak tasarlanmış, her seviyede katılımcıya uygun kapsamlı programlardır.
Düzenli olarak yapılan genel diş muayeneleri, sağlıklı bir ağız ve güzel bir gülüş için önemli bir adımdır.
Anaokulu olarak çocuklarımızın gelişimini yalnızca akademik açıdan değil; duygusal, fiziksel ve psikolojik yönleriyle bir bütün olarak ele alıyoruz.
kadıköy kira avukatı
Bu süreç, dişlerin rengi, şekli, boyutu, konumu ve dudak-diş uyumu gibi birçok faktörün dikkate alındığı kişiye özel bir tasarımdır.
Bu süreç, dişlerin rengi, şekli, boyutu, konumu ve dudak-diş uyumu gibi birçok faktörün dikkate alındığı kişiye özel bir tasarımdır.
Equipped Tactical Academy olarak taktik tabanca eğitim programlarımızı, hem bireysel katılımcıların hem de kurumsal yapıların ihtiyaçlarına yanıt verecek şekilde yapılandırdık.
Kadın ürolojisi, kadınlarda görülen idrar yolları ve genital bölgeyle ilgili sorunların tanı, tedavi ve takibini yapan ürolojinin özel bir alt dalıdır.
samsun botoks
samsun burun estetiği
samsun rinoplasti
samsun nöbetci eczane
Kadın ürolojisi, kadınlarda görülen idrar yolları ve genital bölgeyle ilgili sorunların tanı, tedavi ve takibini yapan ürolojinin özel bir alt dalıdır.
Özellikle 20 yaş dişlerinin cerrahi olarak çıkarılması.
Özellikle 20 yaş dişlerinin cerrahi olarak çıkarılması.
PPF Kaplama (Paint Protection Film), araçların boyasını dış etkenlere karşı korumak amacıyla uygulanan, şeffaf ve yüksek dayanımlı poliüretan bazlı bir koruma filmidir.
Debi, bir sistemden ne kadar akışkan geçtiğini gösterir ve mühendislik hesaplamalarında kritik bir parametredir.
Ağız, diş ve çene cerrahisi, ağız içindeki yumuşak ve sert dokuların hastalıkları, yaralanmaları ve bozukluklarının tanı ve tedavisi ile ilgilenen bir tıp dalıdır.
PPF Kaplama (Paint Protection Film), araçların boyasını dış etkenlere karşı korumak amacıyla uygulanan, şeffaf ve yüksek dayanımlı poliüretan bazlı bir koruma filmidir.
PPF Kaplama (Paint Protection Film), araçların boyasını dış etkenlere karşı korumak amacıyla uygulanan, şeffaf ve yüksek dayanımlı poliüretan bazlı bir koruma filmidir.
kadıköy boşanma avukatı
Rinoplasti, burun şeklini ve fonksiyonlarını iyileştirmek amacıyla yapılan cerrahi bir işlemdir.
20 yılı aşkın eğitim tecrübemiz ve alanında uzman kadromuz ile sınavlara hazırlıkta yalnız değilsiniz.
Rinoplasti, burun şeklini ve fonksiyonlarını iyileştirmek amacıyla yapılan cerrahi bir işlemdir.
istanbul kira avukatı
ankara oto detailing
Liposuction, vücudun belirli bölgelerindeki fazla yağın alınması için tasarlanmış kozmetik bir cerrahi işlemdir.
Düzenli olarak yapılan genel diş muayeneleri, sağlıklı bir ağız ve güzel bir gülüş için önemli bir adımdır.
Manavgat implant diş tedavisi, kaybedilen dişlerin yerine titanyumdan üretilen yapay diş köklerinin çene kemiğine yerleştirilmesiyle yapılan modern bir tedavi yöntemidir.
sıvı yüz germe
ümitköy diş polikliniği
Manavgat implant diş tedavisi, kaybedilen dişlerin yerine titanyumdan üretilen yapay diş köklerinin çene kemiğine yerleştirilmesiyle yapılan modern bir tedavi yöntemidir.
batıkent anaokulu
batıkent anaokulu
rinoplasti ankara
eryaman dişçi
ankara ppf kaplama
Manavgat implant diş tedavisi, kaybedilen dişlerin yerine titanyumdan üretilen yapay diş köklerinin çene kemiğine yerleştirilmesiyle yapılan modern bir tedavi yöntemidir.
ankara ppf kaplama
Sincan gülüş tasarımı, diş hekimliği alanında estetik ve fonksiyonel gereksinimleri bir araya getirerek
Sincan gülüş tasarımı, diş hekimliği alanında estetik ve fonksiyonel gereksinimleri bir araya getirerek
Kadın ürolojisi, kadınlarda görülen idrar yolları ve genital bölgeyle ilgili sorunların tanı, tedavi ve takibini yapan ürolojinin özel bir alt dalıdır.
Ankara fraksiyonel CO2 lazer, cilt yenileme ve estetik tedavilerde yaygın olarak kullanılan bir lazer teknolojisidir.
ai seo
kadıköy arabulucu
Samsun cildiye (dermatoloji) doktorları; cilt, saç, tırnak ve ağız mukozası hastalıklarının tanı, tedavi ve takibini yapan uzman hekimlerdir.
Kaliteli uyku; bağışıklık, kalp sağlığı, kilo kontrolü, hafıza ve günlük performansın temelidir.
Tüp mide ameliyatı, obezite tedavisinde kullanılan cerrahi bir yöntemdir.
Kaliteli uyku; bağışıklık, kalp sağlığı, kilo kontrolü, hafıza ve günlük performansın temelidir.
Beytepe Koleji’nde eğitim yaklaşımı, öğrencilerin özgün düşünme ve akılcı karar verme becerilerini geliştirmeye yöneliktir.
Beytepe Koleji’nde eğitim yaklaşımı, öğrencilerin özgün düşünme ve akılcı karar verme becerilerini geliştirmeye yöneliktir.
Eğitim, bireyin akademik başarısını ve kişisel gelişimini doğrudan etkileyen en önemli süreçlerden biridir.
ankara seramik kaplama tavsiye
Eğitim, bireyin akademik başarısını ve kişisel gelişimini doğrudan etkileyen en önemli süreçlerden biridir.
Samsun dudak dolgusu, dudakların hacmini artırmak, şeklini belirginleştirmek ve daha estetik bir görünüm kazandırmak amacıyla yapılan medikal estetik uygulamalardan biridir.
Samsun dolgu ve botoks, yüz gençleştirme ve yüz hatlarının daha dengeli görünmesini sağlama amacıyla en sık uygulanan medikal estetik işlemler arasındadır.
Ankara Çankaya temporal lift, şakak bölgesindeki sarkma ve kırışıklıkları düzelten estetik bir cerrahi prosedürdür.
Botoks, “Clostridium botulinum” bakterisinden toksinin saflaştırılmasıyla elde edilen bir ilaçtır.
fraksiyonel lazer tedaivsi ankara
Samsun dolgu ve botoks, yüz gençleştirme ve yüz hatlarının daha dengeli görünmesini sağlama amacıyla en sık uygulanan medikal estetik işlemler arasındadır.
Botoks, “Clostridium botulinum” bakterisinden toksinin saflaştırılmasıyla elde edilen bir ilaçtır.
Gebelik öncesi danışmanlık muayenesinde sorunsuz bir gebelik süreci ve sağlıklı bir çocuk sahibi olma şansının arttırılması ana hedeftir
Ankara fitoterapi eğitimi, bitkilerin tedavi edici özelliklerinin bilimsel temellerle öğrenildiği, modern tıp ile geleneksel bilgiyi bir araya getiren kapsamlı bir eğitim sürecidir.
Diş implantları, eksik dişlerin yerine kullanılan modern ve etkili bir tedavi yöntemidir.
Ortodonti, diş ve çene bozukluklarının tanı ve tedavisi ile ilgilenen diş hekimliği branşıdır.
Diş beyazlatma, dişlerin yüzeyindeki lekeleri ve renk değişimlerini gidererek daha beyaz ve parlak bir gülümseme elde etmek için uygulanan kozmetik bir işlemdir.
Ağız ve çene sağlığını koruyarak fonksiyon (çiğneme, konuşma) ve estetiği birlikte sağlar.
Diş implantları, eksik dişlerin yerine konulması için kullanılan kalıcı bir çözümdür.
Diş implantları, eksik dişlerin yerine kullanılan modern ve etkili bir tedavi yöntemidir.
Ortodonti, diş ve çene bozukluklarının tanı ve tedavisi ile ilgilenen diş hekimliği branşıdır.
Kadın ürolojisi, kadınlarda görülen idrar yolları ve genital bölgeyle ilgili sorunların tanı, tedavi ve takibini yapan ürolojinin özel bir alt dalıdır.
Kadın ürolojisi, kadınlarda görülen idrar yolları ve genital bölgeyle ilgili sorunların tanı, tedavi ve takibini yapan ürolojinin özel bir alt dalıdır.
Kadın ürolojisi, kadınlarda görülen idrar yolları ve genital bölgeyle ilgili sorunların tanı, tedavi ve takibini yapan ürolojinin özel bir alt dalıdır.
Aracınız için en yeni kaplama ve koruma teknolojilerini profesyonel uygulamalarla sunuyoruz. Kalite, estetik ve uzun ömürlü çözümlerle aracınıza gerçek değer katıyoruz. Her detay bizim için önemlidir.
Aracınız için en yeni kaplama ve koruma teknolojilerini profesyonel uygulamalarla sunuyoruz. Kalite, estetik ve uzun ömürlü çözümlerle aracınıza gerçek değer katıyoruz. Her detay bizim için önemlidir.
Fraksiyonel lazer, cilt yenileme ve gençleştirme amaçlı kullanılan ileri teknoloji lazer yöntemidir.
Üzerinden kaç yıl geçti bu olayın ama hala dün yaşanmış gibi bu durumun etkisinden çıkamadım diye düşündüğünüz oluyor mu?
Fraksiyonel lazer, cilt yenileme ve gençleştirme amaçlı kullanılan ileri teknoloji lazer yöntemidir.
Üzerinden kaç yıl geçti bu olayın ama hala dün yaşanmış gibi bu durumun etkisinden çıkamadım diye düşündüğünüz oluyor mu?
Deep Brain Stimulation (DBS) represents a groundbreaking form of therapy in the field of neurology, offering a beacon of hope for patients suffering from various movement disorders.
Bağlıca implant tedavisi, eksik dişlerin yerine titanyum vida şeklindeki yapay diş köklerinin çene kemiğine yerleştirilmesi işlemidir.
Ağız, Diş ve Çene Cerrahisi (Oral
Deep Brain Stimulation (DBS) represents a groundbreaking form of therapy in the field of neurology, offering a beacon of hope for patients suffering from various movement disorders.
Bağlıca implant tedavisi, eksik dişlerin yerine titanyum vida şeklindeki yapay diş köklerinin çene kemiğine yerleştirilmesi işlemidir.
Ağız Diş ve Çene Cerrahisi, ağız içi ve çevre dokusundaki sert ve yumuşak dokuların rahatsızlıklarını gidermek adına girişimsel işlemlerde bulunabilen diş hekimliği dalıdır.
Kadın ürolojisi, kadınlarda görülen idrar yolları ve genital bölgeyle ilgili sorunların tanı, tedavi ve takibini yapan ürolojinin özel bir alt dalıdır.
Kadın ürolojisi, kadınlarda görülen idrar yolları ve genital bölgeyle ilgili sorunların tanı, tedavi ve takibini yapan ürolojinin özel bir alt dalıdır.
Akne, cildin yağ bezlerinin aşırı sebum (yağ) üretmesi ve ölü cilt hücrelerinin gözenekleri tıkaması sonucu ortaya çıkan yaygın bir cilt hastalığıdır.
Lazerli implant tedavisi, diş implantı uygulaması sırasında klasik cerrahi kesiler yerine ya da onlara ek olarak dental lazer teknolojisinin kullanıldığı modern bir yöntemdir.
Botoks, tıbbi adıyla botulinum toksini, kasların geçici olarak hareketini engelleyerek kırışıklıkların oluşmasını önleyen veya mevcut çizgileri azaltan bir enjeksiyon tedavisidir
Diş problemleri hemen hemen herkesin belirli dönemlerde başına gelen bir durumdur.
Botoks, tıbbi adıyla botulinum toksini, kasların geçici olarak hareketini engelleyerek kırışıklıkların oluşmasını önleyen veya mevcut çizgileri azaltan bir enjeksiyon tedavisidir
Diş problemleri hemen hemen herkesin belirli dönemlerde başına gelen bir durumdur.
İdrar kaçırma, kişinin istemi dışında idrarını tutamaması durumudur. Kadınlarda erkeklere göre çok daha sık görülür ve yaşla birlikte artış gösterebilir.
Matematik, eğitim hayatının her aşamasında öğrencilerin karşısına çıkan ve başarının anahtar derslerinden biridir.
İdrar kaçırma, kişinin istemi dışında idrarını tutamaması durumudur. Kadınlarda erkeklere göre çok daha sık görülür ve yaşla birlikte artış gösterebilir.
İyi planlanmış bir implant, doğal diş hissi ve estetiği sağlar.
Bu yöntem, daha geniş kapsamlı bir yüz germe işlemine ihtiyaç duymayan ancak göz çevresini canlandırmak isteyen hastalar için idealdir.
Hormonlar (progesteron), bazı ilaçlar (kalsiyum kanal blokerleri), nikotin ve kafein LES tonusunu düşürür.
Rinoplasti, burun şeklini ve fonksiyonlarını iyileştirmek amacıyla yapılan cerrahi bir işlemdir.
İstanbul meme büyütme ameliyatı, estetik cerrahinin en hızlı sonuç alınan ameliyatlarından olup, meme boyutunu, şeklini ve dolgunluğunu artırmak isteyen kadınlar arasında popüler bir tercihtir.
İyi planlanmış bir implant, doğal diş hissi ve estetiği sağlar.
Hormonlar (progesteron), bazı ilaçlar (kalsiyum kanal blokerleri), nikotin ve kafein LES tonusunu düşürür.
İstanbul meme büyütme ameliyatı, estetik cerrahinin en hızlı sonuç alınan ameliyatlarından olup, meme boyutunu, şeklini ve dolgunluğunu artırmak isteyen kadınlar arasında popüler bir tercihtir.
Bu yöntem, daha geniş kapsamlı bir yüz germe işlemine ihtiyaç duymayan ancak göz çevresini canlandırmak isteyen hastalar için idealdir.
Marmaris kanal tedavisi, dişin iç kısmında bulunan pulpa adı verilen yumuşak dokunun enfekte olması veya zarar görmesi durumunda uygulanan bir diş hekimliği işlemidir.
Marmaris kanal tedavisi, dişin iç kısmında bulunan pulpa adı verilen yumuşak dokunun enfekte olması veya zarar görmesi durumunda uygulanan bir diş hekimliği işlemidir.
Eksik dişler, hem estetik açıdan hem de çiğneme ve konuşma fonksiyonları açısından önemli sorunlara yol açabilir.
Düzenli olarak yapılan genel diş muayeneleri, sağlıklı bir ağız ve güzel bir gülüş için önemli bir adımdır.
Periodontoloji, diş eti ve diş destek dokularının (çene kemiği, alveol kemiği, periodontal ligament ve diş eti) hastalıklarıyla ilgilenen diş hekimliği dalıdır.
Eksik dişler, hem estetik açıdan hem de çiğneme ve konuşma fonksiyonları açısından önemli sorunlara yol açabilir.
Düzenli olarak yapılan genel diş muayeneleri, sağlıklı bir ağız ve güzel bir gülüş için önemli bir adımdır.
Çankaya zirkonyum diş kaplama, estetik ve dayanıklılığı bir arada sunan, metal içermeyen modern bir diş kaplama yöntemidir.
20 yaş dişleri (akıl dişleri), genellikle 17-25 yaş aralığında çenenin en arka kısmında çıkan üçüncü büyük azı dişleridir. Her bireyde toplam dört adet 20 yaş dişi bulunabilir.
İstanbul meme büyütme ameliyatı, estetik cerrahinin en hızlı sonuç alınan ameliyatlarından olup, meme boyutunu, şeklini ve dolgunluğunu artırmak isteyen kadınlar arasında popüler bir tercihtir.
Çankaya zirkonyum diş kaplama, estetik ve dayanıklılığı bir arada sunan, metal içermeyen modern bir diş kaplama yöntemidir.
Eksik dişler, hem estetik açıdan hem de çiğneme ve konuşma fonksiyonları açısından önemli sorunlara yol açabilir.
Periodontoloji, diş eti ve diş destek dokularının (çene kemiği, alveol kemiği, periodontal ligament ve diş eti) hastalıklarıyla ilgilenen diş hekimliği dalıdır.
Hello! I know this is kinda off topic but I was wondering if you knew where I could get
a captcha plugin for my comment form? I’m using the same
blog platform as yours and I’m having trouble finding one?
Thanks a lot!
Çankaya implant diş tedavisi, eksik dişlerin yerine çene kemiğine yerleştirilen titanyum vida üzerine yapılan yapay dişlerle uygulanan, modern ve kalıcı bir tedavi yöntemidir.
Ağız, diş ve çene cerrahisi, ağız içindeki yumuşak ve sert dokuların hastalıkları, yaralanmaları ve bozukluklarının tanı ve tedavisi ile ilgilenen bir tıp dalıdır.
instagram takipçi hilesine dair her şey burada
İmplant tedavisi, kaybolmuş dişlerin yerine yapay diş köklerinin yerleştirildiği bir diş tedavi yöntemidir.
Şanlıurfa Çiçekçi
su tesisatçısı, gider açma hizmeti, su kaçak tespiti hizmeti için bizlere ulaşın!
**mitolyn reviews**
Mitolyn is a carefully developed, plant-based formula created to help support metabolic efficiency and encourage healthy, lasting weight management.
Otoplasti, kulak kıkırdaklarını ve lobül denilen kulak memesi kısmını şekillendirmek için uygulanan cerrahi prosedürdür.
Otoplasti, kulak kıkırdaklarını ve lobül denilen kulak memesi kısmını şekillendirmek için uygulanan cerrahi prosedürdür.
Ağız ve diş sağlığı, hem genel sağlığın önemli bir parçasıdır hem de yaşam kalitesini doğrudan etkiler.
Ağız ve diş sağlığı, hem genel sağlığın önemli bir parçasıdır hem de yaşam kalitesini doğrudan etkiler.
BMW ve Mini Cooper gibi premium segment araçlar, yüksek performanslı motor sistemleriyle öne çıkar.
BMW ve Mini Cooper gibi premium segment araçlar, yüksek performanslı motor sistemleriyle öne çıkar.
İmplant eksik dişleri tamamlamak için çene kemiğine yerleştirilen bir tür vidadır.
Konuların birbiri ile yakından bağlantılı olduğu matematik dersinde başarılı olabilmek için her bir konuyu öğrenmeniz gerekir.
emka seo
Reflü (Gastroözofageal Reflü Hastalığı), midedeki asit ve sindirim enzimlerinin yemek borusuna geri kaçması sonucu ortaya çıkan kronik bir durumdur.
Diş implantları, eksik dişlerin yerine kullanılan modern ve etkili bir tedavi yöntemidir. Titanyumdan yapılan bu yapay diş kökleri, çene kemiğine yerleştirilerek doğal dişlere benzer bir görünüm ve işlev sağlar.
İmplant tedavisi, kaybedilen dişlerin yerine doğal diş görünümü ve fonksiyonuna en yakın çözümü sunan modern bir diş tedavi yöntemidir.
Bağlıca Özel Ders Hocası ile öğrenme deneyiminizi bir üst seviyeye taşıyın! Eğitimde başarı, doğru strateji ve kişiye özel yaklaşımla mümkün.
Reflü (Gastroözofageal Reflü Hastalığı), midedeki asit ve sindirim enzimlerinin yemek borusuna geri kaçması sonucu ortaya çıkan kronik bir durumdur.
Diş implantları, eksik dişlerin yerine kullanılan modern ve etkili bir tedavi yöntemidir. Titanyumdan yapılan bu yapay diş kökleri, çene kemiğine yerleştirilerek doğal dişlere benzer bir görünüm ve işlev sağlar.
Burun, soluduğumuz havayı belirli bir nem ve ısıya getirip akciğerlere filtreleyerek ulaştırılmasında görev alır.
İmplant tedavisi, kaybedilen dişlerin yerine doğal diş görünümü ve fonksiyonuna en yakın çözümü sunan modern bir diş tedavi yöntemidir.
Mastektomi, meme dokusunun tamamının veya bir kısmının cerrahi olarak çıkarılması işlemidir.
Kadınlarda idrar yolu daralması (üretral darlık), idrarın mesaneden dışarı akışını zorlaştıran ve yaşam kalitesini belirgin şekilde düşürebilen bir sağlık sorunudur.
Mastektomi, meme dokusunun tamamının veya bir kısmının cerrahi olarak çıkarılması işlemidir.
Mastektomi, meme dokusunun tamamının veya bir kısmının cerrahi olarak çıkarılması işlemidir.
Marmaris kanal tedavisi, dişin iç kısmında bulunan pulpa adı verilen yumuşak dokunun enfekte olması veya zarar görmesi durumunda uygulanan bir diş hekimliği işlemidir.
Diş implantları, eksik dişlerin yerine kullanılan modern ve etkili bir tedavi yöntemidir.
Marmaris kanal tedavisi, dişin iç kısmında bulunan pulpa adı verilen yumuşak dokunun enfekte olması veya zarar görmesi durumunda uygulanan bir diş hekimliği işlemidir.
Dental implant tedavisi kaybedilen dişlerin yerlerine diş kökünü taklit eden titanyum (son yıllarda zirkonyum da kullanılmaktadır.) vidalardır.
Eksozomlar, hücrelerin birbirleriyle haberleşmesini sağlayan mikroskobik veziküllerdir.
Ankara tüp mide tedavisi, obezite cerrahisi kapsamında yer alan ve midenin büyük bir bölümünün çıkarılmasıyla gerçekleştirilen bir ameliyat yöntemidir
Ankara tüp mide tedavisi, obezite cerrahisi kapsamında yer alan ve midenin büyük bir bölümünün çıkarılmasıyla gerçekleştirilen bir ameliyat yöntemidir
Gömülü dişler: Özellikle 20 yaş dişlerinin cerrahi olarak çıkarılması.
Yükseköğretim Kurumları Sınavı (YKS), Türkiye’deki üniversitelere giriş için en önemli aşamadır. YKS, temel yeterlilik testi (TYT) ve alan yeterlilik testi (AYT) olmak üzere iki ana aşamadan oluşur.
Gömülü dişler: Özellikle 20 yaş dişlerinin cerrahi olarak çıkarılması.
Diş kaybı, hem estetik hem de fonksiyonel açıdan yaşam kalitesini önemli ölçüde etkileyen bir durumdur.
Diş kaybı, hem estetik hem de fonksiyonel açıdan yaşam kalitesini önemli ölçüde etkileyen bir durumdur.
BMW araçları, yüksek performans, güvenlik ve konfor sunan üst segment otomobillerdir. Bu özel mühendislik harikalarının uzun ömürlü, güvenli ve ilk günkü performansıyla kullanılabilmesi için düzenli bakım ve profesyonel servis desteği gerekir.
BMW araçları, yüksek performans, güvenlik ve konfor sunan üst segment otomobillerdir. Bu özel mühendislik harikalarının uzun ömürlü, güvenli ve ilk günkü performansıyla kullanılabilmesi için düzenli bakım ve profesyonel servis desteği gerekir.
Equipped Tactical Academy bünyesinde geliştirdiğimiz taktik tabanca eğitim programları, katılımcıların farklılaşan ihtiyaç ve beklentilerine karşılık verecek esneklikte tasarlanmıştır.
Pendik, İstanbul’un hızla gelişen ve nüfusu artan semtlerinden biri olarak sağlık hizmetlerinde de önemli bir merkez haline gelmiştir
Kadıköy implant tedavisi, diş kayıplarını tedavi etmek amacıyla kullanılan bir yöntemdir. Diş implantları, çene kemiğine yerleştirilen yapay diş kökleridir.
Zirkonyum diş beyaz renkli bir metal üzerine porselen kaplama uygulamasıdır. Zirkonyum kaplama pürüzsüz ve doğal diş görünümü vermesi sebebiyle son zamanlarda yaygınlaşan ve hastalarımız tarafından en çok talep gören bir uygulamadır.
Kadıköy implant tedavisi, diş kayıplarını tedavi etmek amacıyla kullanılan bir yöntemdir. Diş implantları, çene kemiğine yerleştirilen yapay diş kökleridir.
7, 8, 9. Sınıf Olarak 12 Kişilik Homojen Gruplar, Deneyimli Kadro, Yeni Nesil Yayın Desteği, Birebir Etütler, Ders Çalışma Kütüphaneleri Vardır.
Liposuction, vücudun belirli bölgelerindeki fazla yağın alınması için tasarlanmış kozmetik bir cerrahi işlemdir.
7, 8, 9. Sınıf Olarak 12 Kişilik Homojen Gruplar, Deneyimli Kadro, Yeni Nesil Yayın Desteği, Birebir Etütler, Ders Çalışma Kütüphaneleri Vardır.
Akü, elektrik enerjisini kimyasal enerji olarak biriktirerek ihtiyaç dâhilinde bu enerjiyi kullanan cihazdır. Detaylı bilgi için akü ne işe yarar? Akü suyu nasıl elde edilir? Sorularına cevap verdiğimiz makalemizi okumaya devam edin.
Kaliteli uyku; bağışıklık, kalp sağlığı, kilo kontrolü, hafıza ve günlük performansın temelidir.
Zirkonyum diş beyaz renkli bir metal üzerine porselen kaplama uygulamasıdır. Zirkonyum kaplama pürüzsüz ve doğal diş görünümü vermesi sebebiyle son zamanlarda yaygınlaşan ve hastalarımız tarafından en çok talep gören bir uygulamadır.
BMW araç sahipleri için düzenli bakım ve profesyonel servis hizmeti, aracın uzun ömürlü olması ve yüksek performansını koruması açısından büyük önem taşır.
BMW araç sahipleri için düzenli bakım ve profesyonel servis hizmeti, aracın uzun ömürlü olması ve yüksek performansını koruması açısından büyük önem taşır.
Denemeler aslında kendini ölçme şeklidir ve bu ölçülen değerlerle sınavlara hazırlık sürecini yönetmemizi sağlar. Deneme sınavları gerçek sınavlara hazırlıkta tecrübe edinme yollarının başında gelmektedir.
Eksozomlar, hücrelerin birbirleriyle haberleşmesini sağlayan mikroskobik veziküllerdir.
Anlık güncel altın fiyatları ve güvenilir kuyumculuk hizmetleri ile yatırımlarınızı en iyi şekilde değerlendirin.
Ağız Diş ve Çene Cerrahisi, ağız içi ve çevre dokusundaki sert ve yumuşak dokuların rahatsızlıklarını gidermek adına girişimsel işlemlerde bulunabilen diş hekimliği dalıdır.
Kişiye özel hizmet prensibinden yola çıkarak son derece şık dizayn edilmiş ortamı ile Protez Saç Ankara; yüzde yüz doğal saç protez hizmeti sunuyor.
Arion meme implantlarının, eşsiz esnek şekil hafızalı yapısı ve yüksek biyouyumluluğu tüm cerrahi tercihlere optimum çözümü sağlar
Denemeler aslında kendini ölçme şeklidir ve bu ölçülen değerlerle sınavlara hazırlık sürecini yönetmemizi sağlar. Deneme sınavları gerçek sınavlara hazırlıkta tecrübe edinme yollarının başında gelmektedir.
Eksozomlar, hücrelerin birbirleriyle haberleşmesini sağlayan mikroskobik veziküllerdir.
kadıköy avukat
Kadınların memeleri, yaşlanmanın, kalıtımın, yer çekiminin, hamileliğin, emzirmenin veya kilo kaybının doğal etkileri nedeniyle sarkabilir.
Reflü, mide asidinin yemek borusuna geri kaçmasıyla ortaya çıkan ve yaşam kalitesini ciddi şekilde düşüren yaygın bir sindirim sistemi problemidir.
Reflü, mide asidinin yemek borusuna geri kaçmasıyla ortaya çıkan ve yaşam kalitesini ciddi şekilde düşüren yaygın bir sindirim sistemi problemidir.
Dermatoloji; cilt, saç, tırnak ve mukoza hastalıklarının tanı ve tedavisiyle ilgilenen tıp dalıdır.
güzel bir kaynak olabilir.
Dermatoloji; cilt, saç, tırnak ve mukoza hastalıklarının tanı ve tedavisiyle ilgilenen tıp dalıdır.
Mastektomi, meme dokusunun tamamının veya bir kısmının cerrahi olarak çıkarılması işlemidir.
Ankara safra yolu ameliyatı, safra kanallarında oluşan taş, darlık, iltihap veya tümöral nedenlere bağlı tıkanıklıkların tedavisi için yapılan cerrahi veya girişimsel işlemleri kapsar.
Ağız, diş ve çene cerrahisi, ağız içindeki yumuşak ve sert dokuların hastalıkları, yaralanmaları ve bozukluklarının tanı ve tedavisi ile ilgilenen bir tıp dalıdır
BMW ve Mini Cooper araçlar, yüksek mühendislik kalitesi ve sürüş keyfiyle öne çıkar.
İmplantoloji, kaybedilen dişlerin yerine yapay köklerin (implantların) yerleştirilmesiyle diş eksikliklerinin giderilmesini sağlayan diş hekimliği dalıdır.
istanbu perinatoloji uzmanı
Mastektomi, meme dokusunun tamamının veya bir kısmının cerrahi olarak çıkarılması işlemidir.
BMW ve Mini Cooper araçlar, yüksek mühendislik kalitesi ve sürüş keyfiyle öne çıkar.
bilkent özel ders
marmaris diş hekimi
Periodontoloji; diş eti ve dişleri destekleyen kemik dokuların sağlığı ile ilgilenen diş hekimliği dalıdır.
Botoks, tıbbi adıyla botulinum toksini, kasların geçici olarak hareketini engelleyerek kırışıklıkların oluşmasını önleyen veya mevcut çizgileri azaltan bir enjeksiyon tedavisidir.
Kadıköy diş eti uzmanı, yani periodontoloji alanında çalışan hekim; diş etleri, dişi çevreleyen kemik dokusu ve implant çevresi dokuların sağlığıyla ilgilenir.
Perinatolog, kadın hastalıkları ve doğum uzmanlığı eğitimini tamamladıktan sonra perinatoloji (maternal-fetal tıp) alanında yan dal uzmanlığı yapmış hekimdir.
Eksozomlar, hücrelerin birbirleriyle haberleşmesini sağlayan mikroskobik veziküllerdir.
kadıköy diş kliniği
Periodontoloji; dişleri çevreleyen diş eti, kemik ve bağ dokularının sağlığını inceleyen ve bu dokularda oluşan hastalıkların tedavisini yapan diş hekimliği dalıdır.
Periodontoloji; diş eti ve dişleri destekleyen kemik dokuların sağlığı ile ilgilenen diş hekimliği dalıdır.
Düzenli olarak yapılan genel diş muayeneleri, sağlıklı bir ağız ve güzel bir gülüş için önemli bir adımdır.
Tüp mide ameliyatı, obezite tedavisinde kullanılan cerrahi bir yöntemdir.
Periodontoloji; dişleri çevreleyen diş eti, kemik ve bağ dokularının sağlığını inceleyen ve bu dokularda oluşan hastalıkların tedavisini yapan diş hekimliği dalıdır.
7, 8, 9. Sınıf Olarak 12 Kişilik Homojen Gruplar, Deneyimli Kadro, Yeni Nesil Yayın Desteği, Birebir Etütler, Ders Çalışma Kütüphaneleri Vardır.
eryaman özel okul
Ankara safra yolu ameliyatı, safra kanallarında oluşan taş, darlık, iltihap veya tümöral nedenlere bağlı tıkanıklıkların tedavisi için yapılan cerrahi veya girişimsel işlemleri kapsar.
Ağız, diş ve çene cerrahisi, ağız içindeki yumuşak ve sert dokuların hastalıkları, yaralanmaları ve bozukluklarının tanı ve tedavisi ile ilgilenen bir tıp dalıdır
eryaman özel okul
Perinatolog, kadın hastalıkları ve doğum uzmanlığı eğitimini tamamladıktan sonra perinatoloji (maternal-fetal tıp) alanında yan dal uzmanlığı yapmış hekimdir.
Halk arasında “yaprak porselen” olarak da bilinen lamine kaplamalar, yaklaşık 0.3 ile 0.5 mm kalınlığında, tırnak inceliğinde porselen tabakalardır.
eryaman ppf kaplama
PPF Kaplama Kaç Yıl Dayanır?
Ankara fraksiyonel lazer, cilt sorunlarını tedavi etmek ve cilt dokusunu yenilemek amacıyla kullanılan modern bir lazer tedavi yöntemidir.
Eksozom tedavisi, genel olarak cilt yenilenmesi, saç dökülmesi veya doku onarımı ihtiyacı olan herkese uygulanabilir. Ancak bazı durumlarda dikkatli olunması gerekir.
Estetik diş hekimliği, sadece ağız sağlığınızı değil, aynı zamanda gülüşünüzü ve genel dış görünümünüzü iyileştirmeyi amaçlayan bir diş hekimliği dalıdır.
Eksik dişler, hem estetik açıdan hem de çiğneme ve konuşma fonksiyonları açısından önemli sorunlara yol açabilir.
Etimesgut zirkonyum kaplama, estetik diş hekimliğinde son yıllarda en çok tercih edilen tedavi yöntemlerinden biridir
Çankaya kanal tedavisi, dişin iç kısmında bulunan ve sinir, damar ile bağ dokusunu içeren pulpa dokusunun çeşitli nedenlerle iltihaplanması veya hasar görmesi durumunda uygulanan bir diş tedavi yöntemidir.
Diş beyazlatma (bleaching), çeşitli nedenlerle renk değiştirmiş, sararmış ya da matlaşmış dişlerin özel yöntemlerle birkaç ton açılarak daha estetik bir görünüme kavuşturulması işlemidir.
Ankara fraksiyonel lazer, cilt sorunlarını tedavi etmek ve cilt dokusunu yenilemek amacıyla kullanılan modern bir lazer tedavi yöntemidir.
Eksozom tedavisi, genel olarak cilt yenilenmesi, saç dökülmesi veya doku onarımı ihtiyacı olan herkese uygulanabilir. Ancak bazı durumlarda dikkatli olunması gerekir.
Eksik dişler, hem estetik açıdan hem de çiğneme ve konuşma fonksiyonları açısından önemli sorunlara yol açabilir.
Etimesgut zirkonyum kaplama, estetik diş hekimliğinde son yıllarda en çok tercih edilen tedavi yöntemlerinden biridir
Çankaya kanal tedavisi, dişin iç kısmında bulunan ve sinir, damar ile bağ dokusunu içeren pulpa dokusunun çeşitli nedenlerle iltihaplanması veya hasar görmesi durumunda uygulanan bir diş tedavi yöntemidir.
kadıköy diş kliniği
Estetik diş hekimliği, sadece ağız sağlığınızı değil, aynı zamanda gülüşünüzü ve genel dış görünümünüzü iyileştirmeyi amaçlayan bir diş hekimliği dalıdır.
Batıkent Doruk Koleji, bu alanda öne çıkan; hem akademik hem de sosyal gelişimi esas alan eğitim modeliyle ailelerin güvenle tercih ettiği bir eğitim kurumudur.
eryaman kolej
Çankaya kanal tedavisi, dişin iç kısmında bulunan ve sinir, damar ile bağ dokusunu içeren pulpa dokusunun çeşitli nedenlerle iltihaplanması veya hasar görmesi durumunda uygulanan bir diş tedavi yöntemidir.
Diş beyazlatma (bleaching), çeşitli nedenlerle renk değiştirmiş, sararmış ya da matlaşmış dişlerin özel yöntemlerle birkaç ton açılarak daha estetik bir görünüme kavuşturulması işlemidir.
Göbek fıtığı (umbilikal herni), karın içi dokuların veya bağırsakların göbek deliği çevresindeki zayıf noktadan dışarı doğru çıkmasıyla oluşur.
bursa implant fiyatları
ankara kadın üroloji uzmanı
ifvod官方认证平台,专为海外华人设计,24小时不间断提供高清视频和直播服务。
ankara kadın üroloji uzmanı
Ankara kadın ürolojisi, kadınların sıklıkla dile getirmekte çekindiği ancak günlük yaşamı ciddi şekilde etkileyen sorunlara odaklanan önemli bir uzmanlık alanıdır.
Samsun cildiye (dermatoloji) doktorları; cilt, saç, tırnak ve ağız mukozası hastalıklarının tanı, tedavi ve takibini yapan uzman hekimlerdir.
Dental implant tedavisi kaybedilen dişlerin yerlerine diş kökünü taklit eden titanyum (son yıllarda zirkonyum da kullanılmaktadır.) vidalardır.
Ankara kadın ürolojisi, kadınların sıklıkla dile getirmekte çekindiği ancak günlük yaşamı ciddi şekilde etkileyen sorunlara odaklanan önemli bir uzmanlık alanıdır.
şaşmaz cam filmi
alman ppf markaları
Sinir iletiminin durması, sinirin ulaştığı organın işlevlerinin azalmasını ya da tamamen kaybolmasını sağlar.
Göbek fıtığı (umbilikal herni), karın içi dokuların veya bağırsakların göbek deliği çevresindeki zayıf noktadan dışarı doğru çıkmasıyla oluşur.
Silahlı güvenlik eğitimi, VIP koruma eğitimi ve yakın koruma programları; yalnızca teknik atış becerisi kazandırmayı değil, operasyonel saha gerçeklerine uygun bir güvenlik refleksi oluşturmayı hedefler.
Bursa gülüş estetiği, tek bir tedavi yönteminden ziyade, birden fazla estetik ve fonksiyonel uygulamayı içeren kapsamlı bir tedavi felsefesidir.
Kadıköy implant tedavisi, diş kayıplarını tedavi etmek amacıyla kullanılan bir yöntemdir. Diş implantları, çene kemiğine yerleştirilen yapay diş kökleridir.
真实的人类第三季高清完整版运用AI智能推荐算法,海外华人可免费观看最新热播剧集。
Silahlı güvenlik eğitimi, VIP koruma eğitimi ve yakın koruma programları; yalnızca teknik atış becerisi kazandırmayı değil, operasyonel saha gerçeklerine uygun bir güvenlik refleksi oluşturmayı hedefler.
Kadıköy implant tedavisi, diş kayıplarını tedavi etmek amacıyla kullanılan bir yöntemdir. Diş implantları, çene kemiğine yerleştirilen yapay diş kökleridir.
Ankara kadın ürolojisi, kadınların sıklıkla dile getirmekte çekindiği ancak günlük yaşamı ciddi şekilde etkileyen sorunlara odaklanan önemli bir uzmanlık alanıdır.
Samsun cildiye (dermatoloji) doktorları; cilt, saç, tırnak ve ağız mukozası hastalıklarının tanı, tedavi ve takibini yapan uzman hekimlerdir.
Thank you for the information.
Silahlı güvenlik eğitimi, VIP koruma eğitimi ve yakın koruma programları; yalnızca teknik atış becerisi kazandırmayı değil, operasyonel saha gerçeklerine uygun bir güvenlik refleksi oluşturmayı hedefler.
Bursa gülüş estetiği, tek bir tedavi yönteminden ziyade, birden fazla estetik ve fonksiyonel uygulamayı içeren kapsamlı bir tedavi felsefesidir.
Balgat implant tedavisi, diş kaybı yaşayan bireyler için uygulanan, diş kökünün yerine titanyumdan yapılmış yapay bir diş kökü yerleştirme işlemini ifade eder
Bu yazıda, perinatoloji uzmanlarının uyguladığı tedavi ve takip yöntemlerini detaylı bir şekilde ele alacağız.
BMW ve Mini Cooper araçlar, yüksek mühendislik kalitesi ve sürüş keyfiyle öne çıkar.
BMW ve Mini Cooper araçlar, yüksek mühendislik kalitesi ve sürüş keyfiyle öne çıkar.
Samsun dudak dolgusu, dudakların hacmini artırmak, şeklini belirginleştirmek ve daha estetik bir görünüm kazandırmak amacıyla yapılan medikal estetik uygulamalardan biridir.
Samsun dudak dolgusu, dudakların hacmini artırmak, şeklini belirginleştirmek ve daha estetik bir görünüm kazandırmak amacıyla yapılan medikal estetik uygulamalardan biridir.
Samsun dudak dolgusu, dudakların hacmini artırmak, şeklini belirginleştirmek ve daha estetik bir görünüm kazandırmak amacıyla yapılan medikal estetik uygulamalardan biridir.
Ankara Otomatik Şanzıman Servisi
This is a great piece of content, thank you for sharing the information.
This is a great piece of content, thank you for sharing the information.
marmaris diş hekimi
Marmaris ortodontik tedavi; dişlerdeki çapraşıklık, aralık, gömüklük ve çene uyumsuzluklarını düzeltmek amacıyla uygulanan bir diş hekimliği tedavisidir.
Şeffaf plak tedavisi, dişlerdeki çapraşıklık, aralık ve hizalanma problemlerini düzeltmek amacıyla kullanılan, kişiye özel üretilen saydam apareylerle uygulanan modern bir ortodontik tedavi yöntemidir
Düzenli olarak yapılan genel diş muayeneleri, sağlıklı bir ağız ve güzel bir gülüş için önemli bir adımdır.
Doruk Eğitim Kurumları dinamik, deneyimli ve güçlü kadrosuyla yenilikçi eğitim programları ve alanında öncü bir sınav sistemiyle hayallerinize ulaştırmakta ve etkin rehberlik sistemiyle size en büyük yardımcıdır.
Düzenli olarak yapılan genel diş muayeneleri, sağlıklı bir ağız ve güzel bir gülüş için önemli bir adımdır.
Diş eksikliklerinin giderilmesinde günümüzün en gelişmiş ve doğal çözümü olan Muğla implant tedavisi, hem estetik hem de fonksiyonel açıdan yaşam kalitesini ciddi oranda artırır.
Doruk Eğitim Kurumları dinamik, deneyimli ve güçlü kadrosuyla yenilikçi eğitim programları ve alanında öncü bir sınav sistemiyle hayallerinize ulaştırmakta ve etkin rehberlik sistemiyle size en büyük yardımcıdır.
Şeffaf plak tedavisi, dişlerdeki çapraşıklık, aralık ve hizalanma problemlerini düzeltmek amacıyla kullanılan, kişiye özel üretilen saydam apareylerle uygulanan modern bir ortodontik tedavi yöntemidir
Perinatoloji, gebeliğin özellikle yüksek riskli olarak kabul edilen durumlarıyla ilgilenen, anne ve bebeğin sağlığını birlikte ele alan kadın-doğum yan dalıdır.
BMW ve Mini Cooper gibi özel araçlar, özel ilgi ve uzmanlık gerektirir. Biz de tam olarak bu anlayışla yola çıktık.
Perinatoloji, gebeliğin özellikle yüksek riskli olarak kabul edilen durumlarıyla ilgilenen, anne ve bebeğin sağlığını birlikte ele alan kadın-doğum yan dalıdır.
Perinatoloji, gebeliğin özellikle yüksek riskli olarak kabul edilen durumlarıyla ilgilenen, anne ve bebeğin sağlığını birlikte ele alan kadın-doğum yan dalıdır.
BMW ve Mini Cooper araçlar, yüksek mühendislik kalitesi ve sürüş keyfiyle öne çıkar.
Perinatoloji, gebeliğin özellikle yüksek riskli olarak kabul edilen durumlarıyla ilgilenen, anne ve bebeğin sağlığını birlikte ele alan kadın-doğum yan dalıdır.
Laboratuvar denilmekle birlikte yatak odanıza benzer bir ortam bulunmaktadır.
Laboratuvar denilmekle birlikte yatak odanıza benzer bir ortam bulunmaktadır.
İmplant eksik olan dişlerin yerine dişin fonksiyonunu ve estetiğini tekrar sağlamak amacıyla çene kemiğine yerleştirilen yapay diş köküdür.
İmplant eksik olan dişlerin yerine dişin fonksiyonunu ve estetiğini tekrar sağlamak amacıyla çene kemiğine yerleştirilen yapay diş köküdür.
Çocuk terapisi, çocukların duygusal, sosyal ve davranışsal zorluklarla başa çıkmalarına yardımcı olmak için geliştirilen profesyonel bir psikoterapi yöntemidir.
BMW ve Mini Cooper araçlar, yüksek mühendislik kalitesi ve sürüş keyfiyle öne çıkar.
Çocuğunuzun geleceği için en doğru kararı vermek istiyorsanız, Ankara’daki kolej seçeneklerini değerlendirirken sadece akademik başarıya değil, eğitim anlayışına ve vizyonuna da dikkat etmelisiniz.
İmplant eksik olan dişlerin yerine dişin fonksiyonunu ve estetiğini tekrar sağlamak amacıyla çene kemiğine yerleştirilen yapay diş köküdür.
İmplant eksik olan dişlerin yerine dişin fonksiyonunu ve estetiğini tekrar sağlamak amacıyla çene kemiğine yerleştirilen yapay diş köküdür.
Çocuk terapisi, çocukların duygusal, sosyal ve davranışsal zorluklarla başa çıkmalarına yardımcı olmak için geliştirilen profesyonel bir psikoterapi yöntemidir.
BMW ve Mini Cooper araçlar, yüksek mühendislik kalitesi ve sürüş keyfiyle öne çıkar.
Çocuğunuzun geleceği için en doğru kararı vermek istiyorsanız, Ankara’daki kolej seçeneklerini değerlendirirken sadece akademik başarıya değil, eğitim anlayışına ve vizyonuna da dikkat etmelisiniz.
Laboratuvar denilmekle birlikte yatak odanıza benzer bir ortam bulunmaktadır.
Şanlıurfa Çiçekçi
pendik diş hekimi
geniz eti ameliyatı ankara
Perinatoloji, gebeliğin özellikle yüksek riskli olarak kabul edilen durumlarıyla ilgilenen, anne ve bebeğin sağlığını birlikte ele alan kadın-doğum yan dalıdır.
Dershanemizde hazırladığımız Eryaman YKS Kursları, öğrencinin seviyesine göre şekillenen, TYT ve AYT’yi birlikte yöneten ve net artışını hedefleyen tam kapsamlı bir hazırlık programıdır.
Kadın ürolojisi, kadınlarda görülen idrar yolları ve genital bölgeyle ilgili sorunların tanı, tedavi ve takibini yapan ürolojinin özel bir alt dalıdır.
ankara kadın üroloji uzmanı
Kadın ürolojisi, kadınlarda görülen idrar yolları ve genital bölgeyle ilgili sorunların tanı, tedavi ve takibini yapan ürolojinin özel bir alt dalıdır.
Pretty section of content. I just stumbled upon your weblog and in accession capital to assert that
I acquire in fact enjoyed account your blog posts. Any way I’ll be subscribing to your augment and even I achievement you
access consistently fast.
İmplant eksik olan dişlerin yerine dişin fonksiyonunu ve estetiğini tekrar sağlamak amacıyla çene kemiğine yerleştirilen yapay diş köküdür.
İz Psikoloji olarak, bireylerin duygusal, psikolojik ve sosyal zorluklarla başa çıkmalarına yardımcı olan profesyonel destek hizmetleri sunuyoruz
Reflü (Gastroözofageal Reflü Hastalığı), midedeki asit ve sindirim enzimlerinin yemek borusuna geri kaçması sonucu ortaya çıkan kronik bir durumdur.
İz Psikoloji olarak, bireylerin duygusal, psikolojik ve sosyal zorluklarla başa çıkmalarına yardımcı olan profesyonel destek hizmetleri sunuyoruz
Nice post. I learn something totally new and challenging on sites I stumbleupon everyday.
It will always be helpful to read through content from other authors and
use a little something from their web sites.
Meme implantı operasyonu farklı tercihler ve gerekçelerle yapılabilir ancak operasyon sonrasına dair hekimlerin ve hastaların beklentileri benzerlikler gösterir.
Bu karar cesaret ister. 60 yılı aşkın Arion deneyimi, en doğal ve güvenli sonucu sunmak için her adımda yanınızda.
Meme implantı operasyonu farklı tercihler ve gerekçelerle yapılabilir ancak operasyon sonrasına dair hekimlerin ve hastaların beklentileri benzerlikler gösterir.
Bu karar cesaret ister. 60 yılı aşkın Arion deneyimi, en doğal ve güvenli sonucu sunmak için her adımda yanınızda.
Meme implantı operasyonu farklı tercihler ve gerekçelerle yapılabilir ancak operasyon sonrasına dair hekimlerin ve hastaların beklentileri benzerlikler gösterir.
Bu karar cesaret ister. 60 yılı aşkın Arion deneyimi, en doğal ve güvenli sonucu sunmak için her adımda yanınızda.
ankara otomatik şanzıman
Ağız ve çene sağlığını koruyarak fonksiyon (çiğneme, konuşma) ve estetiği birlikte sağlar.
Ağız ve çene sağlığını koruyarak fonksiyon (çiğneme, konuşma) ve estetiği birlikte sağlar.
Hem fonksiyonel (nefes alma) hem de estetik sorunları aynı anda çözmeyi amaçlayan bu operasyon, deneyimli bir cerrah tarafından titizlikle planlanmalıdır.
Septum, burun boşluğunu ikiye ayıran kıkırdak ve kemikten oluşan bir perdedir. Bu perdede sağa, sola veya her iki yönde gelişen eğriliklere septum deviasyonu denir.
İncek’te implant tedavisi, diş hekimliğinde kaybedilmiş dişlerin yerine titanyum vida benzeri yapılar yerleştirilerek yapılan bir tedavi yöntemidir.
BMW ve Mini Cooper araçlar, yüksek mühendislik kalitesi ve sürüş keyfiyle öne çıkar.
TYT AYT kursu, YKS sınavına yönelik hazırlık yapmak isteyen öğrencilere sunulan, genellikle kapsamlı bir eğitim programıdır.
Kadın ürolojisi, kadınlarda görülen idrar yolları ve genital bölgeyle ilgili sorunların tanı, tedavi ve takibini yapan ürolojinin özel bir alt dalıdır.
Kaz ayağı botoksu, gözlerin dış kenarlarında zamanla oluşan ince çizgi ve kırışıklıkları gidermek için uygulanan estetik bir enjeksiyon işlemidir.
Modern atış teknikleri, güvenli silah kullanımı ve taktik beceriler — her seviyeye uygun programlar.
Arion, bugün de geçmişten gelen öncülüğünü yeni nesil tasarım ve üretim teknolojileri ile birleştirmeye ve kadın sağlığı için en yüksek standartları sağlamaya devam etmektedir.
BMW’nizin bakımı ve onarımı için güvenilir, uzman bir servis mi arıyorsunuz?
Bu perdede sağa, sola veya her iki yönde gelişen eğriliklere septum deviasyonu denir.
Septum, burun boşluğunu ikiye ayıran kıkırdak ve kemikten oluşan bir perdedir. Bu perdede sağa, sola veya her iki yönde gelişen eğriliklere septum deviasyonu denir.
İncek’te implant tedavisi, diş hekimliğinde kaybedilmiş dişlerin yerine titanyum vida benzeri yapılar yerleştirilerek yapılan bir tedavi yöntemidir.
BMW ve Mini Cooper araçlar, yüksek mühendislik kalitesi ve sürüş keyfiyle öne çıkar.
TYT AYT kursu, YKS sınavına yönelik hazırlık yapmak isteyen öğrencilere sunulan, genellikle kapsamlı bir eğitim programıdır.
TYT AYT kursu, YKS sınavına yönelik hazırlık yapmak isteyen öğrencilere sunulan, genellikle kapsamlı bir eğitim programıdır.
Kaz ayağı botoksu, gözlerin dış kenarlarında zamanla oluşan ince çizgi ve kırışıklıkları gidermek için uygulanan estetik bir enjeksiyon işlemidir.
Modern atış teknikleri, güvenli silah kullanımı ve taktik beceriler — her seviyeye uygun programlar.
BMW’nizin bakımı ve onarımı için güvenilir, uzman bir servis mi arıyorsunuz?
İncek’te implant tedavisi, diş hekimliğinde kaybedilmiş dişlerin yerine titanyum vida benzeri yapılar yerleştirilerek yapılan bir tedavi yöntemidir.
TYT AYT kursu, YKS sınavına yönelik hazırlık yapmak isteyen öğrencilere sunulan, genellikle kapsamlı bir eğitim programıdır.
Kaz ayağı botoksu, gözlerin dış kenarlarında zamanla oluşan ince çizgi ve kırışıklıkları gidermek için uygulanan estetik bir enjeksiyon işlemidir.
Arion, bugün de geçmişten gelen öncülüğünü yeni nesil tasarım ve üretim teknolojileri ile birleştirmeye ve kadın sağlığı için en yüksek standartları sağlamaya devam etmektedir.
eryaman diş polikliniği
eryaman diş polikliniği
eryaman butik dershane
bursa implant fiyatları
Ameliyatsız, hızlı ve etkili sonuçlar sunan bu uygulamalar sayesinde daha genç, dinç ve simetrik bir yüz görünümü elde edilir.
eryaman butik dershane
Ameliyatsız, hızlı ve etkili sonuçlar sunan bu uygulamalar sayesinde daha genç, dinç ve simetrik bir yüz görünümü elde edilir.
Bu nedenle İstanbul’da uyku kliniği arayışında olan hastalar için doğru değerlendirme ve uygun tanı süreci büyük önem taşır.
Tel tedavisi, ortodonti olarak da bilinen ve dişlerin ve çenenin düzeltilmesi için kullanılan bir diş hekimliği yöntemidir.
Tel tedavisi, ortodonti olarak da bilinen ve dişlerin ve çenenin düzeltilmesi için kullanılan bir diş hekimliği yöntemidir.
Bu nedenle İstanbul’da uyku kliniği arayışında olan hastalar için doğru değerlendirme ve uygun tanı süreci büyük önem taşır.
Markanızı dijital dünyada öne çıkarıyoruz. SEO’dan sosyal medyaya, reklam yönetiminden web tasarıma — tüm dijital ihtiyaçlarınız için bütünleşik çözümler.
Markanızı dijital dünyada öne çıkarıyoruz. SEO’dan sosyal medyaya, reklam yönetiminden web tasarıma — tüm dijital ihtiyaçlarınız için bütünleşik çözümler.
Прямо здесь и сейчас Стреляй, как пуля в стволе! Прямо здесь и сейчас Давайте срежем это и подожжем!
Tüp mide ameliyatı fiyatı, birçok kişi tarafından en çok merak edilen konular arasında yer alır.
Tüp mide ameliyatı fiyatı, birçok kişi tarafından en çok merak edilen konular arasında yer alır.
Bu web sitesi, bulunduğun noktayı hızlıca öğrenmek isteyen kullanıcılar için sade ve pratik bir deneyim sunar. Ben neredeyim sorusuna anında yanıt almayı kolaylaştıran yapısı sayesinde, ziyaretçiler konum bilgisini ek bir işlemle uğraşmadan görüntüleyebilir. Harita desteğiyle çalışan sistem, konumumu göster ihtiyacı olan kullanıcıların mevcut yerini net biçimde görmesine yardımcı olur. Özellikle telefondan giriş yapanlar için optimize edilen sayfalar, kullanım sürecini daha hızlı ve anlaşılır hale getirir. Canlı konumum bilgisini kontrol etmek isteyen ziyaretçiler de site üzerinden güncel konum detaylarına kolayca ulaşabilir. Kısacası bu platform, konum odaklı aramalarda hız, sadelik ve erişilebilirlik sağlayan kullanışlı bir çözüm sunar.
Ümitköy diş klinikleri, ağız ve diş sağlığının korunması, tedavi edilmesi ve estetik olarak iyileştirilmesi amacıyla kapsamlı hizmetler sunar.
Ümitköy diş klinikleri, ağız ve diş sağlığının korunması, tedavi edilmesi ve estetik olarak iyileştirilmesi amacıyla kapsamlı hizmetler sunar.
Ümitköy diş klinikleri, ağız ve diş sağlığının korunması, tedavi edilmesi ve estetik olarak iyileştirilmesi amacıyla kapsamlı hizmetler sunar.
Safra kesesi ameliyatı, tıp dilinde kolesistektomi olarak adlandırılır ve en sık safra taşı veya safra kesesi iltihabı gibi durumlarda uygulanan, genel cerrahide çok yaygın bir operasyondur.
Uyku, bedenin ve zihnin yenilenmesi için vazgeçilmez bir ihtiyaçtır.
Ankara kadın ürolog Doç. Dr. Eda Tokat Şahin, kadınlara özgü üriner sistem ve pelvik taban sorunlarının tanı ve tedavisinde uzmanlaşmıştır.
Antalya implant tedavisi, kaybedilen dişlerin fonksiyonunu ve estetiğini geri kazandırmak amacıyla çene kemiği içerisine yerleştirilen titanyum vidalar üzerine yapılan yapay diş uygulamasıdır.
Safra kesesi ameliyatı, tıp dilinde kolesistektomi olarak adlandırılır ve en sık safra taşı veya safra kesesi iltihabı gibi durumlarda uygulanan, genel cerrahide çok yaygın bir operasyondur.
Antalya implant tedavisi, kaybedilen dişlerin fonksiyonunu ve estetiğini geri kazandırmak amacıyla çene kemiği içerisine yerleştirilen titanyum vidalar üzerine yapılan yapay diş uygulamasıdır.
BMW ve Mini Cooper araçlar, yüksek mühendislik kalitesi ve sürüş keyfiyle öne çıkar.
Thank you so much!
TYT AYT kursu, YKS sınavına yönelik hazırlık yapmak isteyen öğrencilere sunulan, genellikle kapsamlı bir eğitim programıdır.
BMW ve Mini Cooper araçlar, yüksek mühendislik kalitesi ve sürüş keyfiyle öne çıkar.
thank you for sharing us.
TYT AYT kursu, YKS sınavına yönelik hazırlık yapmak isteyen öğrencilere sunulan, genellikle kapsamlı bir eğitim programıdır.
TYT AYT kursu, YKS sınavına yönelik hazırlık yapmak isteyen öğrencilere sunulan, genellikle kapsamlı bir eğitim programıdır.
Hi fantastic blog! Does running a blog such as this require a massive amount work?
I have no expertise in computer programming however I had been hoping to start my own blog
in the near future. Anyway, should you have any recommendations or tips for new blog owners
please share. I understand this is off subject nevertheless I simply wanted to ask.
Thank you!
şaşmaz ppf kaplama
Reflü, mide asidinin yemek borusuna geri kaçmasıyla ortaya çıkan ve yaşam kalitesini ciddi şekilde düşüren yaygın bir sindirim sistemi problemidir.
Reflü, mide asidinin yemek borusuna geri kaçmasıyla ortaya çıkan ve yaşam kalitesini ciddi şekilde düşüren yaygın bir sindirim sistemi problemidir.
Reflü, mide asidinin yemek borusuna geri kaçmasıyla ortaya çıkan ve yaşam kalitesini ciddi şekilde düşüren yaygın bir sindirim sistemi problemidir.
Safra kesesi ameliyatı, tıp dilinde kolesistektomi olarak adlandırılır ve en sık safra taşı veya safra kesesi iltihabı gibi durumlarda uygulanan, genel cerrahide çok yaygın bir operasyondur
Akne, cildin yağ bezlerinin aşırı sebum (yağ) üretmesi ve ölü cilt hücrelerinin gözenekleri tıkaması sonucu ortaya çıkan yaygın bir cilt hastalığıdır.
Safra kesesi ameliyatı, tıp dilinde kolesistektomi olarak adlandırılır ve en sık safra taşı veya safra kesesi iltihabı gibi durumlarda uygulanan, genel cerrahide çok yaygın bir operasyondur
BMW ve Mini Cooper araçlar, yüksek mühendislik kalitesi ve sürüş keyfiyle öne çıkar.
Arion, 5 farklı anatomik (damla) tip projeksiyon seçeneği ile 60’a yakın farklı hacim/tasarım implant tercihi sunar.
Meme estetiği ameliyatlarında kullanılan implantların kalitesi, hem estetik sonuç hem de uzun vadeli kullanım açısından büyük önem taşır.
Arion, 5 farklı anatomik (damla) tip projeksiyon seçeneği ile 60’a yakın farklı hacim/tasarım implant tercihi sunar.
Meme estetiği ameliyatlarında kullanılan implantların kalitesi, hem estetik sonuç hem de uzun vadeli kullanım açısından büyük önem taşır.
Meme estetiği ameliyatlarında kullanılan implantların kalitesi, hem estetik sonuç hem de uzun vadeli kullanım açısından büyük önem taşır.
Karaciğerde saptanan her kist ameliyat gerektirmez. En sık görülen karaciğer kistleri basit kistlerdir ve bunların büyük bölümü tesadüfen fark edilir, hiçbir belirti vermez ve yalnızca takip yeterli olur.
Tedavi genellikle üç ana başlıkta özetlenir: yaşam tarzı değişiklikleri, ilaç tedavisi ve gerektiğinde endoskopik ya da cerrahi yöntemler.
Reflü (Gastroözofageal Reflü Hastalığı), midedeki asit ve sindirim enzimlerinin yemek borusuna geri kaçması sonucu ortaya çıkan kronik bir durumdur. Aşağıda bu hastalığı ayrıntılı şekilde ele alıyoruz:
BMW ve Mini Cooper gibi özel araçlar, özel ilgi ve uzmanlık gerektirir. Biz de tam olarak bu anlayışla yola çıktık.
Tedavi genellikle üç ana başlıkta özetlenir: yaşam tarzı değişiklikleri, ilaç tedavisi ve gerektiğinde endoskopik ya da cerrahi yöntemler.
Özel güvenlik alanında görev yapan profesyoneller, günümüzün karmaşık tehdit ortamında yalnızca fiziksel varlıklarıyla değil; taktiksel bilinçleri, zihinsel hazırlıkları ve silah kullanım yetkinlikleriyle de fark yaratmak durumundadır.
Özel güvenlik alanında görev yapan profesyoneller, günümüzün karmaşık tehdit ortamında yalnızca fiziksel varlıklarıyla değil; taktiksel bilinçleri, zihinsel hazırlıkları ve silah kullanım yetkinlikleriyle de fark yaratmak durumundadır.
Özel güvenlik alanında görev yapan profesyoneller, günümüzün karmaşık tehdit ortamında yalnızca fiziksel varlıklarıyla değil; taktiksel bilinçleri, zihinsel hazırlıkları ve silah kullanım yetkinlikleriyle de fark yaratmak durumundadır.
Excellent goods from you, man. I have understand your stuff previous to and you are just too excellent.
I really like what you’ve acquired here, really like what you’re saying and the
way in which you say it. You make it enjoyable
and you still take care of to keep it sensible. I can not wait to read
far more from you. This is actually a terrific web site.
İdrar tutamama, kişinin istemsiz olarak idrar kaçırması durumudur. Bu sorun günlük yaşamı, sosyal hayatı, iş yaşamını ve özgüveni olumsuz etkileyebilir.
Ankara’nın hızla gelişen bölgelerinden Batıkent ve Çakırlar çevresinde yaşayan aileler için kaliteli ve güvenilir eğitim kurumları büyük önem taşımaktadır.
Obezite, yalnızca estetik bir sorun değil; aynı zamanda diyabet, yüksek tansiyon, uyku apnesi, eklem rahatsızlıkları ve kalp-damar hastalıkları gibi pek çok sağlık problemini beraberinde getirebilen ciddi bir hastalıktır.
Fortune Rabbit respin: quem já pegou vários seguidos?
Fortune Dragon novo lançamento PG Soft: já testou o dragão dourado?
İdrar tutamama, kişinin istemsiz olarak idrar kaçırması durumudur. Bu sorun günlük yaşamı, sosyal hayatı, iş yaşamını ve özgüveni olumsuz etkileyebilir.
Obezite, yalnızca estetik bir sorun değil; aynı zamanda diyabet, yüksek tansiyon, uyku apnesi, eklem rahatsızlıkları ve kalp-damar hastalıkları gibi pek çok sağlık problemini beraberinde getirebilen ciddi bir hastalıktır.
Obezite, yalnızca estetik bir sorun değil; aynı zamanda diyabet, yüksek tansiyon, uyku apnesi, eklem rahatsızlıkları ve kalp-damar hastalıkları gibi pek çok sağlık problemini beraberinde getirebilen ciddi bir hastalıktır.
Obezite, yalnızca estetik bir sorun değil; aynı zamanda diyabet, yüksek tansiyon, uyku apnesi, eklem rahatsızlıkları ve kalp-damar hastalıkları gibi pek çok sağlık problemini beraberinde getirebilen ciddi bir hastalıktır.
Gebeliklerin büyük bir kısmı sorunsuz ilerlese de bazı anne adaylarında anneye veya bebeğe ait risk faktörleri bulunabilir
Gebeliklerin büyük bir kısmı sorunsuz ilerlese de bazı anne adaylarında anneye veya bebeğe ait risk faktörleri bulunabilir
Ümitköy diş klinikleri, ağız ve diş sağlığının korunması, tedavi edilmesi ve estetik olarak iyileştirilmesi amacıyla kapsamlı hizmetler sunar.
BMW araç sahipleri için doğru servis seçimi, aracın performansı ve uzun ömürlü kullanımı açısından kritik bir rol oynar.
Egzama, cildin iltihaplanmasıyla karakterize akut veya kronik bir deri hastalığıdır.
BMW araçlarda sürüş konforunu belirleyen en önemli sistemlerden biri otomatik şanzımandır.
Perinatoloji, halk arasında “riskli gebelik doktoru” olarak bilinen perinatologlar tarafından yürütülen, anne karnındaki bebeğin (fetüs) ve annenin sağlığıyla yakından ilgilenen kadın doğum uzmanlığının bir yan dalıdır
Invisalign, şeffaf plaklar adı verilen, özel olarak tasarlanmış bir dizi plastik plak kullanarak dişleri hizalar.
BMW araç sahipleri için doğru servis seçimi, aracın performansı ve uzun ömürlü kullanımı açısından kritik bir rol oynar.
BMW araçlarda sürüş konforunu belirleyen en önemli sistemlerden biri otomatik şanzımandır.
Perinatoloji, halk arasında “riskli gebelik doktoru” olarak bilinen perinatologlar tarafından yürütülen, anne karnındaki bebeğin (fetüs) ve annenin sağlığıyla yakından ilgilenen kadın doğum uzmanlığının bir yan dalıdır
türbanlı porno izle
Ümitköy diş klinikleri, ağız ve diş sağlığının korunması, tedavi edilmesi ve estetik olarak iyileştirilmesi amacıyla kapsamlı hizmetler sunar.
BMW araç sahipleri için doğru servis seçimi, aracın performansı ve uzun ömürlü kullanımı açısından kritik bir rol oynar.
İstanbul gibi rekabetin son derece yoğun olduğu bir şehirde dijitalde öne çıkmak isteyen markalar için profesyonel SEO çalışmaları büyük önem taşır. Doğru analiz, güçlü teknik altyapı ve hedef odaklı içerik stratejisi ile çalışan bir İstanbul SEO Uzmanı, web sitenizin sadece daha fazla ziyaretçi almasını değil, aynı zamanda daha doğru kitleye ulaşmasını sağlar. Bu süreçte önemli olan yalnızca sıralama yükseltmek değil; marka güveni oluşturmak, görünürlüğü artırmak ve organik trafiği gerçek müşteriye dönüştürebilmektir. Apexdgt de bu noktada markalara daha planlı, daha stratejik ve sürdürülebilir bir SEO yaklaşımı sunarak İstanbul pazarında daha güçlü bir dijital konum elde etmelerine katkı sağlar.
ankara otomatik şanzıman yağ değişimi
Sıvı yüz germe (Liquid Facelift), cerrahi işlem gerektirmeden yüz hatlarını gençleştirmeyi, cilde hacim kazandırmayı ve sarkmaları toparlamayı amaçlayan modern bir estetik uygulamadır.
Labioplasti, kadın genital bölgesinde iç dudakların ya da bazı durumlarda dış dudakların estetik ve fonksiyonel açıdan yeniden şekillendirilmesini amaçlayan cerrahi bir işlemdir.
Kemik greftleri ve membranlar, diş hekimliğinde özellikle implant tedavisi ve ileri cerrahi uygulamalarda kullanılan, kemik dokusunun yeniden oluşturulmasını ve korunmasını sağlayan önemli yöntemlerdir.
Fıtık, karın duvarındaki kas ve bağ dokularının zayıflaması sonucu, iç organların ya da dokuların bu zayıf alandan dışarı doğru çıkıntı yapmasıyla oluşan bir sağlık sorunudur.
Karın germe uygulaması ya da tıp literatüründe bilinen adıyla Abdominoplasti; estetik bir cerrahi uygulama olarak bilinmektedir.
Kemik greftleri ve membranlar, diş hekimliğinde özellikle implant tedavisi ve ileri cerrahi uygulamalarda kullanılan, kemik dokusunun yeniden oluşturulmasını ve korunmasını sağlayan önemli yöntemlerdir.
Fıtık, karın duvarındaki kas ve bağ dokularının zayıflaması sonucu, iç organların ya da dokuların bu zayıf alandan dışarı doğru çıkıntı yapmasıyla oluşan bir sağlık sorunudur.
Fortune Tiger cartinha misteriosa: quem já ativou x300+?
Karın germe uygulaması ya da tıp literatüründe bilinen adıyla Abdominoplasti; estetik bir cerrahi uygulama olarak bilinmektedir.
Fortune Rabbit tá pagando mais que o Tigrinho essa semana? Mostra seu maior respin!
Fortune Ox no Pix: R$10 vira 180 giros grátis em 2 minutos!
Jogo do Tigrinho dealer ao vivo: big win garantido?
Fortune Dragon novo hit: já testou o dragão dourado?
Wild Bandito sticky wilds: quem já ativou vários?
Bônus sem depósito PG Soft: quem conseguiu giros grátis?
Çıkarılabilir, şeffaf ve neredeyse görünmez plaklarla dişlerinizi rahatsızlık duymadan düzeltin. Günlük yaşamınızı etkilemeyen modern ortodonti.
Çıkarılabilir, şeffaf ve neredeyse görünmez plaklarla dişlerinizi rahatsızlık duymadan düzeltin. Günlük yaşamınızı etkilemeyen modern ortodonti.
Hesap makinesi, sayısal işlemleri hızlı ve doğru biçimde gerçekleştirmek için kullanılan pratik bir araçtır. Toplama, çıkarma, çarpma ve bölme gibi temel matematik işlemlerini saniyeler içinde yapmayı sağlayan hesap makineleri; eğitimden ticarete, ofis işlerinden günlük yaşama kadar pek çok alanda önemli bir kolaylık sunar. Günümüzde klasik fiziksel cihazların yanı sıra online hesap makinesi çözümleri de yaygınlaşmış, kullanıcıların bilgisayar, tablet ve telefon üzerinden anında işlem yapabilmesine imkân tanımıştır. Bu yönüyle hesap makinesi, zaman kazandıran ve işlem hatalarını azaltan vazgeçilmez yardımcı araçlardan biri haline gelmiştir.
Eksik dişler, yalnızca estetik görünümü değil; çiğneme, konuşma ve genel ağız sağlığını da olumsuz etkileyebilir.
Güncel teknoloji ve kanıta dayalı ortodonti yöntemleriyle her yaşta sağlıklı gülüşler.
Antalya zirkonyum diş kaplama, estetik ve dayanıklılığı bir arada sunan modern bir diş kaplama yöntemidir.
Eksik dişler, yalnızca estetik görünümü değil; çiğneme, konuşma ve genel ağız sağlığını da olumsuz etkileyebilir.
Güncel teknoloji ve kanıta dayalı ortodonti yöntemleriyle her yaşta sağlıklı gülüşler.
Septum, burun boşluğunu ikiye ayıran kıkırdak ve kemikten oluşan bir perdedir.
Antalya zirkonyum diş kaplama, estetik ve dayanıklılığı bir arada sunan modern bir diş kaplama yöntemidir.
I really enjoyed your blog post. It was a directly related answer related to the topic I was looking for.
Eksik dişler, yalnızca estetik görünümü değil; çiğneme, konuşma ve genel ağız sağlığını da olumsuz etkileyebilir.
Burun, yüzümüzün merkezinde yer alan ve hem solunum fonksiyonu hem de estetik açıdan büyük öneme sahip bir organdır.
Kancalı diş protezleri, eksik dişlerin tamamlanmasında kullanılan hareketli protez türlerinden biridir.
Burnun mevcut şeklinden mutlu olmayan kişiler rinoplasti dediğimiz estetik burun ameliyatı ile arzu ettikleri burun şekline kavuşabilirler.
İstanbul’da uyku kliniği arayışında olan hastalar için doğru değerlendirme ve uygun tanı süreci büyük önem taşır.
Prostat, mesane ve böbrek kanserlerinde Da Vinci robotik cerrahi sistemi. Daha az ağrı, daha hızlı iyileşme.
Ankara kadın ürolog Doç. Dr. Eda Tokat Şahin, kadınlara özgü üriner sistem ve pelvik taban sorunlarının tanı ve tedavisinde uzmanlaşmıştır.
Ciltte oluşan lekeler, güneş hasarı, kızarıklık, ince kırışıklıklar ve renk düzensizlikleri birçok kişi için estetik açıdan rahatsız edici olabilir.
Kancalı diş protezleri, eksik dişlerin tamamlanmasında kullanılan hareketli protez türlerinden biridir.
Burnun mevcut şeklinden mutlu olmayan kişiler rinoplasti dediğimiz estetik burun ameliyatı ile arzu ettikleri burun şekline kavuşabilirler.
Prostat, mesane ve böbrek kanserlerinde Da Vinci robotik cerrahi sistemi. Daha az ağrı, daha hızlı iyileşme.
Ciltte oluşan lekeler, güneş hasarı, kızarıklık, ince kırışıklıklar ve renk düzensizlikleri birçok kişi için estetik açıdan rahatsız edici olabilir.
Antalya zirkonyum diş kaplama, estetik ve dayanıklılığı bir arada sunan modern bir diş kaplama yöntemidir.
BMW ve Mini Cooper gibi özel araçlar, özel ilgi ve uzmanlık gerektirir. Biz de tam olarak bu anlayışla yola çıktık.
Yükseköğretim Kurumları Sınavı (YKS), Türkiye’deki üniversitelere giriş için en önemli aşamadır. YKS, temel yeterlilik testi (TYT) ve alan yeterlilik testi (AYT) olmak üzere iki ana aşamadan oluşur.
Sıvı yüz germe (Liquid Facelift), cerrahi işlem gerektirmeden yüz hatlarını gençleştirmeyi, cilde hacim kazandırmayı ve sarkmaları toparlamayı amaçlayan modern bir estetik uygulamadır.
Burnun mevcut şeklinden mutlu olmayan kişiler rinoplasti dediğimiz estetik burun ameliyatı ile arzu ettikleri burun şekline kavuşabilirler.
İstanbul’da uyku kliniği arayışında olan hastalar için doğru değerlendirme ve uygun tanı süreci büyük önem taşır.
Eryaman çocuk diş hekimliği, pedodonti olarak da bilinir ve genellikle doğumdan genç yetişkinlik dönemine kadar olan çocukların diş, ağız ve çene sağlığıyla ilgilenir.
Kemik greftleri ve membranlar, diş hekimliğinde özellikle implant tedavisi ve ileri cerrahi uygulamalarda kullanılan, kemik dokusunun yeniden oluşturulmasını ve korunmasını sağlayan önemli yöntemlerdi
Yüz estetiğinde en çok dikkat çeken bölgelerden biri burundur.
Eryaman çocuk diş hekimliği, pedodonti olarak da bilinir ve genellikle doğumdan genç yetişkinlik dönemine kadar olan çocukların diş, ağız ve çene sağlığıyla ilgilenir.
Kemik greftleri ve membranlar, diş hekimliğinde özellikle implant tedavisi ve ileri cerrahi uygulamalarda kullanılan, kemik dokusunun yeniden oluşturulmasını ve korunmasını sağlayan önemli yöntemlerdi
Samsun botoks uygulamaları, hem estetik görünümü desteklemek hem de bazı fonksiyonel şikâyetleri azaltmak amacıyla sıklıkla tercih edilen medikal işlemler arasında yer alır.
Samsun botoks uygulamaları, hem estetik görünümü desteklemek hem de bazı fonksiyonel şikâyetleri azaltmak amacıyla sıklıkla tercih edilen medikal işlemler arasında yer alır.
Diş implantları, eksik dişlerin yerine konulması için kullanılan kalıcı bir çözümdür.
Lingual ortodonti, dişlerin iç yüzeyine yerleştirilen özel braketler ve teller yardımıyla uygulanan bir ortodontik tedavi yöntemidir
Diş kaybı sonrasında ya da uzun süre dişsiz kalındığında çene kemiğinde hacim kaybı meydana gelebilir.
Lingual ortodonti, dişlerin iç yüzeyine yerleştirilen özel braketler ve teller yardımıyla uygulanan bir ortodontik tedavi yöntemidir
Diş kaybı sonrasında ya da uzun süre dişsiz kalındığında çene kemiğinde hacim kaybı meydana gelebilir.
Marmaris zirkonyum kaplama, diş estetiği ve fonksiyonunu birlikte iyileştirmeyi amaçlayan, metal içermeyen modern bir diş kaplama yöntemidir
Çayyolu zirkonyum kaplama tedavisi, estetik görünüm ile dayanıklılığı bir arada sunan modern diş hekimliği uygulamalarından biridir.
Marmaris zirkonyum kaplama, diş estetiği ve fonksiyonunu birlikte iyileştirmeyi amaçlayan, metal içermeyen modern bir diş kaplama yöntemidir
Çayyolu zirkonyum kaplama tedavisi, estetik görünüm ile dayanıklılığı bir arada sunan modern diş hekimliği uygulamalarından biridir.
Bari Takım Elbise ürünlerini web sitemizden erişebilir tarzınızı yakalayabilirsiniz.
Akne, en sık ergenlik döneminde görülmekle birlikte erişkin yaşlarda da devam edebilen, ciltte siyah nokta, beyaz nokta, sivilce ve iltihaplı lezyonlarla seyreden kronik bir deri hastalığıdır.
Diş implantları, eksik dişlerin yerine konulması için kullanılan titanyumdan yapılmış yapay diş kökleridir.
Epilepsi (Sara hastalığı), yineleyen nöbetler ile karakterize ve sıklıkla geçici bilinç kayıplarına neden olan, beyindeki hücrelerin kontrol edilemeyen, ani, aşırı ve anormal deşarjlarına bağlı olarak ortaya çıkan bir durumdur
ぜひ、私たちが厳選した便利なウェブサイト一覧をご覧ください。
ハドロンブックマーク – ハドロンブックマーク
thank you amazing article
ハドロンはこの分野でナンバーワンだ。
Bu yazıda, perinatoloji uzmanlarının uyguladığı tedavi ve takip yöntemlerini detaylı bir şekilde ele alacağız.
Bu yazıda, perinatoloji uzmanlarının uyguladığı tedavi ve takip yöntemlerini detaylı bir şekilde ele alacağız.
Diş implantları, eksik dişlerin yerine konulması için kullanılan titanyumdan yapılmış yapay diş kökleridir.
Bu yazıda, perinatoloji uzmanlarının uyguladığı tedavi ve takip yöntemlerini detaylı bir şekilde ele alacağız.
Aile Danışmanlığı, aile bireyleri arasındaki ilişkileri güçlendirmeyi ve iletişim problemlerini çözmeyi hedefleyen bir psikodanışmanlık türüdür
Uyku testi, uyku bozukluklarını teşhis etmek için kullanılan bir tıbbi uygulama şeklidir.
Aile Danışmanlığı, aile bireyleri arasındaki ilişkileri güçlendirmeyi ve iletişim problemlerini çözmeyi hedefleyen bir psikodanışmanlık türüdür
Uyku testi, uyku bozukluklarını teşhis etmek için kullanılan bir tıbbi uygulama şeklidir.
Perinatoloji, anne ve bebeğin sağlığını tehdit edebilecek riskli durumların erken tanısı, yakın takibi ve tedavisiyle ilgilenen kadın-doğum yan dalıdır.
You’ve made some decent points there. I checked on the web to learn more about the issue and found most individuals will go along with your views on this
site.
Liposuction, halk arasında yağ alma veya yağ emme olarak da bilinen, plastik cerrahide kullanılan bir tür yağ alma prosedürüdür.
Liposuction, halk arasında yağ alma veya yağ emme olarak da bilinen, plastik cerrahide kullanılan bir tür yağ alma prosedürüdür.
Erenköy’de erken teşhis ve doğru tedavi planlamasıyla diş eti hastalıkları kontrol altına alınabilir.
TYT AYT kursu, YKS sınavına yönelik hazırlık yapmak isteyen öğrencilere sunulan, genellikle kapsamlı bir eğitim programıdır
TYT AYT kursu, YKS sınavına yönelik hazırlık yapmak isteyen öğrencilere sunulan, genellikle kapsamlı bir eğitim programıdır
LGS, öğrencilerin yalnızca akademik bilgilerini değil, aynı zamanda analitik düşünme, problem çözme ve zaman yönetimi becerilerini de ölçen bir sınavdır.
Burun kemik yapısında hiçbir problem olmayan sadece burun ucundaki şekil bozuklukları için yapılan burun estetiği ameliyatlarına Burun Ucu Estetiği (Tip Plasti) adı verilir.
Ağız, diş ve çene cerrahisi, ağız içindeki yumuşak ve sert dokuların hastalıkları, yaralanmaları ve bozukluklarının tanı ve tedavisi ile ilgilenen bir tıp dalıdır
Ağız, diş ve çene cerrahisi, ağız içindeki yumuşak ve sert dokuların hastalıkları, yaralanmaları ve bozukluklarının tanı ve tedavisi ile ilgilenen bir tıp dalıdır
Liposuction, halk arasında yağ alma veya yağ emme olarak da bilinen, plastik cerrahide kullanılan bir tür yağ alma prosedürüdür.
TYT AYT kursu, YKS sınavına yönelik hazırlık yapmak isteyen öğrencilere sunulan, genellikle kapsamlı bir eğitim programıdır
Eryaman ortodonti uzmanı arayışında olan hastalar için doğru teşhis, kişiye özel tedavi planlaması ve düzenli takip süreci oldukça önemlidir.
Ankara KBB burun estetiği, burun görünümünü iyileştirmek ve aynı zamanda nefes alma fonksiyonlarını düzenlemek amacıyla yapılan cerrahi işlemleri ifade eder.
Eryaman ortodonti uzmanı arayışında olan hastalar için doğru teşhis, kişiye özel tedavi planlaması ve düzenli takip süreci oldukça önemlidir.
Yaşlandıkça, ince çizgilerin ve kırışıklıkların oluşması, y
Yaşlandıkça, ince çizgilerin ve kırışıklıkların oluşması, y
Yüz estetiğinde en çok dikkat çeken bölgelerden biri burundur.
Eryaman ortodonti uzmanı arayışında olan hastalar için doğru teşhis, kişiye özel tedavi planlaması ve düzenli takip süreci oldukça önemlidir.
Yüz estetiğinde en çok dikkat çeken bölgelerden biri burundur.
Burun, yüzümüzün merkezinde yer alan ve hem solunum fonksiyonu hem de estetik açıdan büyük öneme sahip bir organdır.
Sedef hastalığında, bağışıklık sistemi hatalı bir şekilde cilt hücrelerine saldırır ve bu da hücrelerin normalden çok daha hızlı çoğalmasına neden olur.
Burun, yüzümüzün merkezinde yer alan ve hem solunum fonksiyonu hem de estetik açıdan büyük öneme sahip bir organdır.
Sedef hastalığında, bağışıklık sistemi hatalı bir şekilde cilt hücrelerine saldırır ve bu da hücrelerin normalden çok daha hızlı çoğalmasına neden olur.
Somon DNA gençlik aşısı, cilt yenilenmesi ve gençleşmesi amacıyla uygulanan bir estetik tedavi yöntemidir.
Burun estetiği, yüzün genel görünümünü doğrudan etkileyen ve hem estetik hem de fonksiyonel açıdan dikkatle planlanması gereken cerrahi işlemlerden biridir.
Somon DNA gençlik aşısı, cilt yenilenmesi ve gençleşmesi amacıyla uygulanan bir estetik tedavi yöntemidir.
Burun estetiği, yüzün genel görünümünü doğrudan etkileyen ve hem estetik hem de fonksiyonel açıdan dikkatle planlanması gereken cerrahi işlemlerden biridir.
Burun estetiği, yüzün genel görünümünü doğrudan etkileyen ve hem estetik hem de fonksiyonel açıdan dikkatle planlanması gereken cerrahi işlemlerden biridir.
izmir avukat
Kaş arası çizgiler, kişiye olduğundan daha yorgun, sinirli veya sert bir ifade verebilir.
Kaş arası çizgiler, kişiye olduğundan daha yorgun, sinirli veya sert bir ifade verebilir.
Burun estetiği (rinoplasti) burun yapılarının istenilen forma kavuşturulması amacı ile uygulanan cerrahi işlemlerin tümüdür.
7, 8, 9. Sınıf Olarak 12 Kişilik Homojen Gruplar, Deneyimli Kadro, Yeni Nesil Yayın Desteği, Birebir Etütler, Ders Çalışma Kütüphaneleri Vardır.
Dudak dolgusu, dudak hacmini artırmak, dudak hatlarını belirginleştirmek ve daha dengeli bir yüz görünümü elde etmek için yapılan, hyalüronik asit içerikli dolgu uygulamasıdır.
İmplant, eksik dişlerin yerine çene kemiğine yerleştirilen, genellikle titanyumdan yapılan vida şeklinde yapay bir diş köküdür.
Lamine diş kaplama, estetik diş hekimliğinin en zarif ve en koruyucu uygulamalarından biridir.
Somon DNA tedavisi, somon kanı ve üreme sıvılarından oluşan bir karışımın cilde enjekte edilmesidir.
Bursa’da 1 günde implant tedavisi, eksik olan bir veya daha fazla dişin yerine, aynı gün içinde implantların yerleştirilip geçici diş protezlerinin takılması işlemidir.
Kaş arası çizgiler, kişiye olduğundan daha yorgun, sinirli veya sert bir ifade verebilir. Botoks uygulaması ile bu bölgedeki kas hareketleri kontrollü şekilde azaltılarak daha dinlenmiş, yumuşak ve dengeli bir yüz ifadesi hedeflenir.
Burun estetiği (rinoplasti) burun yapılarının istenilen forma kavuşturulması amacı ile uygulanan cerrahi işlemlerin tümüdür.
7, 8, 9. Sınıf Olarak 12 Kişilik Homojen Gruplar, Deneyimli Kadro, Yeni Nesil Yayın Desteği, Birebir Etütler, Ders Çalışma Kütüphaneleri Vardır.
Bursa’da 1 günde implant tedavisi, eksik olan bir veya daha fazla dişin yerine, aynı gün içinde implantların yerleştirilip geçici diş protezlerinin takılması işlemidir.
Dudak dolgusu, dudak hacmini artırmak, dudak hatlarını belirginleştirmek ve daha dengeli bir yüz görünümü elde etmek için yapılan, hyalüronik asit içerikli dolgu uygulamasıdır.
İmplant, eksik dişlerin yerine çene kemiğine yerleştirilen, genellikle titanyumdan yapılan vida şeklinde yapay bir diş köküdür.
Somon DNA tedavisi, somon kanı ve üreme sıvılarından oluşan bir karışımın cilde enjekte edilmesidir.
Bursa’da 1 günde implant tedavisi, eksik olan bir veya daha fazla dişin yerine, aynı gün içinde implantların yerleştirilip geçici diş protezlerinin takılması işlemidir.
Kaş arası çizgiler, kişiye olduğundan daha yorgun, sinirli veya sert bir ifade verebilir. Botoks uygulaması ile bu bölgedeki kas hareketleri kontrollü şekilde azaltılarak daha dinlenmiş, yumuşak ve dengeli bir yüz ifadesi hedeflenir.
Perinatoloji, anne ve bebeğin sağlığını tehdit edebilecek riskli durumların erken tanısı, yakın takibi ve tedavisiyle ilgilenen kadın-doğum yan dalıdır.
Dudak dolgusu, dudak hacmini artırmak, dudak hatlarını belirginleştirmek ve daha dengeli bir yüz görünümü elde etmek için yapılan, hyalüronik asit içerikli dolgu uygulamasıdır.
Ankara fraksiyonel CO2 lazer, cilt yenileme ve estetik tedavilerde yaygın olarak kullanılan bir lazer teknolojisidir.
Dudak dolgusu, dudak hacmini artırmak, dudak hatlarını belirginleştirmek ve daha dengeli bir yüz görünümü elde etmek için yapılan, hyalüronik asit içerikli dolgu uygulamasıdır.
Septorinoplasti, burnun hem estetik hem de fonksiyonel olarak yeniden şekillendirilmesini amaçlayan cerrahi bir operasyondur.
Yüz analizi, anatomik değerlendirme ve birlikte tanımlanan beklentiler.
Yüz analizi, anatomik değerlendirme ve birlikte tanımlanan beklentiler.
Çocuklarda kulak enfeksiyonları oldukça sık görülür. Orta kulak iltihabı; kulak ağrısı, ateş, huzursuzluk, iştahsızlık ve uyku problemleriyle ortaya çıkabilir.
Çocuklarda kulak enfeksiyonları oldukça sık görülür. Orta kulak iltihabı; kulak ağrısı, ateş, huzursuzluk, iştahsızlık ve uyku problemleriyle ortaya çıkabilir.
Çocuklarda kulak enfeksiyonları oldukça sık görülür. Orta kulak iltihabı; kulak ağrısı, ateş, huzursuzluk, iştahsızlık ve uyku problemleriyle ortaya çıkabilir.
Rinoplasti, burun şeklinin hem estetik hem de fonksiyonel açıdan iyileştirilmesini sağlayan ve etkileri uzun vadeli olan bir cerrahi işlemdir.
ankara ppf kaplama
Rinoplasti, burun şeklinin hem estetik hem de fonksiyonel açıdan iyileştirilmesini sağlayan ve etkileri uzun vadeli olan bir cerrahi işlemdir.
Doçentlik unvanı, 50 yayın ve binlerce başarılı operasyonla kanıtlanmış uzmanlık.
Doçentlik unvanı, 50 yayın ve binlerce başarılı operasyonla kanıtlanmış uzmanlık.
Silikon meme büyütme ameliyatı, meme hacmini artırmak, meme formunu daha dolgun hale getirmek ve vücut oranlarıyla daha uyumlu bir görünüm elde etmek amacıyla uygulanan estetik cerrahi işlemlerden biridir.
Silikon meme büyütme ameliyatı, meme hacmini artırmak, meme formunu daha dolgun hale getirmek ve vücut oranlarıyla daha uyumlu bir görünüm elde etmek amacıyla uygulanan estetik cerrahi işlemlerden biridir.
Kalın derili burun estetiği, burun derisinin yapısal olarak daha kalın, yağlı veya ödem tutmaya yatkın olduğu kişilerde uygulanan rinoplasti sürecini ifade eder.
Kalın derili burun estetiği, burun derisinin yapısal olarak daha kalın, yağlı veya ödem tutmaya yatkın olduğu kişilerde uygulanan rinoplasti sürecini ifade eder.
Her gebe bir perinatolog tarafından takip edilmek zorunda değildir. Ancak bazı durumlar, anne veya bebeğin sağlığı açısından risk oluşturabileceği için bu uzmanlığı gerektirir .
Psöriazis kronik, immünite (bağışıklık) aracılı inflamatuar bir deri hastalığıdır.
Psöriazis kronik, immünite (bağışıklık) aracılı inflamatuar bir deri hastalığıdır.
Revizyon rinoplasti, burun estetiği sonrası istenmeyen görünüm veya nefes alma problemlerinin yeniden ele alınmasını sağlar.
Diş eksikliği, hem estetik görünümü hem de çiğneme fonksiyonunu doğrudan etkileyen önemli bir ağız ve diş sağlığı problemidir.
Daha beyaz, parlak ve estetik bir gülüş birçok kişinin önem verdiği konuların başında gelir.
Diş eksikliği, hem estetik görünümü hem de çiğneme fonksiyonunu doğrudan etkileyen önemli bir ağız ve diş sağlığı problemidir.
BBL lazer cilt yenileme, cilt tonunu eşitlemek, lekelerin görünümünü azaltmak, kızarıklık problemlerini hafifletmek ve cilde daha canlı bir görünüm kazandırmak amacıyla uygulanan modern ışık tabanlı cilt yenileme yöntemlerinden biridir.
Ankara revizyon rinoplasti, hem estetik hem de fonksiyonel açıdan deneyim gerektiren özel bir cerrahi alandır.
Septorinoplasti, burun içindeki septum eğriliği ile burun dış yapısındaki estetik sorunların aynı ameliyatta düzeltilmesini sağlayan cerrahi bir işlemdir.
Çocuklarda geniz eti büyümesi, özellikle okul öncesi ve ilkokul çağındaki çocuklarda sık görülen kulak burun boğaz problemlerinden biridir.
Revizyon rinoplasti, burun estetiği sonrası istenmeyen görünüm veya nefes alma problemlerinin yeniden ele alınmasını sağlar.
Diş beyazlatma, bu renklenmeleri ortadan kaldırarak daha sağlıklı ve estetik bir gülüşe kavuşmanızı sağlayan modern bir diş estetiği uygulamasıdır.
BBL lazer cilt yenileme, cilt tonunu eşitlemek, lekelerin görünümünü azaltmak, kızarıklık problemlerini hafifletmek ve cilde daha canlı bir görünüm kazandırmak amacıyla uygulanan modern ışık tabanlı cilt yenileme yöntemlerinden biridir.
Ankara revizyon rinoplasti, hem estetik hem de fonksiyonel açıdan deneyim gerektiren özel bir cerrahi alandır.
Dişi çepeçevre sararak renk, şekil ve büyüklüğünü düzelten estetik restorasyonlar.
Diş beyazlatma, bu renklenmeleri ortadan kaldırarak daha sağlıklı ve estetik bir gülüşe kavuşmanızı sağlayan modern bir diş estetiği uygulamasıdır.
Dişi çepeçevre sararak renk, şekil ve büyüklüğünü düzelten estetik restorasyonlar.
Ankara kadın ürolog Doç. Dr. Eda Tokat Şahin, kadınlara özgü üriner sistem ve pelvik taban sorunlarının tanı ve tedavisinde uzmanlaşmıştır.
Gop Wash olarak; PPF kaplamadan renk değişimine, seramik kaplamadan cam filmine kadar aracınızın değerini koruyan ve tarzını yansıtan profesyonel çözümler sunuyoruz.
Karaktere saygılı, ölçülü bir estetik anlayış.
Çocuklarda bademcik ameliyatı, tıbbi adıyla tonsillektomi, bademciklerin cerrahi olarak alınması işlemidir
Penis eğriliği, erkeklerde hem fiziksel hem de psikolojik açıdan rahatsızlık oluşturabilen ürolojik bir durumdur.
Çocuklarda bademcik ameliyatı, tıbbi adıyla tonsillektomi, bademciklerin cerrahi olarak alınması işlemidir. Bademcikler boğazın iki yanında bulunan ve bağışıklık sisteminin bir parçası olan dokulardır.
Kadın ürolojisi, kadınlarda görülen idrar yolları ve genital bölgeyle ilgili sorunların tanı, tedavi ve takibini yapan ürolojinin özel bir alt dalıdır.
Kadın ürolojisi, kadınlarda görülen idrar yolları ve genital bölgeyle ilgili sorunların tanı, tedavi ve takibini yapan ürolojinin özel bir alt dalıdır.
Kadın ürolojisi, kadınlarda görülen idrar yolları ve genital bölgeyle ilgili sorunların tanı, tedavi ve takibini yapan ürolojinin özel bir alt dalıdır.
Kadın ürolojisi, kadınlarda görülen idrar yolları ve genital bölgeyle ilgili sorunların tanı, tedavi ve takibini yapan ürolojinin özel bir alt dalıdır.
Kadınlarda idrar kaçırma, günlük yaşamı belirgin ölçüde etkileyen, sosyal hayattan iş yaşamına kadar birçok alanda özgüven kaybına yol açabilen yaygın bir sağlık sorunudur.
Revizyon rinoplasti, burun estetiği sonrası istenmeyen görünüm veya nefes alma problemlerinin yeniden ele alınmasını sağlar.
Kadınlarda idrar kaçırma, günlük yaşamı belirgin ölçüde etkileyen, sosyal hayattan iş yaşamına kadar birçok alanda özgüven kaybına yol açabilen yaygın bir sağlık sorunudur.
Çocuklarda işitme kaybı, konuşma gelişimini, öğrenme sürecini, sosyal iletişimi ve okul başarısını doğrudan etkileyebilen önemli bir sağlık sorunudur.
Çocuklarda işitme kaybı, konuşma gelişimini, öğrenme sürecini, sosyal iletişimi ve okul başarısını doğrudan etkileyebilen önemli bir sağlık sorunudur.
Ankara tüp mide tedavisi, obezite cerrahisi kapsamında yer alan ve midenin büyük bir bölümünün çıkarılmasıyla gerçekleştirilen bir ameliyat yöntemidir.
Revizyon rinoplasti, burun estetiği sonrası istenmeyen görünüm veya nefes alma problemlerinin yeniden ele alınmasını sağlar.
I love the idea of making Christmas masks with a Cricut. It adds a personal touch to the holiday season. I have a Cricut but haven’t tried masks yet. This tutorial seems easy to follow and I can’t wait to give it a shot. Thanks for sharing these tips.
Çayyolu zirkonyum kaplama, estetik görünüm ve dayanıklılığı bir arada sunan modern diş tedavilerinden biridir.
Çocuklarda işitme kaybı, konuşma gelişimini, öğrenme sürecini, sosyal iletişimi ve okul başarısını doğrudan etkileyebilen önemli bir sağlık sorunudur.
Ankara tüp mide tedavisi, obezite cerrahisi kapsamında yer alan ve midenin büyük bir bölümünün çıkarılmasıyla gerçekleştirilen bir ameliyat yöntemidir.
Ağız, diş ve çene cerrahisi, ağız içindeki yumuşak ve sert dokuların hastalıkları, yaralanmaları ve bozukluklarının tanı ve tedavisi ile ilgilenen bir tıp dalıdır.
Gülüş estetiği, günümüzde sadece dişlerin beyazlığı değil, aynı zamanda dişlerin formu, simetrisi ve genel ağız sağlığı ile de yakından ilgilidir.
Çayyolu zirkonyum kaplama, estetik görünüm ve dayanıklılığı bir arada sunan modern diş tedavilerinden biridir.
Kompozit bonding, dişlerdeki estetik kusurları gidermek için uygulanan koruyucu ve pratik diş tedavilerinden biridir
Ağız, diş ve çene cerrahisi, ağız içindeki yumuşak ve sert dokuların hastalıkları, yaralanmaları ve bozukluklarının tanı ve tedavisi ile ilgilenen bir tıp dalıdır.
Gülüş estetiği, günümüzde sadece dişlerin beyazlığı değil, aynı zamanda dişlerin formu, simetrisi ve genel ağız sağlığı ile de yakından ilgilidir.
Kompozit bonding, dişlerdeki estetik kusurları gidermek için uygulanan koruyucu ve pratik diş tedavilerinden biridir
Gülüş estetiği, günümüzde sadece dişlerin beyazlığı değil, aynı zamanda dişlerin formu, simetrisi ve genel ağız sağlığı ile de yakından ilgilidir.
Titanyum implantlardan tam proteze, sabit restorasyonlardan hareketli proteze kadar bütüncül bir tedavi anlayışıyla yanınızdayım.
Ankara dermatoloji uzmanı, cilt, saç, tırnak ve mukozalarla ilgili hastalıkların tanı ve tedavisiyle ilgilenen uzman hekimdir.
Ankara dermatoloji uzmanı, cilt, saç, tırnak ve mukozalarla ilgili hastalıkların tanı ve tedavisiyle ilgilenen uzman hekimdir.
Titanyum implantlardan tam proteze, sabit restorasyonlardan hareketli proteze kadar bütüncül bir tedavi anlayışıyla yanınızdayım.
Gülüş estetiği, günümüzde sadece dişlerin beyazlığı değil, aynı zamanda dişlerin formu, simetrisi ve genel ağız sağlığı ile de yakından ilgilidir.
Çağın gereklerini değerleriyle yorumlayarak içinde yaşadığı topluma örnek olup yön verebilecek vizyon sahibi gençler yetiştirmek amacıyla bu yola çıktık.
G noktası dolgusu, kadın genital estetik ve cinsel sağlık alanında uygulanan, vajina ön duvarında yer aldığı kabul edilen hassas bölgenin dolgu maddeleriyle desteklenmesini amaçlayan medikal bir uygulamad
Ankara’da robotik cerrahi ve minimal invaziv üroloji alanında uzman. Modern tıp, hasta odaklı bakım.
Burun; yüzün tam merkezinde yer alması, solunumdaki kritik rolü ve karmaşık anatomik yapısı nedeniyle estetik cerrahide en fazla uzmanlık gerektiren organlardan biridir.
Her bireyin ağız yapısına göre özelleştirilmiş tedavi planlaması.
Burun; yüzün tam merkezinde yer alması, solunumdaki kritik rolü ve karmaşık anatomik yapısı nedeniyle estetik cerrahide en fazla uzmanlık gerektiren organlardan biridir.
Rinoplasti, yüzün doğallığını bozmadan karakterini ortaya çıkarma sanatıdır.
Revizyon rinoplasti, burun estetiği sonrası istenmeyen görünüm veya nefes alma problemlerinin yeniden ele alınmasını sağlar.
Samsun Dermatolog: Cilt Sağlığı, Estetik Dermatoloji ve Yüz Gençleştirme Uygulamaları
Kadınlarda idrar kaçırma, günlük yaşamı, sosyal hayatı ve kişinin özgüvenini etkileyebilen yaygın ürolojik sorunlardan biridir.
Titanyum implantlardan tam proteze, sabit restorasyonlardan hareketli proteze kadar bütüncül bir tedavi anlayışıyla yanınızdayım.
Vizyonumuz, eğitim-öğretimde kalitesi ve başarılı çalışmaları ile fark yaratan seçkin bir kurum olmaktır.
Samsun Dermatolog: Cilt Sağlığı, Estetik Dermatoloji ve Yüz Gençleştirme Uygulamaları
Kadınlarda idrar kaçırma, günlük yaşamı, sosyal hayatı ve kişinin özgüvenini etkileyebilen yaygın ürolojik sorunlardan biridir.
Vizyonumuz, eğitim-öğretimde kalitesi ve başarılı çalışmaları ile fark yaratan seçkin bir kurum olmaktır.
Rinoplasti, yüzün doğallığını bozmadan karakterini ortaya çıkarma sanatıdır.
Penil eksozom uygulaması, erkeklerde sertleşme sorunu, penil doku kalitesi, damar dolaşımı ve cinsel performansla ilgili bazı problemleri desteklemek amacıyla gündeme gelen yenileyici tıp uygulamalarından biridir.
Eksozomlar, hücreler tarafından salgılanan, yaklaşık 30-150 nanometre boyutundaki çok küçük keseciklerdir.
Samsun Dermatolog: Cilt Sağlığı, Estetik Dermatoloji ve Yüz Gençleştirme Uygulamaları
Titanyum implantlardan tam proteze, sabit restorasyonlardan hareketli proteze kadar bütüncül bir tedavi anlayışıyla yanınızdayım.
Penil eksozom uygulaması, erkeklerde sertleşme sorunu, penil doku kalitesi, damar dolaşımı ve cinsel performansla ilgili bazı problemleri desteklemek amacıyla gündeme gelen yenileyici tıp uygulamalarından biridir.
Eksozomlar, hücreler tarafından salgılanan, yaklaşık 30-150 nanometre boyutundaki çok küçük keseciklerdir.
Meme küçültme ameliyatı, büyük ve ağır meme yapısına bağlı olarak ortaya çıkan fiziksel rahatsızlıkları azaltmak ve vücutla daha uyumlu bir meme formu elde etmek amacıyla uygulanan cerrahi bir işlemdir.
Meme küçültme ameliyatı, büyük ve ağır meme yapısına bağlı olarak ortaya çıkan fiziksel rahatsızlıkları azaltmak ve vücutla daha uyumlu bir meme formu elde etmek amacıyla uygulanan cerrahi bir işlemdir.
Birebir öğrenci takibi ve haftalık deneme sınavlarıyla her öğrencinin gelişimini yakından izliyoruz. LGS ve YKS’de üst düzey başarı.
Çağın gereklerini değerleriyle yorumlayarak içinde yaşadığı topluma örnek olup yön verebilecek vizyon sahibi gençler yetiştirmek amacıyla bu yola çıktık.
Birebir öğrenci takibi ve haftalık deneme sınavlarıyla her öğrencinin gelişimini yakından izliyoruz. LGS ve YKS’de üst düzey başarı.
Birebir öğrenci takibi ve haftalık deneme sınavlarıyla her öğrencinin gelişimini yakından izliyoruz. LGS ve YKS’de üst düzey başarı.
Beytepe implant tedavisi, eksik dişlerin yerine doğal diş görünümüne ve çiğneme fonksiyonuna yakın bir çözüm sunmak amacıyla uygulanan modern diş hekimliği işlemlerinden biridir.
Rinoplasti, kepçe kulak estetiği ve göz kapağı estetiği başta olmak üzere yüz cerrahisinde doğallığı koruyan, hastaya özgü planlama.
Yılların verdiği tecrübe ile BMW ve Mini Cooper marka araçlara özel bakım, onarım ve arıza tespiti konularında uzmanlaştık.
Ankara’da robotik cerrahi ve minimal invaziv üroloji alanında uzman. Modern tıp, hasta odaklı bakım.
Ankara’da robotik cerrahi ve minimal invaziv üroloji alanında uzman. Modern tıp, hasta odaklı bakım.
Uzman psikolog kadromuzla öğrencilerimizin akademik ve kişisel gelişimlerini destekliyor, her adımda yanlarında oluyoruz.
Kepçe kulak estetiği — çocuktan yetişkine kalıcı sonuçlar veren cerrahi.
Kepçe kulak estetiği — çocuktan yetişkine kalıcı sonuçlar veren cerrahi.
20 yılı aşkın eğitim tecrübemiz ve alanında uzman kadromuz ile sınavlara hazırlıkta yalnız değilsiniz.
Rinoplasti, kepçe kulak estetiği ve göz kapağı estetiği başta olmak üzere yüz cerrahisinde doğallığı koruyan, hastaya özgü planlama.
Ankara’da robotik cerrahi ve minimal invaziv üroloji alanında uzman. Modern tıp, hasta odaklı bakım.
İstanbul’da faaliyet gösteren özel hastaneler için dijital reklam çalışmaları, yalnızca görünür olmak için değil; doğru hasta kitlesine ulaşmak, güven oluşturmak ve başvuru süreçlerini ölçülebilir hale getirmek için büyük önem taşır.
kartal avukat
Uzman psikolog kadromuzla öğrencilerimizin akademik ve kişisel gelişimlerini destekliyor, her adımda yanlarında oluyoruz.
Diş klinikleri için dijital pazarlama çalışmaları, günümüzde hasta kazanımının en önemli parçalarından biri haline gelmiştir.
Günümüzde estetik kaygıların artmasıyla birlikte beyaz ve sağlıklı görünen dişlere sahip olmak pek çok kişinin önceliği haline gelmiştir.
İmplant tedavisi, eksik dişlerin yerine titanyumdan yapılmış yapay diş köklerinin çene kemiğine yerleştirilmesi işlemidir.
Diş klinikleri için dijital pazarlama çalışmaları, günümüzde hasta kazanımının en önemli parçalarından biri haline gelmiştir.
Günümüzde estetik kaygıların artmasıyla birlikte beyaz ve sağlıklı görünen dişlere sahip olmak pek çok kişinin önceliği haline gelmiştir.
RIRC, PNL, ESWL ve URS yöntemleriyle böbrek ve üreter taşlarında minimal invaziv kalıcı tedavi.
İstanbul’da faaliyet gösteren özel hastaneler için dijital reklam çalışmaları, yalnızca görünür olmak için değil; doğru hasta kitlesine ulaşmak, güven oluşturmak ve başvuru süreçlerini ölçülebilir hale getirmek için büyük önem taşır.
RIRC, PNL, ESWL ve URS yöntemleriyle böbrek ve üreter taşlarında minimal invaziv kalıcı tedavi.
Süt dişlerine sahip bebek ve çocuk hastalardan protez ihtiyacı olan ileri yaştaki hastalarımıza kadar tüm hastalara ağız ve diş sağlığı konusundaki tüm işlemler herhangi bir başka kuruluşa gerek olmadan kliniğimizde gerçekleştirilebilmektedir.
samsun dermatoloji doktorları
samsun dermatoloji doktorları
İletişim, çatışma ve bağ kurma süreçlerinde çiftlerin birbirini yeniden anlaması; evlilik ve ilişki süreçlerine yönelik bütüncül destek.
Septorinoplasti, burun içindeki septum eğriliği ile burun dış yapısındaki estetik sorunların aynı ameliyatta düzeltilmesini sağlayan cerrahi bir işlemdir.
İletişim, çatışma ve bağ kurma süreçlerinde çiftlerin birbirini yeniden anlaması; evlilik ve ilişki süreçlerine yönelik bütüncül destek.
Septorinoplasti, burun içindeki septum eğriliği ile burun dış yapısındaki estetik sorunların aynı ameliyatta düzeltilmesini sağlayan cerrahi bir işlemdir.
Süt dişlerine sahip bebek ve çocuk hastalardan protez ihtiyacı olan ileri yaştaki hastalarımıza kadar tüm hastalara ağız ve diş sağlığı konusundaki tüm işlemler herhangi bir başka kuruluşa gerek olmadan kliniğimizde gerçekleştirilebilmektedir.
Özel hastaneler için dijital reklam çalışmaları, yalnızca daha fazla kişiye ulaşmak amacıyla yapılan tanıtım faaliyetleri değildir.
Kadın ürolojisi, kadınlarda görülen idrar yolları ve genital bölgeyle ilgili sorunların tanı, tedavi ve takibini yapan ürolojinin özel bir alt dalıdır.
Özel hastaneler için dijital reklam çalışmaları, yalnızca daha fazla kişiye ulaşmak amacıyla yapılan tanıtım faaliyetleri değildir.
Özel hastaneler için dijital reklam çalışmaları, yalnızca daha fazla kişiye ulaşmak amacıyla yapılan tanıtım faaliyetleri değildir.
Yılların verdiği tecrübe ile BMW ve Mini Cooper marka araçlara özel bakım, onarım ve arıza tespiti konularında uzmanlaştık.
Rinoplasti, kepçe kulak estetiği ve göz kapağı estetiği başta olmak üzere yüz cerrahisinde doğallığı koruyan, hastaya özgü planlama.
Özel hastaneler için dijital reklam çalışmaları, yalnızca daha fazla kişiye ulaşmak amacıyla yapılan tanıtım faaliyetleri değildir.
Sağlıklı gülüşünüzü önemsiyor, her hastamıza konforlu, güvenilir ve kişiye özel bir tedavi deneyimi sunmayı hedefliyoruz.
Rinoplasti, kepçe kulak estetiği ve göz kapağı estetiği başta olmak üzere yüz cerrahisinde doğallığı koruyan, hastaya özgü planlama.
Yılların verdiği tecrübe ile BMW ve Mini Cooper marka araçlara özel bakım, onarım ve arıza tespiti konularında uzmanlaştık.
Rinoplasti, kepçe kulak estetiği ve göz kapağı estetiği başta olmak üzere yüz cerrahisinde doğallığı koruyan, hastaya özgü planlama.
Markanızın dijital itibarını güçlendirirken, hedef kitlenizle düzenli ve etkili iletişim kurmanızı sağlıyoruz.
Terapiyi; bireyin kendini daha derinlemesine tanıdığı, içgörü kazandığı ve yaşamında daha dengeli bir yol izlemeyi öğrendiği bir alan olarak değerlendiririm.
Terapiyi; bireyin kendini daha derinlemesine tanıdığı, içgörü kazandığı ve yaşamında daha dengeli bir yol izlemeyi öğrendiği bir alan olarak değerlendiririm.
BBL lazer Ankara’da cilt gençleştirme, leke tedavisi, kızarıklık azaltma ve cilt tonunu dengeleme amacıyla tercih edilen modern medikal estetik uygulamalardan biridir.
Ankara botoks fiyatları, botoks uygulaması yaptırmak isteyen kişilerin en çok merak ettiği konuların başında gelir.
Ankara tüp mide tedavisi, obezite cerrahisi kapsamında yer alan ve midenin büyük bir bölümünün çıkarılmasıyla gerçekleştirilen bir ameliyat yöntemidir.
Çocuklarda bademcik ameliyatı, tıbbi adıyla tonsillektomi, bademciklerin cerrahi olarak alınması işlemidir.
Detaylı anatomik analiz, beklenti görüşmesi ve fotoğraf üzerinden simülasyon. Estetik ve fonksiyonel hedefler birlikte belirlenir, kişiye özgü cerrahi plan hazırlanır.
İdrar kaçırma, kişinin istemi dışında idrarını tutamaması durumudur. Kadınlarda erkeklere göre çok daha sık görülür ve yaşla birlikte artış gösterebilir.
Markanızın dijital itibarını güçlendirirken, hedef kitlenizle düzenli ve etkili iletişim kurmanızı sağlıyoruz.
Terapiyi; bireyin kendini daha derinlemesine tanıdığı, içgörü kazandığı ve yaşamında daha dengeli bir yol izlemeyi öğrendiği bir alan olarak değerlendiririm.
Terapiyi; bireyin kendini daha derinlemesine tanıdığı, içgörü kazandığı ve yaşamında daha dengeli bir yol izlemeyi öğrendiği bir alan olarak değerlendiririm.
Ankara botoks fiyatları, botoks uygulaması yaptırmak isteyen kişilerin en çok merak ettiği konuların başında gelir.
Çocuklarda bademcik ameliyatı, tıbbi adıyla tonsillektomi, bademciklerin cerrahi olarak alınması işlemidir.
Detaylı anatomik analiz, beklenti görüşmesi ve fotoğraf üzerinden simülasyon. Estetik ve fonksiyonel hedefler birlikte belirlenir, kişiye özgü cerrahi plan hazırlanır.
Terapiyi; bireyin kendini daha derinlemesine tanıdığı, içgörü kazandığı ve yaşamında daha dengeli bir yol izlemeyi öğrendiği bir alan olarak değerlendiririm.
BBL lazer Ankara’da cilt gençleştirme, leke tedavisi, kızarıklık azaltma ve cilt tonunu dengeleme amacıyla tercih edilen modern medikal estetik uygulamalardan biridir.
Markanızın dijital itibarını güçlendirirken, hedef kitlenizle düzenli ve etkili iletişim kurmanızı sağlıyoruz.
Ankara kırışıklık botoks tedavisi fiyatları, uygulama yapılacak bölgeye, kullanılacak ürün miktarına, kişinin kas yapısına ve işlemi uygulayan hekimin deneyimine göre değişiklik gösterebilir.
Kaş arası, masseter, diş sıkma ve hiperhidroz için botulinum toksini uygulamaları. Hareket özgürlüğünü koruyarak dinlenmiş bir ifade.
Kepçe kulak estetiği — çocuktan yetişkine kalıcı sonuçlar veren cerrahi.
Kaş arası, masseter, diş sıkma ve hiperhidroz için botulinum toksini uygulamaları. Hareket özgürlüğünü koruyarak dinlenmiş bir ifade.
Kepçe kulak estetiği — çocuktan yetişkine kalıcı sonuçlar veren cerrahi.
Yüzümüz vücudumuzun dış dünya ile ili ki kurduğumuz, duygularımızı gösterdiğimiz ve karşımızdaki insana yaşımız konusunda bilgi veren en önemli bölgemizdir.
Markanızın dijital itibarını güçlendirirken, hedef kitlenizle düzenli ve etkili iletişim kurmanızı sağlıyoruz.
Ankara botoks fiyatları, botoks uygulaması yaptırmak isteyen kişilerin en çok merak ettiği konuların başında gelir.
Yüzümüz vücudumuzun dış dünya ile ili ki kurduğumuz, duygularımızı gösterdiğimiz ve karşımızdaki insana yaşımız konusunda bilgi veren en önemli bölgemizdir.
Meme küçültme ameliyatı, büyük ve ağır meme yapısına bağlı olarak ortaya çıkan fiziksel rahatsızlıkları azaltmak ve vücutla daha uyumlu bir meme formu elde etmek amacıyla uygulanan cerrahi bir işlemdir.
implant bostancı
Diş sağlığınızın her aşaması için planladığımız tedavileri inceleyin. Detaylar için ilgili tedaviye dokunabilirsiniz.
Diş sağlığınızın her aşaması için planladığımız tedavileri inceleyin. Detaylar için ilgili tedaviye dokunabilirsiniz.
Diş sağlığınızın her aşaması için planladığımız tedavileri inceleyin. Detaylar için ilgili tedaviye dokunabilirsiniz.
Ankara’da botoks ve dolgu uygulamaları, hem daha dinç bir görünüm elde etmek hem de yüz hatlarını daha dengeli hale getirmek isteyen kişiler tarafından sıkça tercih edilmektedir.
İhtiyacınız olan tüm tedaviler tek çatı altında, ölçülerle planlanıp özenle uygulanıyor.
Çağın gereklerini değerleriyle yorumlayarak içinde yaşadığı topluma örnek olup yön verebilecek vizyon sahibi gençler yetiştirmek amacıyla bu yola çıktık.
Keep this going please, great job!